There are many ways to protect WordPress files, from granting access to logged-in users to requiring a password. The most effective one is setting a password protection layer, that doesn’t require users to remember their accounts.
In this article, we will show you how to lock your protected files with a password form, so that they are accessible to authorized users only.
Requirements:
- Password Protect WordPress Lite version 1.4.5.1 or greater
- Password Protect WordPress Pro version 1.3.0.2 or greater
- PPWP Smart Restriction extension version 1.1.0 and greater
How to password protect files
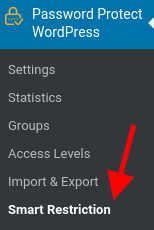
Once activating our plugins, navigate to Password Protect WordPress >> Smart Restriction menu from your admin dashboard.
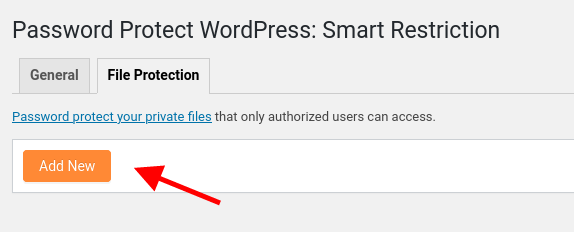
Switch to File Protection tab and start to add a new file URL.
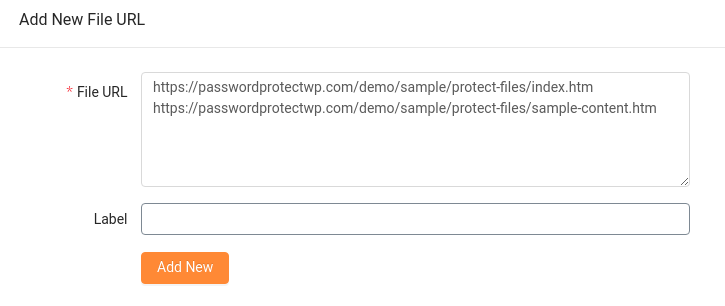
Simply add the URL of the file you want to protect. Input multiple URLs at once by entering one URL per line.
Once you click “Add New” button, only valid URLs are added to our plugin’s table. The file URLs from external sites or containing special characters such as ^ # & + ? ‘ will be considered “invalid”.
Your file can be located anywhere in your site, including both WordPress root and uploads directory.
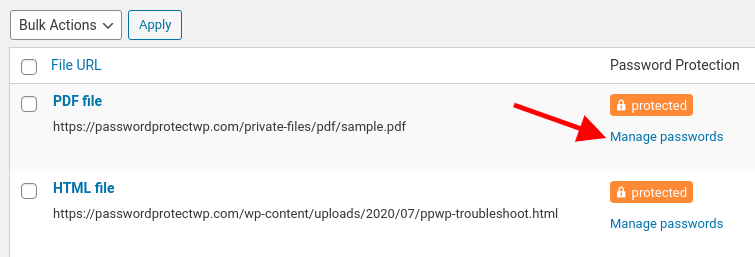
Once a file is added to our plugin’s table, it will be protected automatically. In order to create a password to unlock the private file, click on Manage passwords button link.
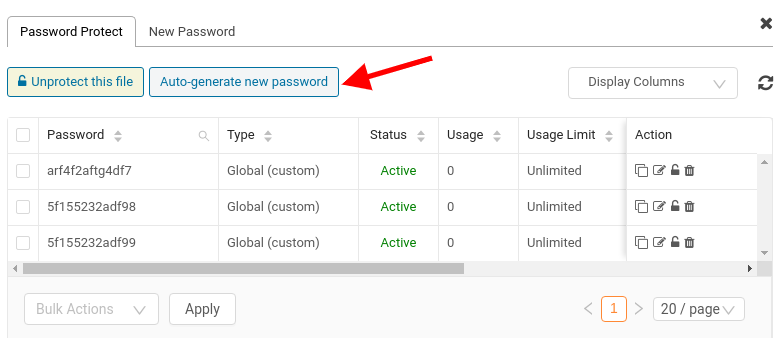
You can either create a custom password or auto-generate a random one.
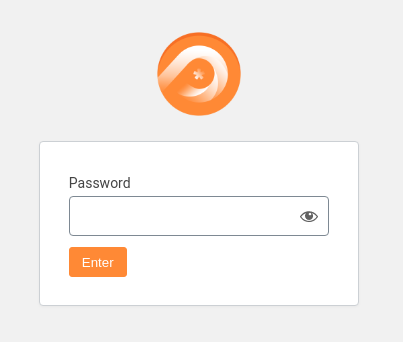
When accessing the file URL, you should see a password form as the image below.
Manage passwords
Generating a new password includes these pieces of information:
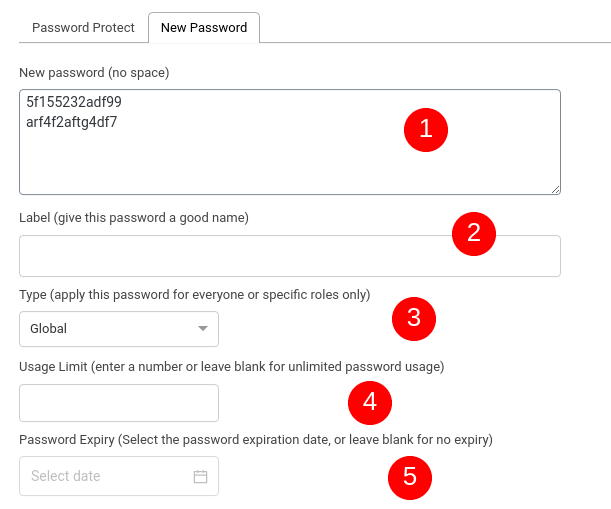
- New Password (required): unique, no space, case-sensitive, and limited to 100 characters. You can set multiple passwords at once and input one password per line.
- Label (optional): some extra information about your password, e.g. what it is used for.
- Type (required):
- Global (default): anyone with the password can unlock the protected section
- Roles: only specific user roles are able to use the password to access the restricted area
- Let’s say you set a password with type Role (editor)
- Only editors can use this password to view the private part.
- Others, e.g. subscribers, will receive an error message when attempting to enter it into password form.
- Let’s say you set a password with type Role (editor)
- Usage Limit: the maximum number of times a password is used.
- Let’s assume that the usage limit of a password is set to 1. If a user enters that password to unlock the protected content section, others can’t use it anymore.
- This feature proves useful to prevent users from sharing your passwords without permission.
- Password Expiry: Make your password auto-expire after a period of time. In other words, users won’t be able to use that password to access your private section after a given time.
A file can be protected with multiple passwords.
-
- If a password is inactive, no one can use it. Others who have accessed the protected files will be logged out.
- If a password expired, no one can use it anymore. However, others who have accessed the protected files still are able to see them until the cookie expires.
Customize password form
You can override our default password form values by using WordPress custom CSS.
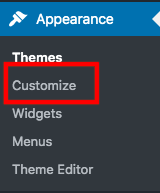
Let’s say you want to change our logo to your own one. Go to Appearance >> Customize from your admin dashboard.
Navigate to the Additional CSS section and input the code snippet below.
/* Change logo image */
.ppwpsr__logo a.ppwpsr__logo-link {
     background-image: url( your-logo-URL.png );
}

/* Change button color */
.ppwpsr__form .form__btn-submit {
    background: red;
    border-color: red;
}
Block search indexing
To prevent your protected files from appearing on the search engine results page, add the following code snippet to your (child) theme’s functions.php file.
add_action('ppwpsr_head', function () {
    echo '<meta name="robots" content="noidex" />';
});
Display files in content
Normally, when you insert a password protected file into content, users will be redirected to a new tab to enter password. In order to display the password form in the same page or via popup, you can use <iframe> tag as below.
<iframe src="your-file-url">
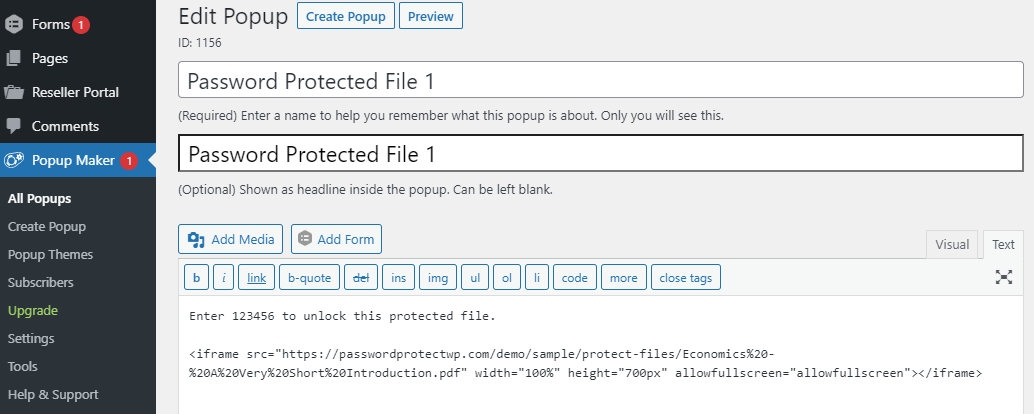
Check out our demo page to see it in action.
Logic & Limitation
- Our plugin protects your file URL by adding a custom rewrite rules to your .htaccess files. The rules will be added and updated automatically when:
- The plugin is activated or deactivated
- A file is protected or unprotected
- Since our plugin has modified your server file based on your file name, it’s recommended to name your files and folders with lowercase letters, numbers, and dash (-) only. Uppercase letters and special characters such as “$”, “%”, and empty spaces might not work on certain setup.
- If you deactivate the main plugins (PPWP Free or PPWP Pro), the extension won’t work anymore. However, the custom rewrite rules are kept. As a result, the file URL will return to the 404 page.
- Once users enter a password, our plugin will save a cookie to their browser. So they don’t have to re-enter the password when accessing the file URL multiple times.
- You can modify the cookie expiration time under the plugin’s settings page.
- Currently, you can add duplicate file URLs, however, the function works with the one added first.
- Even though 2 files are protected with the same password, unlocking one file doesn’t make the other accessible.
Custom Rules for Nginx Servers
Step 1: Find and open your website’s Nginx config file which is normally located at /etc/nginx/site-available (or /etc/nginx/conf/site-available if you’re using Arch Linux)
Step 2: Put the following custom code inside the server block
location ^~ /wp-content/upload/your-file.html {
   rewrite (.*\.\w+)$ "index.php?ppwp_file=$1" last;
}

location ^~ /sample-folder/your-file.html {
   rewrite (.*\.\w+)$ "index.php?ppwp_file=$1" last;
}
After that, restart your Nginx server for these rules to be applied.
Custom Rules for Multisite Mode
Since our plugin can’t automatically update rewrite rules in Multisite mode, you need to add the following rules to .htacess file manually.
Main site
# PPWP Smart Restriction Rewrite Rules
<IfModule mod_rewrite.c>
RewriteEngine on
RewriteCond %{REQUEST_URI} ^/multisite/wp-content/uploads/you-file.pdf$
RewriteRule (.*\.\w+)$ /multisite/index.php?ppwp_file=$1 [QSA,L]
</IfModule>
# PPWP Smart Restriction Rewrite Rules Ends
Subsites
# PPWP Smart Restriction Rewrite Rules
<IfModule mod_rewrite.c>
RewriteEngine on
RewriteCond %{REQUEST_URI} ^/multisite/wp-content/uploads/sites/2/your-files.pdf$
RewriteRule subsite(.*\.\w+)$ /multisite/index.php?ppwp_file=$1 [QSA,L]
</IfModule>
# PPWP Smart Restriction Rewrite Rules Ends
WordPress.com Workaround for HTML files
As I mentioned earlier, yes you have to make some little tweaks for the file protection to work properly on WordPress.com. Here are the 3 simple steps:
Step 1: Rename your HTML to PHP file
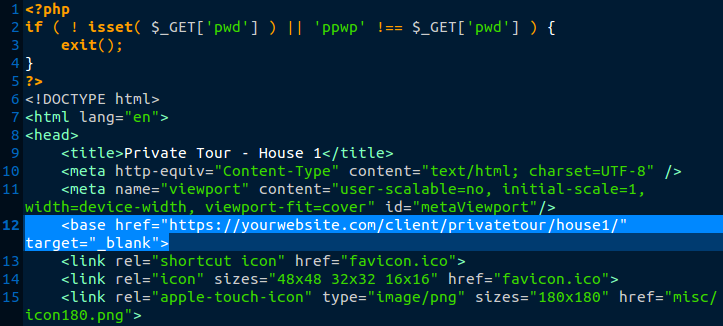
Step 2: Put these codes on top of the file like below
<?php
if ( ! isset( $_GET['pwd'] ) || 'ppwp' !== $_GET['pwd'] ) {
   exit();
}
?>

<base href="https://yourwebsite.com/put-your-directory/where-your-file-located/" target="_blank">
The base URL value is the root folder/directory where your files are located at, e.g. https://yourwebsite.com/client/privatetour/house1/
Step 3: Add a new file into our system as usual
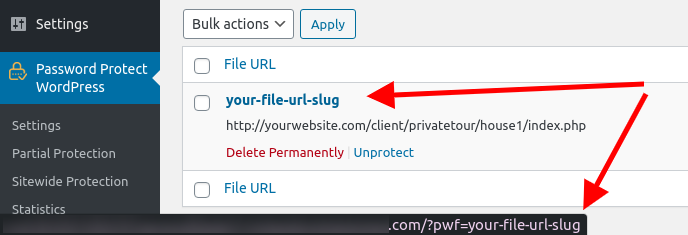
Please note that the label will become your quick access link’s slug on WordPress.com. In other words, you won’t be able to access your file directly via its original file URL but this short URL instead: https://yourwebsite.com/?pwf=your-file-url-slug.
For this reason, the label is required if you’re trying to insert a PHP file.

You can get the raw file URL when hovering to the file label as well.
