There are some cases where you want to grant access to password protected content for those who have joined your email list.
In this article, we will walk you through the following steps to send passwords automatically once a visitor subscribes to your MailChimp list.
- Configure PPWP MailChimp Integration
- Create a MailChimp Audience
- Add PPWP fields to MailChimp template
- Create signup form linked to MailChimp list
- Track password usage
Requirements:
- PPWP MailChimp Integration version 1.1.0 or greater
- Password Protect WordPress Lite version 1.2.3.1 or greater
- Password Protect WordPress Pro version 1.1.5.1 or greater
- PPWP Access Levels version 1.1.2.1 or greater (optional)
Configure PPWP MailChimp Integration
Add MailChimp API
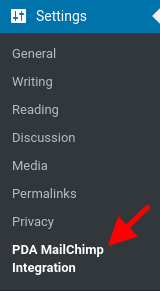
Once activating our plugins, go to Settings >> PDA MailChimp Integration from your admin dashboard.
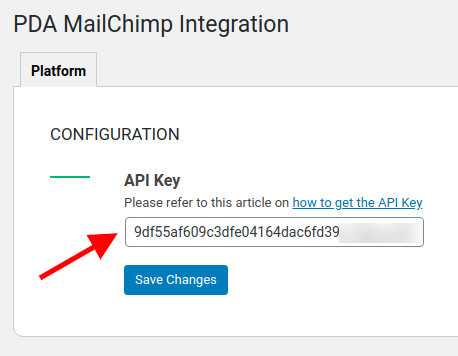
Then insert your MailChimp API key to connect your MailChimp account with our plugins.
Define PPWP values
Our plugins need the following information to grant access to your password protected content:
- PPWP_PROTECTED_POST defines which content you want to grant access based on post_id
- PPWP_PROTECTED_CAT defines which category you want to grant access based on category_id (required PPWP Access Levels extension)
- PPWP_PWD_EXPIRY (optional) defines the number of days before the password expires
- PPWP_PWD_LIMIT (optional) defines the maximum number of times the password is used
define( 'PPWP_PROTECTED_POST', 1 );
define( 'PPWP_PROTECTED_CAT', 1 ); // optional
define( 'PPWP_PWD_LIMIT', 1 );
define( 'PPWP_PWD_EXPIRY', 1 );
If you define both PPWP_PROTECTED_POST and PPWP_PROTECTED_CAT constants, passwords of the protected category will be generated and sent to your visitors.
Let’s say you want to grant access to a post with id 1 and the password will expire after one time of usage or one day from subscription, you will define these values under your wp-config.php as below:
define( 'PPWP_PROTECTED_POST', 1 );
define( 'PPWP_PWD_LIMIT', 1 );
define( 'PPWP_PWD_EXPIRY', 1 );
Simply get the post ID by hovering over the desired post title.
Create a MailChimp Audience
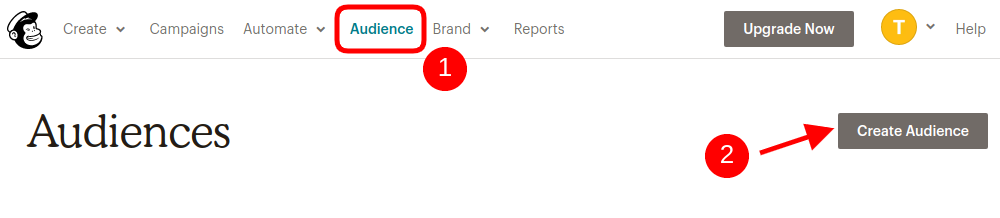
Navigate to Audience page from your MailChimp Dashboard, then click on “Create Audience” button to generate a MailChimp list.
Create PPWP webhook
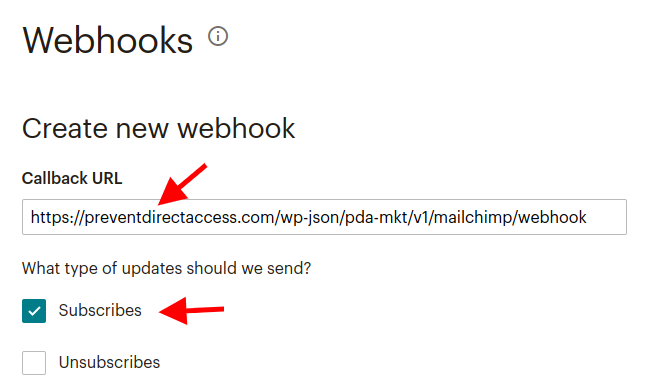
Go to Settings >> Webhooks from your Audience dashboard.

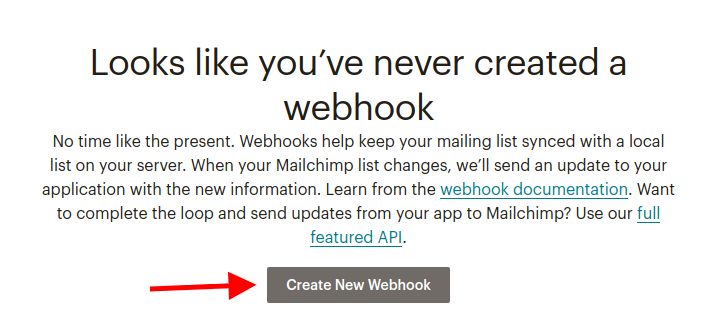
You will see the image below if you haven’t created any MailChimp webhook before. Simply click on “Create New Webhook” button to generate a new one.
In order to create a webhook, you are required to (1) insert a Callback URL where you want to send webhook requests and (2) select which events triggering the webhook.
Your Callback URL need to follow this format:
https://your-website/wp-json/pda-mkt/v1/mailchimp/webhook
If you want to send passwords to your new subscribers, you should untick all options except Subscribes under “What type of updates should we send?”.
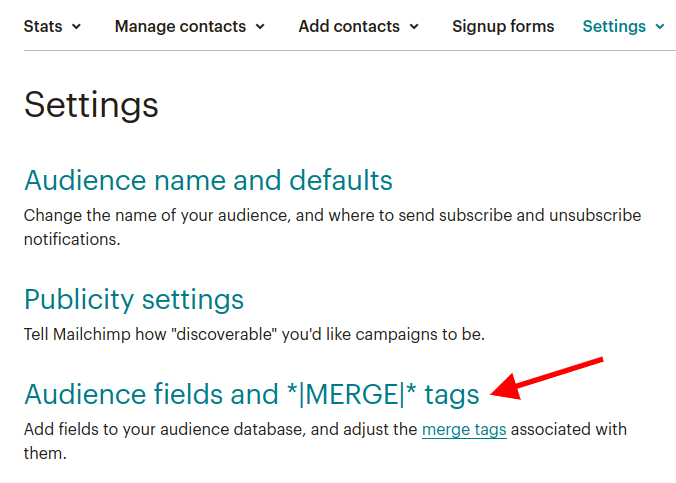
Create PPWP fields
Go to Settings >> Audience fields and *|MERGE|* tags from your Audience Dashboard.
Click on”Add A Field” at the bottom of this page to create a new field.
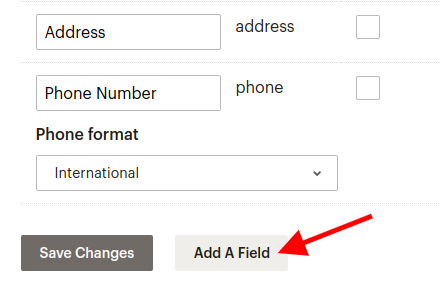
Select “Text” type and insert 2 fields below:
PPWP_PWDrefers to password which will be sent to the subscriberPPWP_PROTECTED_URLrefers to the protected content (category) URL

Click “Save Changes” to save these fields.
Add PPWP fields to MailChimp template
Let’s say you want to create an automated welcome email for new subscribers.
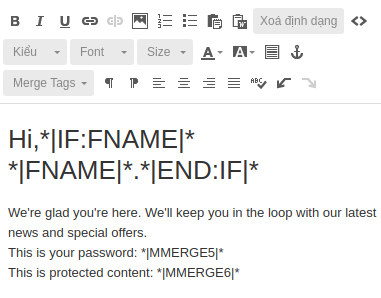
When editing the email design, select our PPWP fields from Merge Tags drop-down menu and insert them into the content.
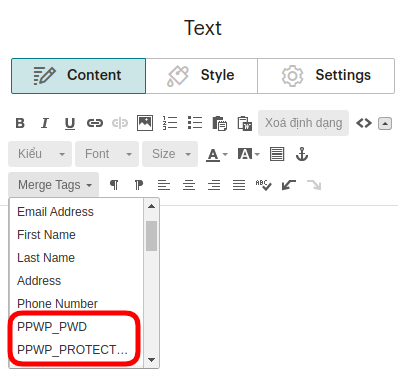
Your email template should look like as below:
Create signup form linked to MailChimp list
Finally, you need to create a signup form allowing your visitors to join your email list.
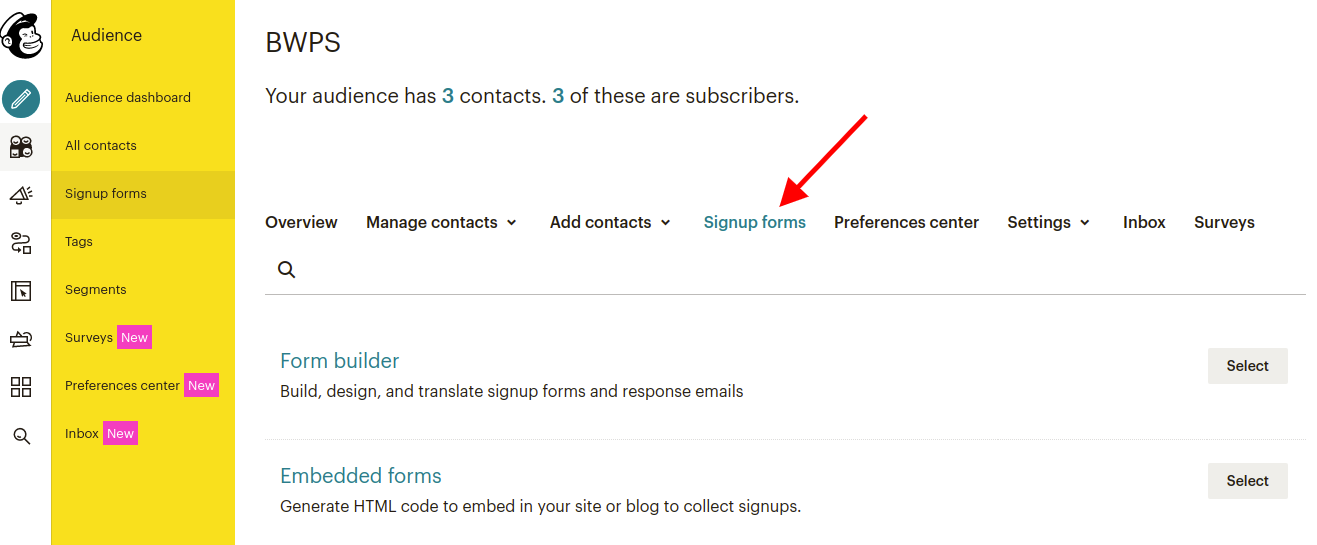
You can display MailChimp form in your WordPress website using form URLs, embedded forms, or form plugins.
So once a visitor subscribes, they will receive a welcome email containing a password and URL to access your protected content.
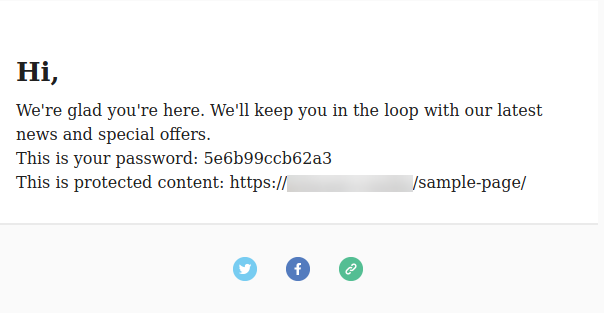
You can also see this password and its related information from PPWP configuration popup.
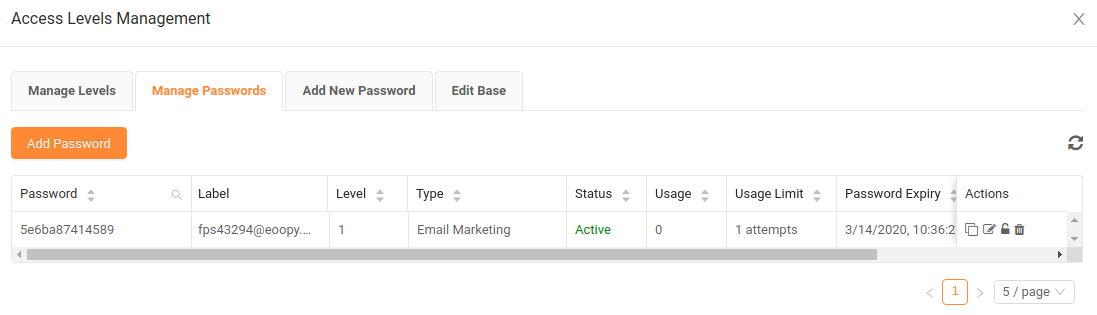
Track password usage
Using PPWP Statistics if you want to know who has accessed your private content with these passwords and when they do it.
