WordPress comes with a built-in password protection function allowing everyone to use a password to unlock the content. But if you want only certain people can use this password? Others will be restricted access to protected content even though they have the correct password.
In this article, we show you how to password protect against specific user roles in both Password Protect WordPress (PPWP) Free and Pro version.
Password Protect WordPress Free
The first thing you need to do is install and activate Password Protect WordPress Lite plugin.
After activation, go to edit the page that you want to password protect. You will see a new Password Protect WordPress section in the right sidebar.
Step 1: Change “Role” to the user roles that you want to give password, e.g. subscriber.
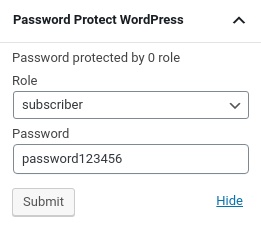
Step 2: Enter your password in “Password” field. Simply leave the password field empty to remove a password for a particular user role.
Step 3: Click on “Submit” button to save your password. You can continue setting a password for another user role without having to refresh the page.
PPWP Free version limits you to create one password per user role. If you want to create multiple passwords for multiple roles at the same time, you should check out PPWP Pro version.
Password Protect WordPress Pro
PPWP Pro comes with an easy-to-use interface that allows you to add multiple passwords and assign them to multiple user roles at once.
You can create a new password with Pro version under the plugin’s popup as well as when editing content.
From Pages or Posts Screen
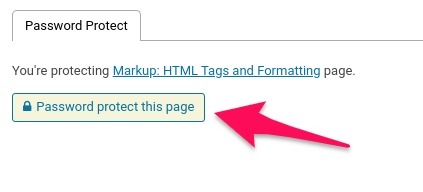
Step 1: Under your WordPress dashboard, locate the content you want to protect under Pages or Posts and click on “Password protect” button link.

Step 2: Click on “Password protect this page” button and then switch to New Password tab.
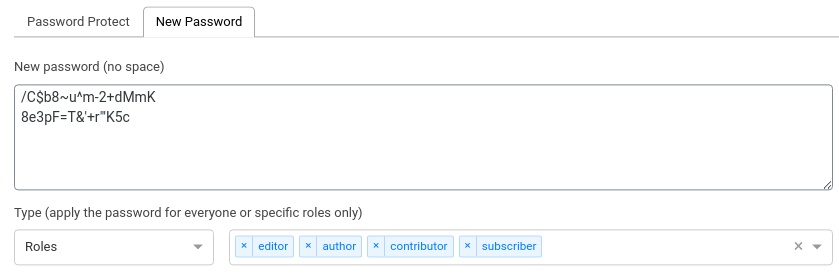
Step 3: Simply change “Type” to Roles and then select which roles you want to assign these passwords
While editing content
Similar to PPWP Free, when editing content, you will see a new Password Protect WordPress section in the right sidebar.
Step 1: First of all, you need to enable “Password protected”
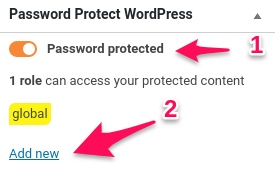
Step 2: Click on “Add New” button and then change “Global” to “Roles”
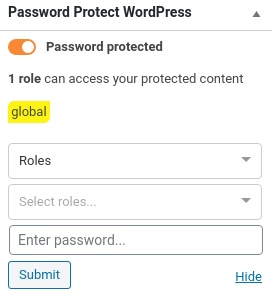
Step 3: Select as many roles as you want and enter your password. Don’t forget to “Submit” to save it.
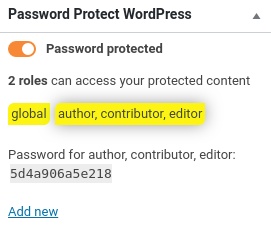
You can continue setting a password for another user role without having to refresh the page.
