While developing your WordPress site, your library of content would also grow up consequently. From time to time, many posts are outdated and no longer need to stay visible on your site. By default, WordPress enables you to remove unnecessary posts just in a moment, yet no features for automatic post expiration.
If you’re looking for any solutions, a plugin can be of help.
In this article, we’re going to talk about the Password Protect WordPress (PPWP) plugin that serves your needs. We’ll let you know when to create expiration dates for posts and how to expire posts or partial post content in WordPress with the PPWP plugin.
Let’s get right to it!
- When to Expire Posts or Partial Post Content
- #1 Expire Posts by Usage Limit
- #2 Expire Posts by Specific Date
- #3 Expire Posts by Cookie Expiration Time
- #4 Expire Partial Post Content Using On/Off Attribute
When to Expire Posts or Partial Post Content
When it comes to time-sensitive posts like recruitment posts, advertising, or short-term announcements, it’d be better to hide rather than show them up. A compelling reason is to avoid misleading information to your readers; otherwise, they’ll be confused when running into your site.
Another use case for WordPress post expiration is to hide partial post content, e.g. special limited-time discount coupons. That’s the case when your posts are still up-to-date, except for some sections which become less relevant.
Expiring a post is not a big deal if it’s not for doing that by hand. For your convenience, we’ll teach you how to expire posts or partial post content automatically with a plugin in the next walkthrough.
How to Expire Posts or Partial Post Content in WordPress
A quick introduction, Password Protect WordPress (PPWP) plugin allows you to secure posts/pages, content sections, or an entire site with passwords. Prior to setting post expiration, it’s important to set password protection for your desired contents or partial ones.
To password-protect a post, simply go to Posts in your WordPress admin dashboard and select a wanted post. Click on Protect, and then a password will be generated automatically.

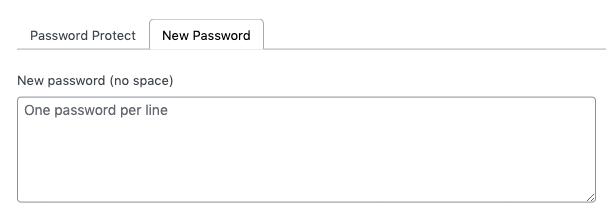
If you want to create multiple passwords per post, feel free to do that in the New Password section.
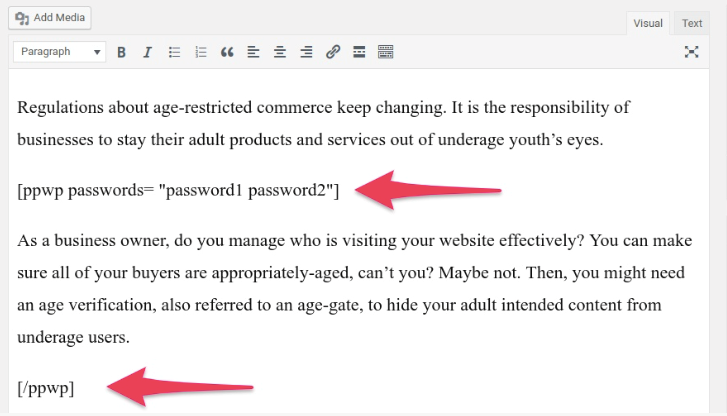
For partial content protection, add the below shortcode to your target sections:
[ppwp passwords= “password1 password2”] Your content [/ppwp]
Next, click on Publish button and you will see a password form as follow:
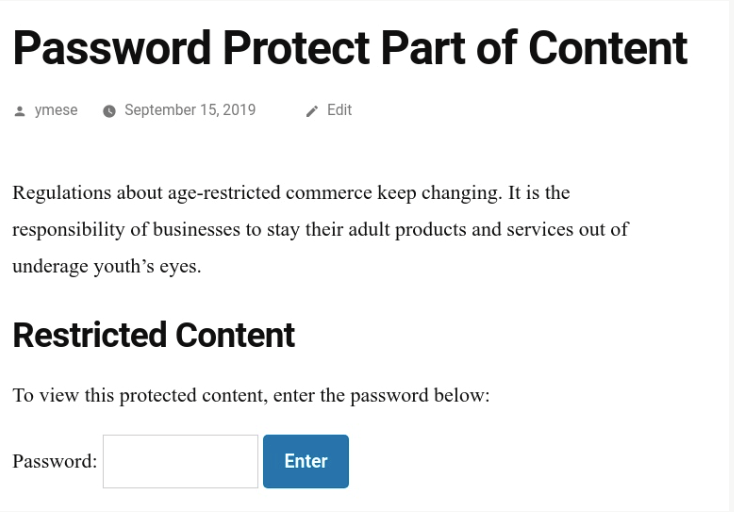
Once the post or partial post content is secured with the PPWP plugin, it’s only accessible to users with correct passwords. There are four ways to make a post expire, rather it means to cease the passwords from work.
#1 Expire Posts by Usage Limit
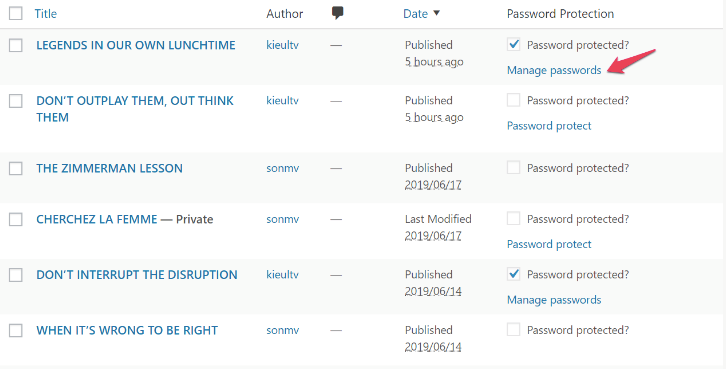
Under your WordPress Posts, click on Manage passwords to open Password Protection Popup.
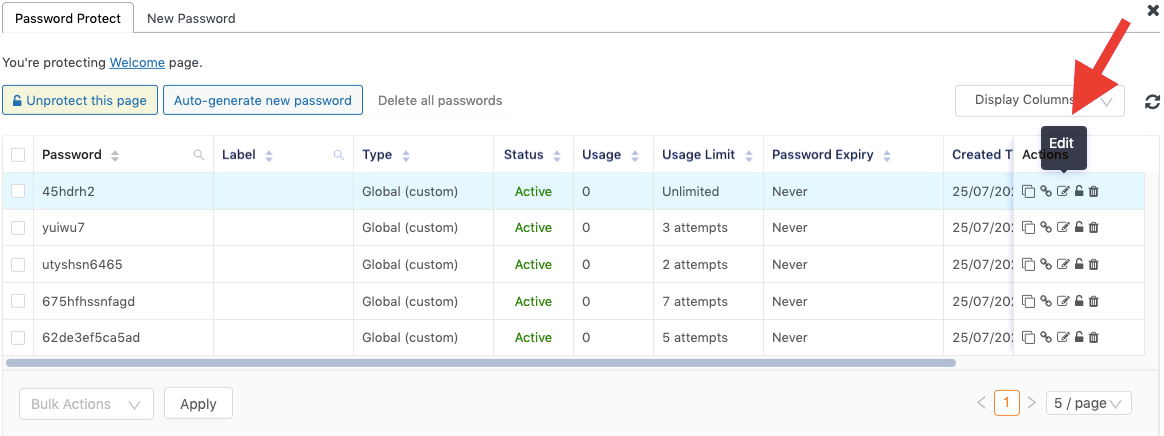
Head to the Actions section and click the Edit button to configure the password usage limit.
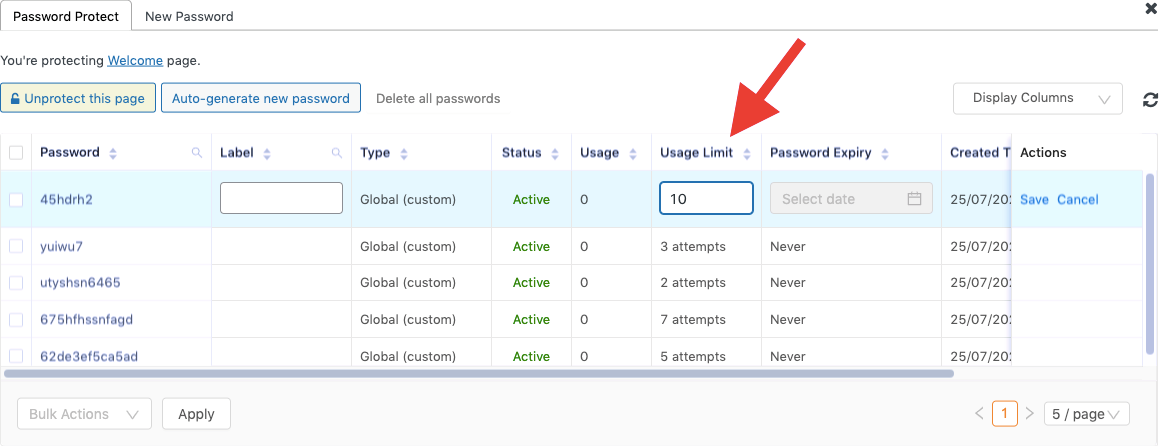
After that, enter a number to set up your password usage limit, e.g. 10, then click Save. That means after 10 attempts, the password will expire, and your users can no longer access the post accordingly.
#2 Expire Posts by Specific Date
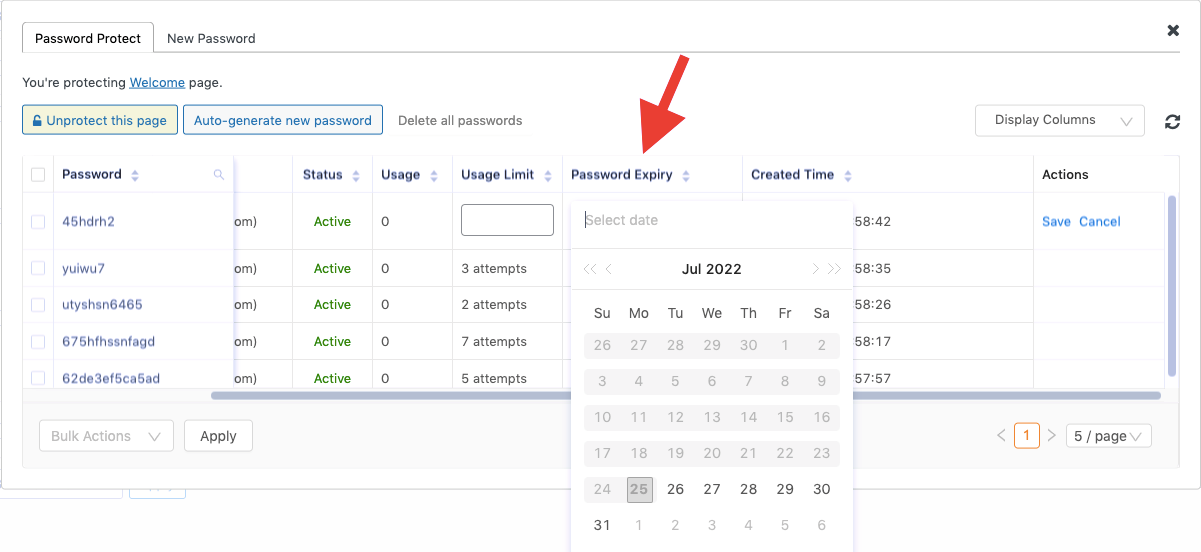
Instead of kicking a password off by usage limit, you can schedule its expiration by a specific date. Also, open your Password Protection Popup and select a date under the Password Expiry column. This way, the according password will automatically expire by the defined date.
To expire partial post content passwords, navigate to PCP Passwords popup in Partial Protection under your admin dashboard. Then, repeat the above steps to terminate passwords by usage limit or date.
Bonus Tips: Expire Posts and Partial Post Content By Quick Access Links (QALs)
Specifically, QALs are URLs containing access tokens. Each link associates with a password to direct your users to private content correspondingly. That way, there’s no need to remember lots of passwords yet bypass password-protected post or partial post content directly with just a link.
First, create and get QALs on your Password Protection Popup.

Also, define a date or usage limit to expire your private post or partial content with QALs afterward.
#3 Expire Posts by Cookie Expiration Time
The purpose of cookie expiration is to keep users’ access to content without re-entering passwords over time. For instance, the cookie is set up to last 7 days. When users enter passwords to access the post, they can maintain the access within seven days without having passwords rerolling. Once the cookie expires, users are expelled from protected content simultaneously.
In case they wish to have a re-entry into your protected content, they’ll need to enter passwords once again.
At the moment, you’re able to set cookie expiration time by seconds, minutes, hours, or days with the PPWP plugin.

#4 Expire Partial Post Content Using On/Off Attribute
The On/Off attribute function enables you to automatically show or hide protected content based on a format Y-m-d h:i:a. For example, if you set 2020/10/20 14:00:00 as the “on” time, the protected content will display automatically at the appointed time.
On the condition that you want to stop showing protected content automatically on 2020/10/30 14:00:00, simply enable the “off” attribute and schedule the expiration time.
You can watch our tutorial to see the steps more clearly:
Ready to Expire Posts or Partial Post Content on Your WordPress Site?
Hiding or removing outdated content is essential to improving your readers’ experience. However, it’s annoying and time-consuming to expire each post by hand, particularly regarding an extensive content library on your site.
With the help of the PPWP plugin, you’re able to achieve that at ease. There are four ways to set up the automatic post or partial post content expiration by usage limit, specific date, cookie expiration time, and on/off attribute functions.
Are you ready to try them out, and let us know which methods you prefer the most?
You may be interested in how to expire file download links inserted in content.
