about the quality of the services but you also need to establish good communication with your clients. You can exchange information via a live chat, a contact form, or several other methods.
Do you know that WordPress client portal would be an essential client management tool for more intimate and efficient user experience as well? You can relieve the headache of a full inbox while still keeping track of projects and deliverables between you and clients.
In this article, we will walk you through 3 main points: what a WordPress client portal is, why you need it, and how to create one for your business website.
Let’s get started with the basics!
What is a WordPress client portal?
A client portal refers to a private part of your WordPress website where users can log in and personalize their presence. They can streamline purchase history, access private content, customize their profiles, or upload files.
Why creating a WordPress client portal?
WordPress client portals help enhance your services in various cases to best please your customers. As a result, you can have more new users and build better relationships with existing ones.
- Share private content with specific types of clients
By securing certain parts of your WordPress site and granting access to specific users, you can allow them to view their projects only. Nobody can snoop around these pages or uploaded files except the website’s admins and the project’s owners. - Create multiple private areas for individual clients
Imagine you have many types of customers from potential, new, impulsive, to discount ones. New clients should see related products for upselling and cross-selling while loyal customers often get interested in discounts or best deals. So it’s necessary to differentiate their accessible content. - Keep all users in the same place
All of your clients will be managed and kept track of in the same place. What’s more, you can get rid of a huge amount of messages and emails back and forth every day. You will no longer worry about file attachment sizes either. WordPress client portals can handle it all.
How to create a client portal
There are dozens of plugins supporting client portal creation in WordPress. Each type of them comes with a powerful set of features that help simplify the process. We recommend using the Password Protect WordPress Pro plugin to create a private area for your clients.
The plugin effectively secures your WordPress content with passwords. You can lock pages, posts, custom post types, categories, parents and their child-pages, or even the entire website. Only clients with the correct password could see their secure content.
Step 1: Install PPWP Pro plugin
Follow these 5 steps to install and get started using PPWP Pro plugin
- Download PPWP Pro plugin
- Click Add New under Plugins in your WordPress dashboard
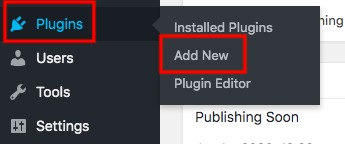
- Select the zip file that has just been downloaded
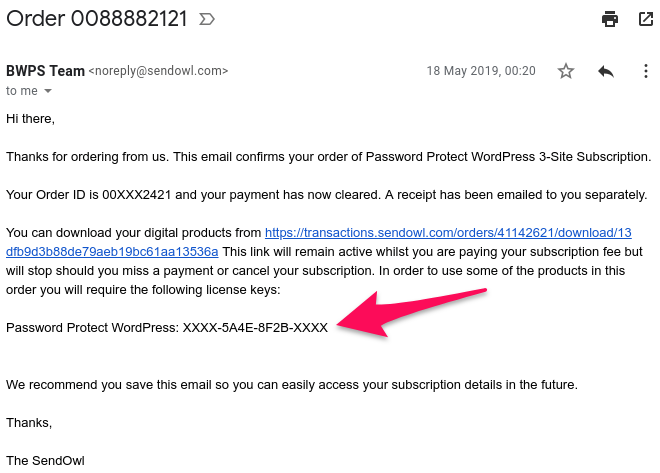
- Enter the license key sent to your email address
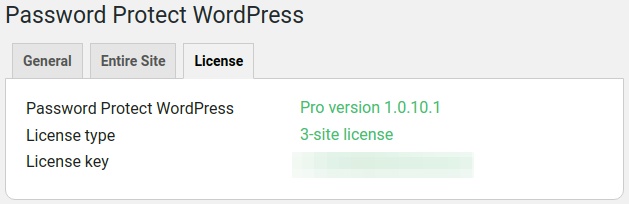
- Save your changes and you will see the Settings as follow
PPWP Pro allows you to create client portals in multiple ways. Adding a new private parent page and sub-pages for each client appears the simplest solution. You can also have a category including all posts of a project. The plugin enables you to gather related content together in a group and lock them at once too.
Step 2: Password protect parent pages and child pages
Clients should have their own private area. You can create a parent page for each client then adding new sub-pages. PPWP Pro permits you to protect the main page and all its child pages automatically with the same passwords. Your clients can use one password to unlock any pages. Then, the rest will become accessible too.
Suppose you’ve already created the main page and sub-pages for your client, here is how to get started setting passwords for that parent page and its child pages:
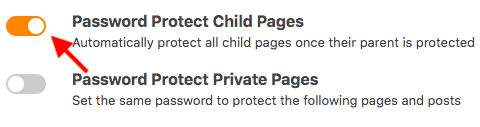
- Visit the plugin’s General settings page
- Enable the option Password Protect Child Pages
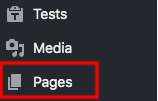
- Head to Pages on your WordPress sidebar
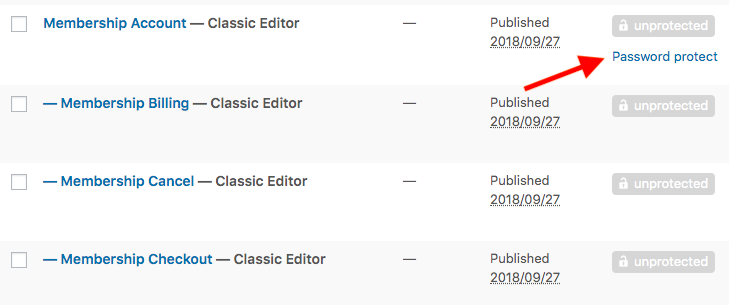
- Choose your desired parent page
- Click Password protect in the Password protection column
- Hit Password protect this page button
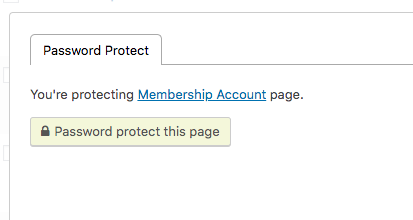
- Auto-generate a new password or add your own new password
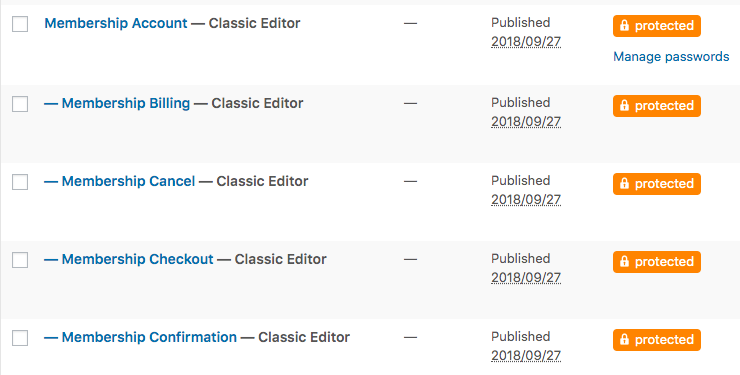
All of the sub-pages under the main page Membership Account are password protected now.
You can limit the usage of a password by assigning it a usage limitation number or an expiration period. After the password is expired, your clients are no longer allowed to use it to access the content.
On top of that, it’s possible for you to set roles for passwords. In other words, your users must log in as the right user role before entering passwords. Other roles, despite having the correct password, will see an error message when filling the password form.
You can create as many private parent pages as you would love to, depending on the number of your clients.
Step 3: Secure WordPress categories with a password
Don’t want to offer protected pages but posts for your clients? Explore another powerful feature of the plugin: password protect categories.
Once a category is secured with a password, all posts under it become private too. Nobody can read these pages except the clients with the right password.
To password protect a WordPress category, you need to:
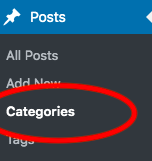
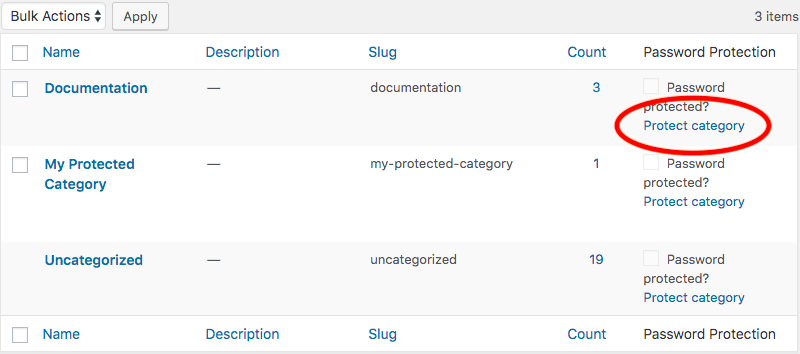
- Visit Categories under Posts in your admin dashboard
- Click Protect category in the Password Protection column
Step 4: Password protect a group of content
While parent page and category protection apply to pages or posts only, the Group Password Protection method secures unlimited pages, posts, and custom post types at the same time. You can make a private group for one or several clients and protect it with multiple passwords. Your clients can use these passwords to open their content.
This guide shows you how to short out and secure your client-specific group:
- Download the Group Password Protection extension of PPWP Pro plugin
- Install and activate the extension. The process is similar to what you’ve done above for PPWP Pro plugin
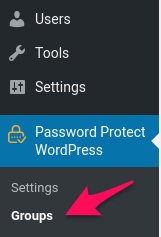
- Head to Groups under Password Protect WordPress icon
- Click Add New then fill in the group’s name and its description (optional)
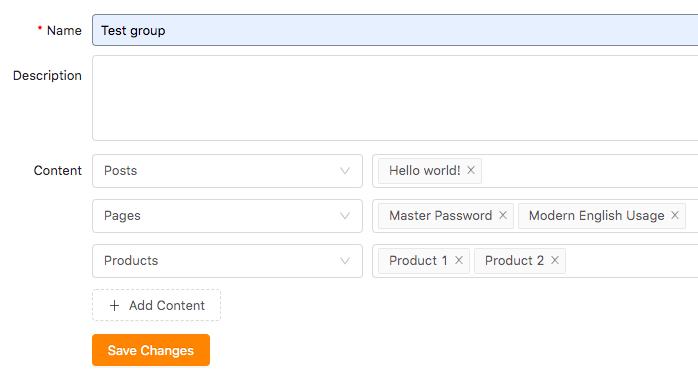
- Add new content to the group
- Choose the content type: post, page or custom post type
- Hit Save Changes
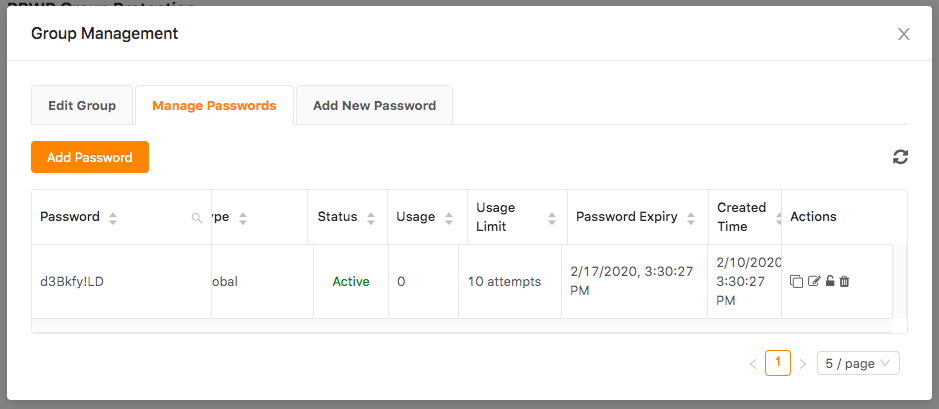
- Go to the Add New Password tab and enter your password
Managing, deactivating, or deleting groups have never been easier thanks to the Group management popup. Everything takes you a few simple clicks only.
Which will be your option to create a WordPress client portal?
We all can see the benefits of client portals in engaging customers and increasing sales for your website.
Password Protect WordPress Pro makes it possible for you to build private client portals on your WordPress site in several ways. Your client can access specific content via protected pages, posts, and groups of content. There is no more registration or logins required.
Install our PPWP Pro and have the first client portal on your WordPress site today!
