When creating a website, you always want as much traffic coming to your site as possible. To do so, you have to publish content consistently and make sure your pages and posts visible to both search engines and users.
So what is the point of making WordPress pages private? Once shielded from the public, how can users find your protected content?
In this article, we’ll discuss how people are arguing over the advantages of WordPress private pages. We’ll then guide you through how to create a private page for your WordPress site with and without a plugin.
What Are WordPress Private Pages Used for?
As the name suggests, WordPress private pages are not visible to the public. Even though visitors have the page URLs, they won’t be able to view it. Instead, they will see a 404 not found error or a password form, depending on your settings. Only authorized users, admins or editors, for instance, can access these pages.
There may be times when you must keep people from snooping around your WordPress pages. Some pages are created for internal training or communication within the company employees. Some others are used as private product pages for premium customers.
#1 Team internal communication or training
Rather than sending emails back and forth, many companies choose to share internal information like team goals, rules, and projects via private pages. This page keeps prying eyes off your company’s confidential information. You can allow employees from specific departments to read it.
#2 Private product pages
Premium customers have not only a great impact but also influence in the market. To build a good relationship with these people, you can offer them the limited edition or higher-value products. Only priority customers can view these private products and make purchases.
#3 Controversial content
Another case of making WordPress pages private comes to controversial content. You write a page discussing a sensitive topic on your site. Actually, it’s not ideal to let all types of people know your opinion. You can protect that page and grant access to only those having the same idea. As a result, you avoid unnecessary arguments.
How to Create a WordPress Private Pages
You can add a private page to WordPress in 2 ways: using WordPress built-in visibility option or installing a private page plugin.
WordPress built-in private options
Once published, your pages become accessible to the public by default. WordPress enables you to hide the page content via the page Visibility feature. Follow these 3 simple steps to make your page private:
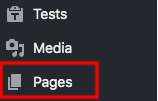
- Go to Pages in your WordPress navigation menu
- Select your desired page and click Edit
- Find Publish section in the page edit screen
- Click Edit next to Visibility: Public
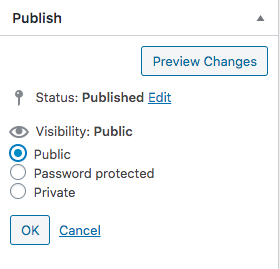
- Public – Everyone is able to see the content
- Private – The site editors and administrators can access this page. Others will see a 404 not found page when attempting to open it.
- Password protected – The page content is covered under a password form. Only those with the correct password can unlock the content.
WordPress requires you to set just one password per post. All user roles must use this password and open the content. What if you have a lot of users on your site and want each to use a different password to unlock the content? To expand the functionality, look at a password protection plugin!
Password Protect WordPress (PPWP) plugin
Password Protect WordPress which is available on WordPress.org for free allows you to secure your pages with multiple passwords. Unlike the WordPress default password protection feature, PPWP enables you to set roles for each password.
To get started using the plugin and protect your pages with more than one password, you need to:
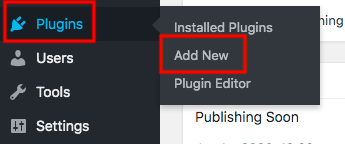
- Head to Add New under Plugins in your WordPress dashboard
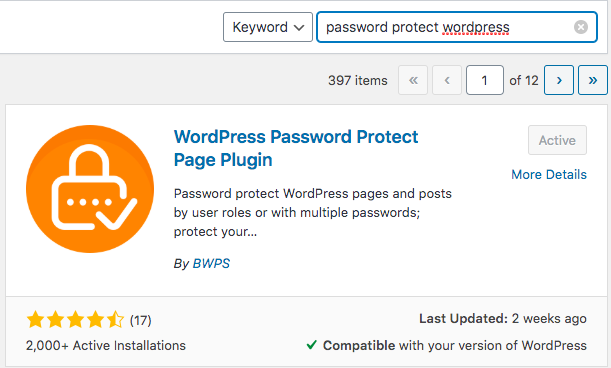
- Type “password protect wordpress” in the keyword box
- Install and activate the plugin
- Go to Pages on WordPress sidebar and visit the page you intend to password protect
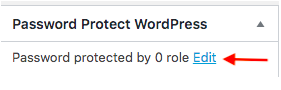
- Look for the Password Protect WordPress section at the top right corner of the page and hit Edit
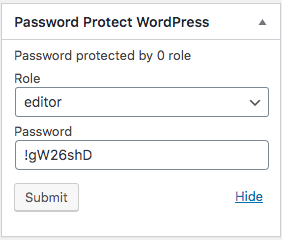
- Enter your passwords. Each pasword must be displayed on a separate line.
- Set roles for each password if necessary
While the Global passwords permit all users to unlock the content, role passwords require specific logged-in user roles to fill in the password form. Other roles will see an error message even though they’ve entered the correct password.
In case you secure numerous pages with a unique or master password, users can use that password to unlock all the content at the same time.
Make WP Private Pages Visible to Subscribers
Subscribers refer to a user role in WordPress who can leave comments or receive additional information and premium content without having to enter passwords.
Although they have very limited access to WordPress sites, it’s necessary to engage your visitors to subscribe. It’s easier for you to convert these potential leads to customers than forcing standard users to make purchases.
You can take 2 different paths to make WordPress private pages visible to subscribers, either editing the theme functions.php file or using the PPWP plugin.
Edit the functions.php file
The former method involves you:
- Visiting Appearance then click on Theme Editor in your WordPress sidebar
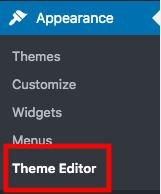
- Finding the functions.php theme file in the Theme Files menu on the right hand
- Adding the code below to the file
/* * Make Private Posts visible to Subscribers * Typically only visible to admin or editor */ <?php function whitespider_private_posts_subscribers(){ $subRole = get_role( 'subscriber' ); $subRole->add_cap( 'read_private_posts' ); $subRole->add_cap( 'read_private_pages' ); } add_action( 'init', 'ws_private_posts_subscribers' ); - Hitting Update File
Use Password Protect WordPress (PPWP) plugin
If you’re not tech-savvy, the method above seems quite complicated. Once making any strange changes to the file, it might affect the entire website’s performance. To reduce the risk, turning out to a plugin is highly recommended. As mentioned, PPWP authorizes you to set user roles for passwords.
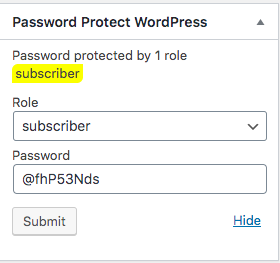
Simply select the Subscribers in the Password Protect WordPress box. You can generate unlimited passwords for your content. Enter one password and hit Submit then repeat the process.
Another way to use PPWP to enable subscribers to access your secure content without having to enter passwords is setting whitelist roles. This method forces you to upgrade the plugin to the Pro version. Here is how to upgrade the Lite version of PPWP and set the whitelisted role to subscribers:
- Download PPWP Pro plugin
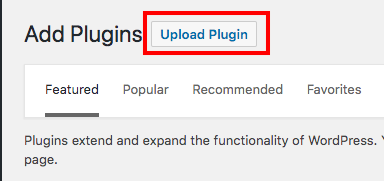
- Go to Add New under Plugins in your WordPress admin area
- Click on the Upload Plugin button and select the plugin zip file you’ve just downloaded
- Active the plugin
- Head to the plugin Settings page
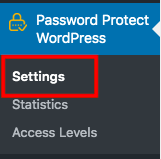
- Choose Logged-in users in the role dropdown

After setting the whitelisted roles to subscribers you need to password protect your pages from others. After registering and logging in, subscribers can read your private pages without having to enter passwords now.
On top of that, the plugin blocks Google and other search engines from indexing your protected content. The private pages won’t show up on any search results pages.
WordPress Page Visible Only With Links
Afraid of brute force attacks? PPWP Pro offers an advanced feature supporting you in granting users direct access to the secure content without password submission. Unlike the whitelist role method, users no longer have to log in.
All you need to do includes locking WordPress pages with passwords, generating access links, and sharing the link with users. They can click on these links and browse the content without any restrictions.
- Head over Pages section and find your desired page
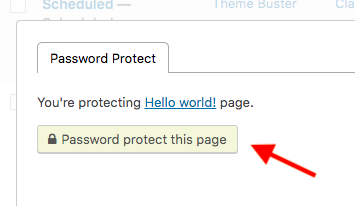
- Click on the Password protect link next to the Date column

- Hit Password protect this page button on the Password protect pop up screen
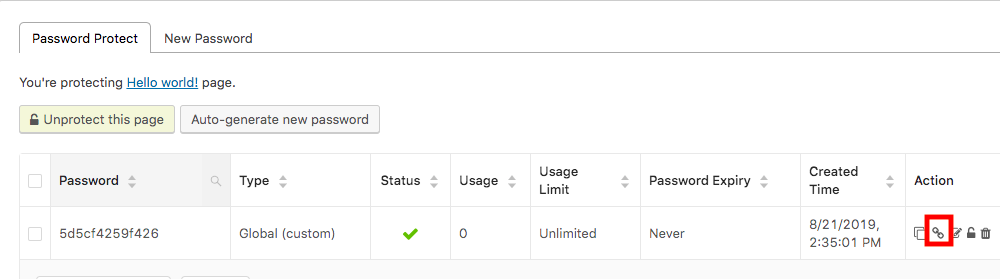
Your page/post is protected with a random password generated by the plugin now. You can add your own passwords by clicking on the New Password tab. - Generate an access link automatically
Once a page is protected, its passwords and access links will be managed on a pop-up screen. Simply click on the Copy access link icon in the Action column to get the access link of the post.
In case you’ve already protected a page or post before and then want to copy the access link, follow these 3 simple steps:
- Visit the Pages or Posts section and choose your desired page/post
- Hit the Manage passwords link

- Copy the access link in the Password protect pop-up
Now, users can see the hidden content in 2 ways, either accessing the content directly via the access link or entering the correct password in the password form.
Why WordPress Private Pages Are Still Visible
Even though you set the private status or password protection for your WordPress pages, some are still visible to the public. This may happen due to 2 main reasons: you’re using a cache plugin or you’re setting private status to WooCommerce shop pages.
WooCommerce shop page is a special page that doesn’t follow the WordPress default Page Visibility settings. To fix this problem, you should change the page to the Draft mode. In this case, only the site admins or editors are able to access it. Want some other uses to see the shop pages and make purchases? Use PPWP Pro to password protect the page.
If you’re using a cache plugin for WordPress, it will contain a copy of your post when it’s visible. You must purge the cache and deactivate the plugin before making the page private again.
Make Use of Your WordPress Private Pages
We can’t deny the benefits of WordPress private pages. You can use them to offer premium products or to communicate with your colleagues.
There are several ways to secure your WordPress pages. WordPress default page visibility allows you to lock individual pages with a single password. PPWP Pro plugin, meanwhile, enables you to assign multiple passwords to a private page. You can also make private pages visible to the subscribers too.
You should notice that your private content might be still visible to the public if you’re using a cache plugin. Make sure you purge the cache and deactivate the plugin to fix this error. What’s more, the WooCommerce shop page won’t follow WordPress visibility settings. You must use a plugin to protect your WooCommerce shop page instead of applying WordPress default feature.
Still have a question about how to create and manage your private pages? Let us know in the comments!
