Online business, undeniably, is booming. And guess what? When talking about e-commerce stores on WordPress sites, over 80% of users think about WooCommerce. This plugin has become the standard among WordPress-based shop systems, from SMB to large businesses.
WooCommerce comes as a free and open-source plugin for WordPress with easy to use features that help set up and maximize your online store.
There are many factors in creating a successful WooCommerce shop. Some businesses focus on the product image design while others increase visibility with SEO.
You need to take care of many details while developing your online shop, but have you ever paid attention to the login page? Since it would affect the user experience directly, you shouldn’t forget to present a friendly one.
Luckily, you have more than one login option to choose from, depending on the type of store you’re offering. Today, we’ll introduce you to 5 different kinds of WooCommerce login and how to create each of them with ease.
Types of WooCommerce Login
When discussing WooCommerce login, it’s not only about entering usernames and passwords to make purchases but users sometimes can access the shop via a special access link. Here are 5 typical WooCommerce login methods you can consider:
#1 Guest checkout
Guest checkout enables shoppers to purchase from your store without logging into an account. Since customers’ information is applied to one order only, they won’t be able to reuse it in the next shopping time.
This process, on one hand, boosts the conversion rate as users find it easy to buy a product. However, it might cause some problems:
- Difficult to review, modify, or track orders
- Prevent users from reordering products. Without the order history, they have to go to the store, look for the products again.
- Unable to save the consumer buying behavior data. As a consequence, you can’t build an effective marketing strategy or even reward loyal customers.
- Take the customer service team a lot of time to assist shoppers with their orders
In fact, this checkout method doesn’t apply to every store. When selecting the guest checkout option, make sure you aim to target new customers rather than retaining those who have made purchases.
#2 Check out with user accounts
In contract to Guest Checkout, the standard checkout process in public stores requires users to fill in their credential information for future reuse. It saves their time from providing this information whenever returning to your store.
This checkout solution best fits WooCommerce stores selling handmade, personal care, or houseware products. Customers will tend to be loyal and buy the same goods for a long time.
With a saved account, they can quickly reorder their desired products without browsing the store and adding items to their cart again. Customers can also store their shipping or payment information.
It’s also easier to handle the return or refund process. You don’t have to go through the hassle of contacting via emails, contact forms, or social media. All a user needs to do is log in to his account and leave a customer service request.
What’s more, if you’re offering memberships, bookings, courses, groups, or digital downloads, using account checkout is a must. It allows users to manage everything from the same place: checking the order history, managing bookings, etc.
#3 Social login
Users sometimes find it annoying to register or enter checkout information which might lead to customer leaks. That’s why WooCommerce Social Login comes in handy.
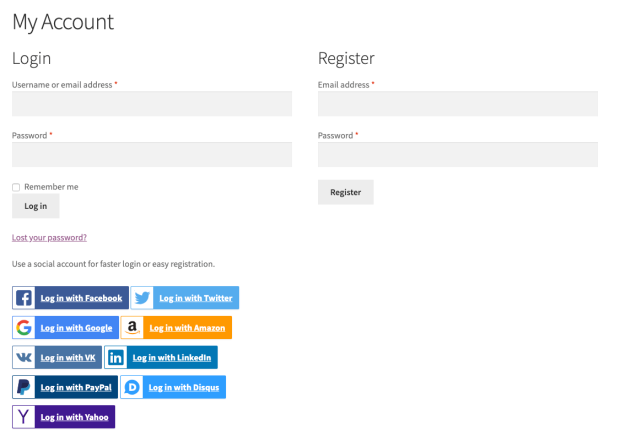
WooCommerce social login makes it easy and secure for consumers to log into your site using social accounts such as Facebook, Twitter, Google, Amazon, LinkedIn, PayPal, Disqus, Yahoo, or VK. They don’t have to spend time creating a new user account.
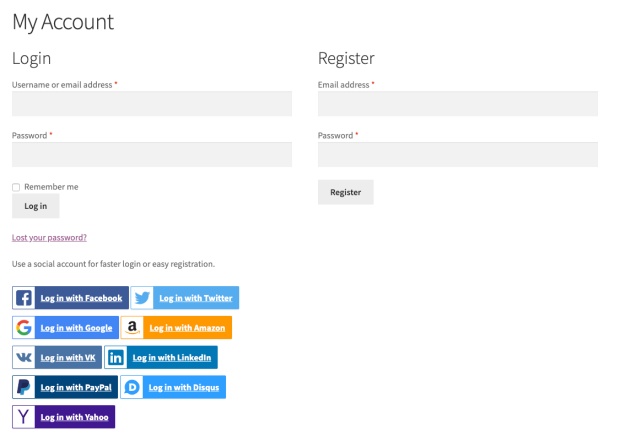
There are a few reasons for applying this login method to your WooCommerce store:
- Users don’t have to create and remember new usernames and passwords.
- It helps improve security and increase trust by using social sign-in.
- You can increase the conversion rates since almost all people own at least a social account.
#4 Private store and products
Not all products are accessible to every customer. Some stores provide high-end and premium products for specific customers only. Take a digital product store as an example. Everybody can buy most ebooks and courses. However, not all of them are able to view and buy certain goods like a new publication from a best-selling author without the right permission.
Shop owners often restrict access to their products or stores via user roles and whitelisted accounts.
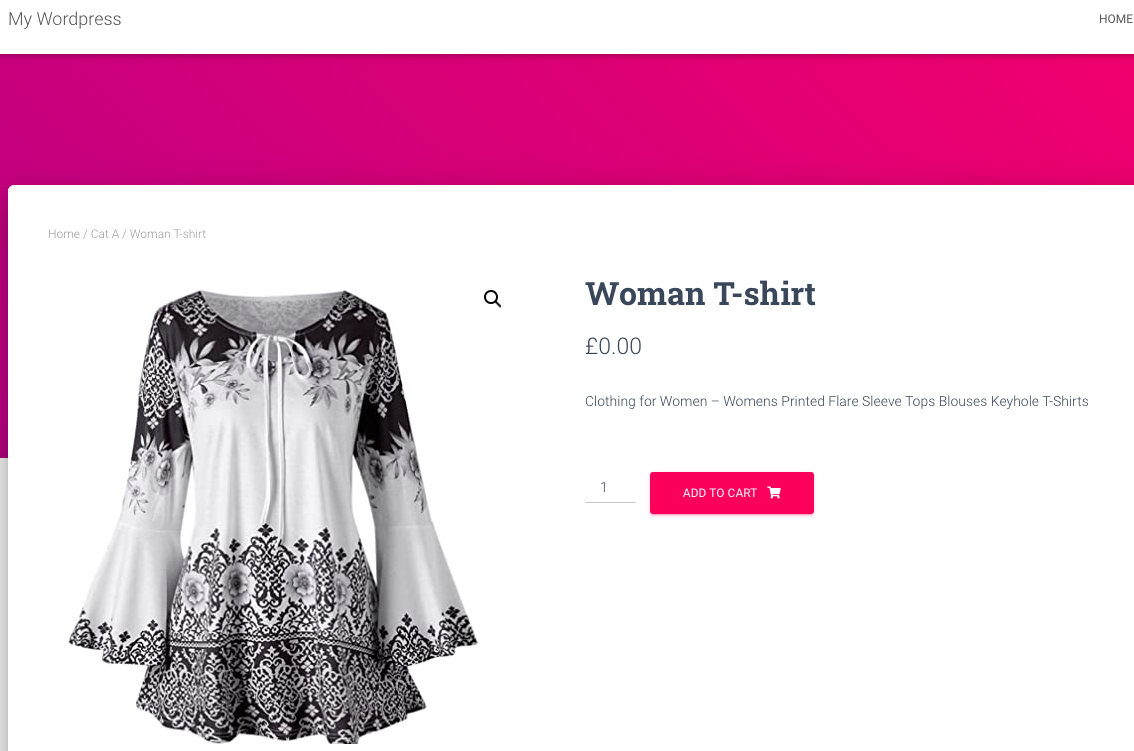
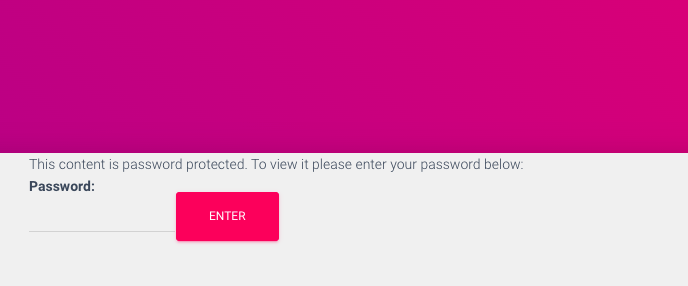
You can also password protect individual products, a product category, or the entire store so that only authorized customers can make purchases. This is a product example before and after being password protected:
#5 Auto-login links
Last but not least, customers are able to log in by clicking on a special URL without entering usernames or passwords. Not only don’t they have to remember credential information but it also increases order security.
Auto-login links are perfect to create a private WooCommerce store. You can offer premium or customer-specific products that are available to certain buyers.
You can make use of auto-login links to grant customers access to password protected products. Instead of having to enter passwords, clients can click the access link allowing them to view the product. This method is the choice for websites selling premium content using WooCommerce.
How to Set up Login Options in WooCommerce Stores
Depending on the login method, there are different solutions you can take to set up logins in your WooCommerce stores. You can either use WooCommerce default options or install a third-party plugin.
#1 Guest checkout
Enabling guest checkout for WooCommerce stores shouldn’t take you much time. You can do that right in your WooCommerce checkout settings page. These 2 simple steps show you how:
- Head to WooCommerce → Settings → Account & Privacy in your WordPress dashboard. If you couldn’t find the Account & Privacy tab, go the Checkout tab
- Tick on the box “Allow customers to place orders without an account” next to the Guest checkout section
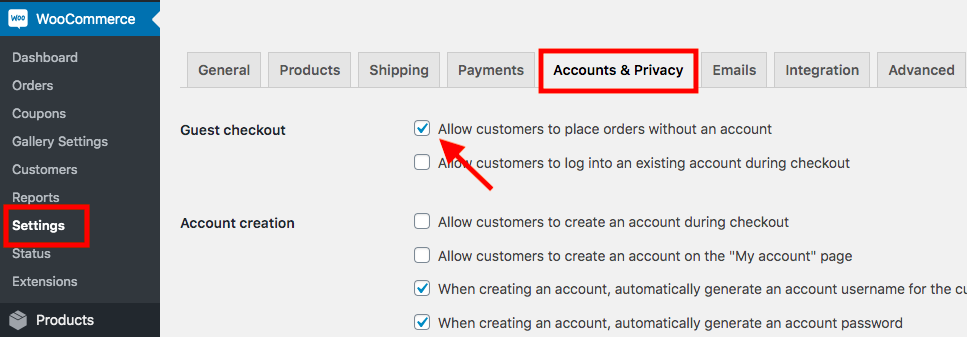
In case you don’t want users to create accounts, even while they’re checking out or they’re on the registration page, you need to uncheck all the boxes in the Account creation section.
#2 Public store with user accounts
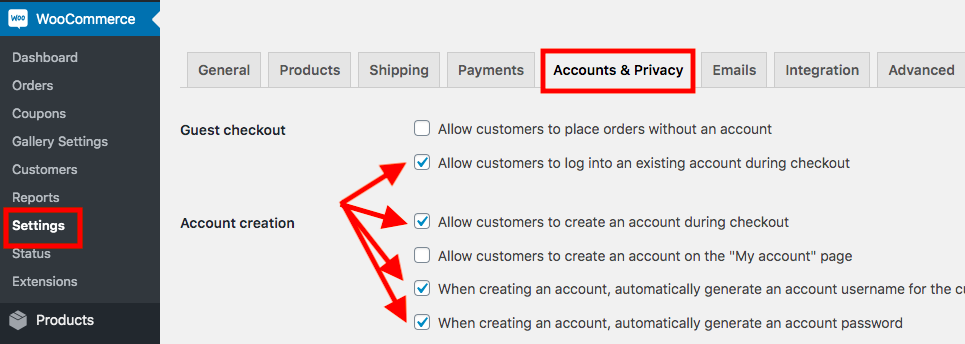
Similar to the method above, WooCommerce comes equipped with a default feature permitting you to automatically create accounts for all users during the checkout process. Users will receive an email to their account with an auto-generated username and password.
Here is how you enable users to generate an account while they’re checking out:
- Navigate to WooCommerce → Settings → Account & Privacy
- Check the box “Allow customers to log into an existing account during checkout” in the Guest checkout section only
- In the Account creation part, unable the option “Allow customers to create an account on the “My account” page only”
#3 Social login
WooCommerce doesn’t provide a function authorizing users to log in with their social accounts. You have to install another plugin to support this function.
Provided by the WooCommerce team, WooCommerce Social Login proves a reliable plugin making it easy and secure for users to log into your WooCommerce store via Facebook, Twitter, Google accounts, etc.
Follow these 5 steps to install and get started with the plugin:
- Download the WooCommerce Social Login extension
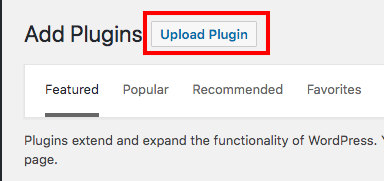
- Visit Plugins → Add New → Upload Plugin and choose the zip file you’ve downloaded

- Install and activate the plugin
Now, whenever your users log in and check out on your WooCommerce store, they will have other choices to register or log in. Here is what they will see in the login page:
#4 Private WooCommerce products or store
Some WooCommerce stores allow specific users and user roles to view and buy private products. Some others want to simplify the process by assigning just a password.
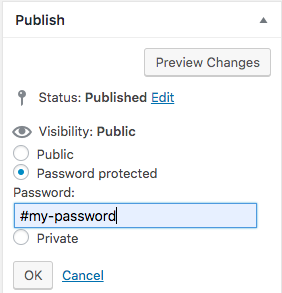
You can password protect individual product pages in the exact same way as securing a WordPress page and post. In the product page edit screen, enable the Password protected option in the Publish box and set a password for it.
Want to password protect all products in a WooCommerce category? There is no other way except installing a password protection plugin.
Password Protect WordPress Pro locks your entire WooCommerce category with just a single click. Once protected, all product pages will be assigned a password automatically. Users have to enter the correct password to access them.
Refer to how to install the plugin in the Social Logins section. Here is all you need to do:
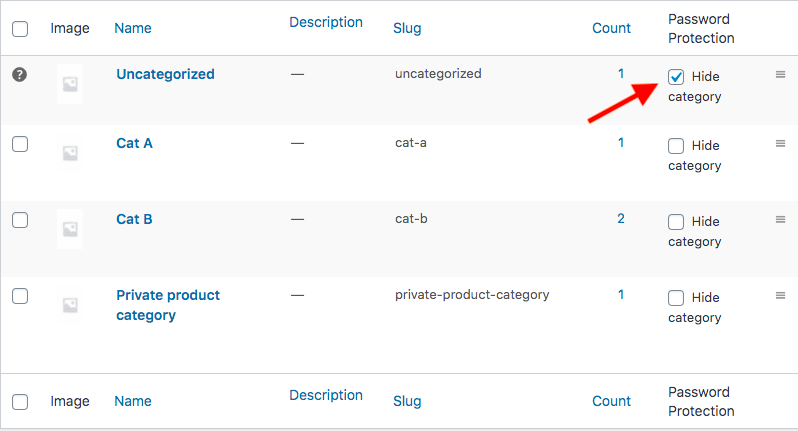
- Locate Products → Categories in the WordPress navigation menu
- Tick Hide Category of your desired product category in the Password Protection column
Since WooCommerce and WordPress don’t support shop page password protection, you’re able to password protect it in the same way you protect product pages.
You’re required to use WooCommerce Integration extension together with the Password Protect WordPress Pro plugin to lock your shop page with passwords.
Upon installation and password protecting the shop page, all your products and their category pages will be protected as well.
#5 Auto-login links
This method lets users log in and make purchases on your WooCommerce store by clicking on a custom link. There is no username or password required.
The auto-login link solution can tie together other login methods mentioned above. This requires the Autologin Links plugin.
We break the guide to applying this login option in the following steps:
- Click Add New under WordPress Plugins
- Type “Autologin Links” in the keyword box
- Install and activate the plugin
- Go to Users in your WordPress admin dashboard
- Choose the desired users you intend to provide the auto-login link
- Scroll down to the Auto-login section
- Click New and copy the link

- Update the profile
- Send users the login link
In fact, you have to manually email users with the link to their accounts which might take a lot of time and effort. Password Protect WordPress Pro and its WooCommerce Integration extension can handle that.
While the former locks your single products or product categories with passwords, the latter helps create quick access links for virtual products and password protect the entire WooCommerce store.
Once a customer purchases your virtual products using any login options above, they will receive a quick access link permitting them to access protected content directly without having to enter passwords.
What is the Right Customer Login Option for Your WooCommerce Store?
There are numerous WooCommerce login types for different stores. Users can either checkout as guests, have to provide credential information, or simply use their social accounts.
You can apply multiple login methods at a time. For example, users have to register an account but they can log in via an auto-login in later.
Are you offering a private store with premium products? Protect them with a password so only specific users can access and buy. Password Protect WordPress Pro and its WooCommerce Integration extension help you handle this with ease.
Still have questions about WordPress logins? Please add your comments below.
