Since shopping online has become more and more popular, making your e-commerce stores stand out from trillion other stores to attract customers is not a piece of cake.
While people seem to solely focus on the product and service quality, there is also a need to pay attention to the e-commerce store’s shop pages. Considering it represents the soul of your store, it’s where you show up all your products, and above all, it’s what customers see first when they visit your site.
Do you know the look of your online shop pages plays an important role in your store’s success? How you customize your shop pages in a certain way can contribute to creating unique experiences for customers and driving up sales.
This article will show you how to customize your WooCommerce shop page to fascinate more customers using Elementor.
- Get to Know WooCommerce Shop Page and Elementor
- 5 Steps to Customize WooCommerce Shop Page with Elementor
Get to Know WooCommerce Shop Page and Elementor
“WooCommerce shop page” and “Elementor” are the two main subjects that will be mentioned throughout this article. We will go through the term “WooCommerce shop page” first.
Why we need to customize WooCommerce shop page
According to WooCommerce, the shop page is a placeholder for a post type archive for products. Simply put, it is a page displaying all of your available products for sale.
A shop page is essential to your online store as customers will interact with it the most. The look of your WooCommerce shop page leads to the success of your online business. How you arrange your products in a certain way, how detailed the product information is provided, or how easily buyers can find the things they are looking for surely affect the buyer experience.
Creating an attractive and user-friendly WooCommerce shop page that simplifies the buying process, and distinguishes yours from others can bring a big opportunity. These are the revenue, the conversion rates, and further, the reputation of your business.
While the basic WooCommerce shop page template is already functional and good-looking, there are still some inappropriate showcases for certain types of products. If you wish to show off each of your products in the best way, then you should need a custom WooCommerce shop page.
In this article, we will introduce to you the effortless way to customize your WooCommerce shop page using Elementor. You will know what it is, right in the following part.
Why Using Elementor for WooCommerce Shop Page Customization
Elementor is a drag-drop WordPress page builder. It is a tool that lets you create your site in the way you want without the need for coding knowledge.
Elementor is not the only page builder working in this field, but it is our favorite solution for WooCommerce shop page customization. It’s the most popular WordPress page builder plugins with over 4 million active installations, and fully supported with WooCommerce.
In the past, editing a WooCommerce shop page template involved a time-consuming, costly, and complicated coding process. Web designers had only 2 options which are coding theme PHP files or using WooCommerce’s hooks. Nowadays, thanks to Elementor, what we need is the drag-dropping skill and a taste for design.
Apart from that, Elementor also comes with a rich collection of useful add-ons. That allows you to freely organize your site in a way that exactly meets your brand’s standards. Most importantly, what makes Elementor stand out from other page builders is its visual format. This means that what you see when you design your content, is exactly what users will see when they visit your shop pages.
Now you know the convenience of using Elementor, let’s discover 5 steps to customize your WooCommerce shop page.
5 Steps to Customize WooCommerce Shop Page with Elementor
In this tutorial, we focus on customizing the shop page.
Before we dive in, make sure that you have the Elementor plugin successfully installed and WooCommerce activated on your website. If you don’t activate WooCommerce, you will not be able to access Elementor’s product templates.
Here comes the main part – 5 steps to customize your shop pages.
Step 1: Create a Product Archive Template
Let’s design product shop pages that can be applied to all products on the site.
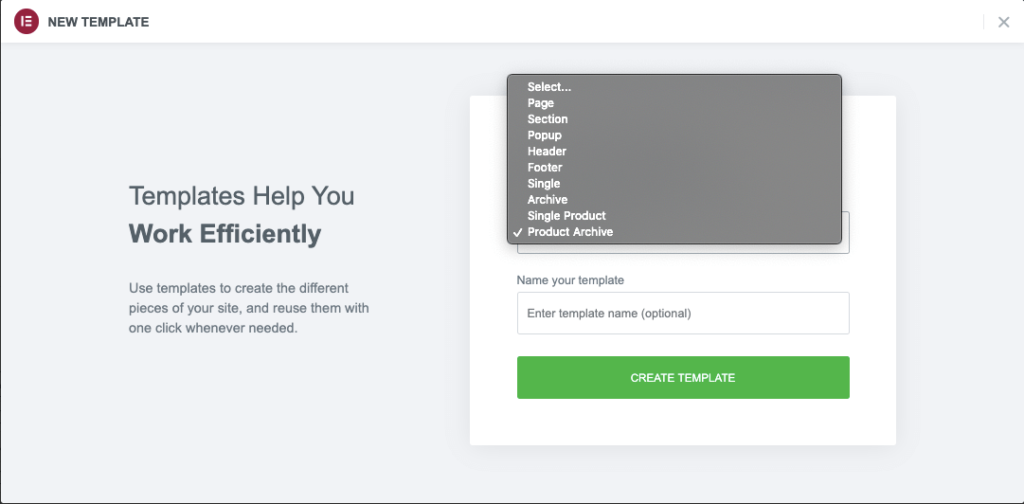
- Go to “Elementor,” open “My templates,” and click on the “Add new” button.
- Choose “Product archive” as your template.
- Enter the template name and click on the “Create template” button.
Step 2: Insert an Elementor Template or Build One from Scratch
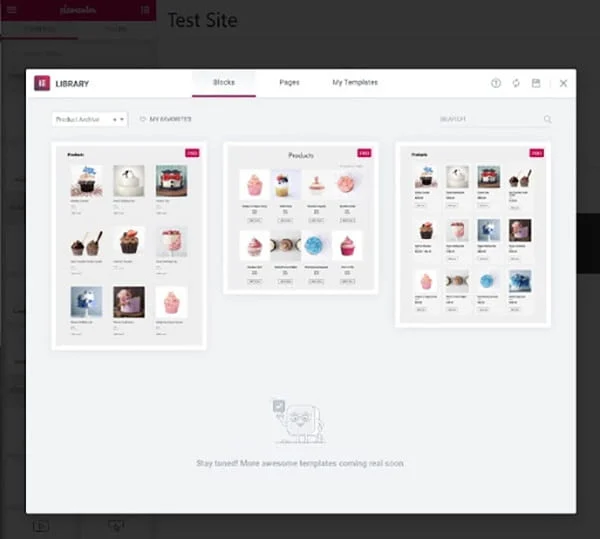
You need to choose a layout you want to customize your shop with Elementor. Alternatively, you can build one from scratch and design it by using special widgets in the editing panel.
We suggest you select one of the available layouts and then customize it to best suit your site.
Step 3: Add Products Widgets to Beautify your Shop
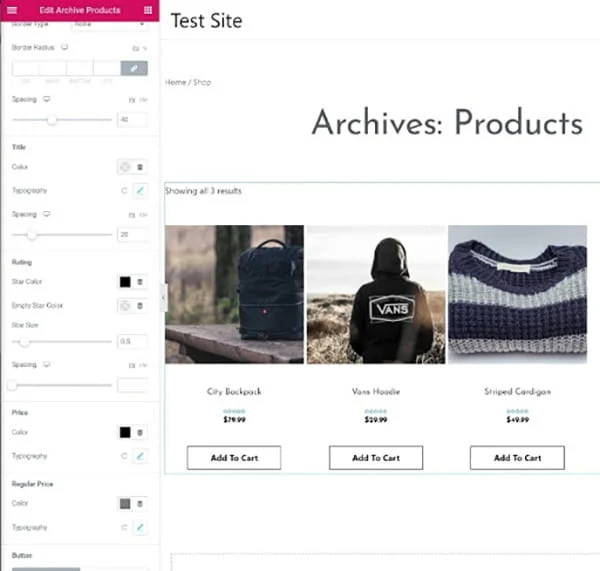
Elementor does provide widgets solely to create a WooCommerce site. You can use these widgets to customize every single corner of your online shop.
Here is a list of Elementor widgets that you can use:
- Archive title and description
- WooCommerce Breadcrumbs
- Custom add to cart
- Archive product
- Products
- WooCommerce pages
- Menu cart
- Product categories
Step 4: Tweak the “Add to cart” Button
The “Add-to-cart” button is the most important feature of any shop page. What you need to do is make your “add-to-cart” button stand out and catch customer’s eyes.
Click on the “Custom Add to Cart” block and try adjusting to make it in line with your brand style.
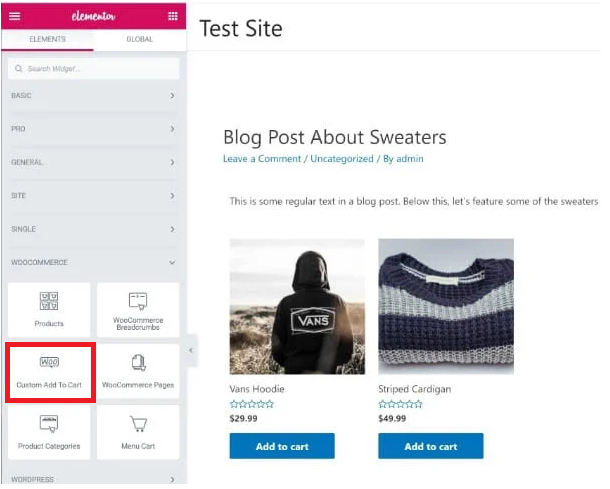
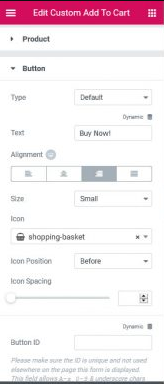
With just a few clicks, the button will be transformed more eye-catching.
Step 5: Set the Condition and Public your Shop Page
Once you’re happy with all the customizations you’ve done to your page, hit the “Publish” button.
Elementor will ask you to set the condition that determines where your template is used throughout your site.
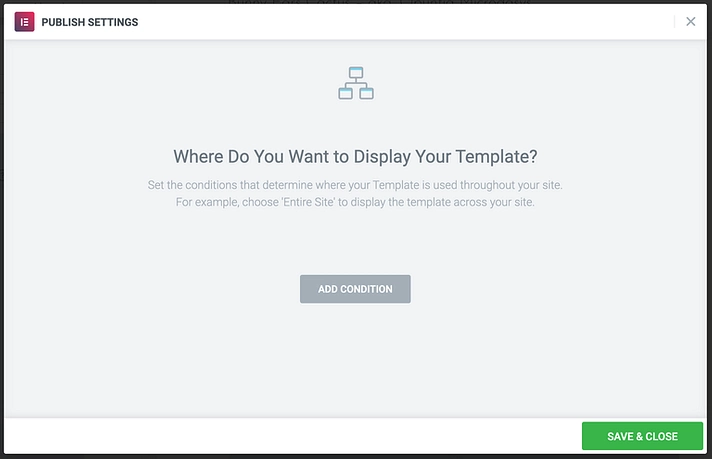
If you want to have the template used for all products, simply select “All Product Archive” from the list.
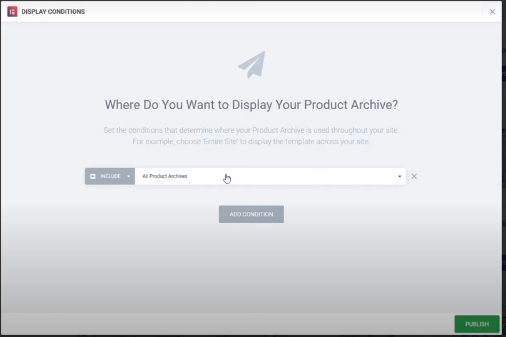
By default, the template will affect all the product pages on your site. You can also select a specific category of products.
Click on “Save & Close” to finalize everything. By finishing this step, you’ve done the WooCommerce shop page customization with Elementor.
Final Thoughts
We’ve gone through 5 detailed and comprehensive steps for customizing a WooCommerce shop page with Elementor. Before that, we’ve also listed some advantages using Elementor. This feature-rich plugin enables you to create and design your shop pages flexibly and visually in your way. It’s both time and cost-saving as thanks to it, you don’t need to hire a professional to build up your site.
Pairing WooCommerce with Elementor is no wonder a great idea for your dream online shop! Let us know your thoughts about this article and your better solutions for WooCommerce shop page customization by leaving comments below.
