A slideshow comes as great visual aids for all WordPress sites, including blogs, eCommerce stores, or photography sites. It lends a helping hand in drawing user attention and letting visitors get the hang of your key messages without any hitch.
In this tutorial, we’d like to show you the nitty-gritty of how to create WordPress slideshows, using either Jetpack or MetaSlider plugin.
First, let us walk you through the benefits of having a slideshow on your WordPress site.
Let’s hop in!
- Why do You Need to Use Slideshow in WordPress?
- Add Slideshow to WordPress Using Jetpack
- How to Create Slideshow in WordPress with MetaSlider
Why do You Need to Use Slideshows in WordPress?
A WordPress slideshow comes as the most effective way to showcase images, videos, and other types of content on your site.
Bloggers make use of slideshows to highlight their new-published or most important content on their homepage. Users may find it overwhelming to navigate through a huge library of blog posts. With a WordPress slideshow, they just click on the showcased images or URLs which take them to the right post.
eCommerce site owners also create slideshows to highlight their latest or best-seller products or a range of special deals. The great part is WordPress slideshows stay responsive across devices, including desktops, tablets, or smartphones.
What’s more, a slideshow is perfect for a photography site to point up its stunning photo galleries. In case you’re a web designer and wish to show off your expertise with online portfolios, adding them to a slideshow and displaying it on your homepage is also a smart idea. Alternatively, you can create WordPress slideshows on your About page to display customer or client testimonials.
All in all, a slideshow can add a visual punch to your site, making visitors easily get your key messages, shop your products, and stay on your site for longer.
As a matter of fact, WordPress doesn’t provide any built-in features to form a slideshow. In the next part, we’ll learn how to create WordPress slideshows with the help of carousel gurus, namely Jetpack and MetaSlider.
Add Slideshow to WordPress Using Jetpack
Well-known as an exclusive solution for WordPress backup, security, and speed, many of you may knock the socks off to know we make use of Jetpack to create slideshows in WordPress.
One of the main reasons we choose Jetpack in this tutorial goes to the developer team behind – Automattic – the same team with WordPress. This means Jetpack is basically guaranteed to be compatible and more secure.
If you’re putting your trust in this plugin to secure, backup, and speed up your site, you’re free from installing another one to create slideshows. This helps save your storage too.
In addition, it’s straightforward and beginner-friendly to build slideshows with Jetpack since it’s quick and doesn’t require you any steep learning curves to get started off.
To create slideshows in WordPress using Jetpack, first, you need to activate the slideshow, then add a Jetpack slideshow to a page or post on your WordPress site.
Activate Jetpack Slideshows
Enabling the Jetpack slideshow or carousel is simple. Once it’s active, the WordPress galleries from any standards that you have embedded in posts or pages will launch a stunning full-screen photo browsing experience.
Let us step you through the process below.
- In your WordPress dashboard, find Jetpack > Settings > Writing.
- Scroll down to the section labeled Media.
- Enable the Display images in a full-screen carousel gallery option. You can also decide to show or hide the photo Exif metadata and the comments area in the image lightbox, as well as changing the Carousel color scheme.
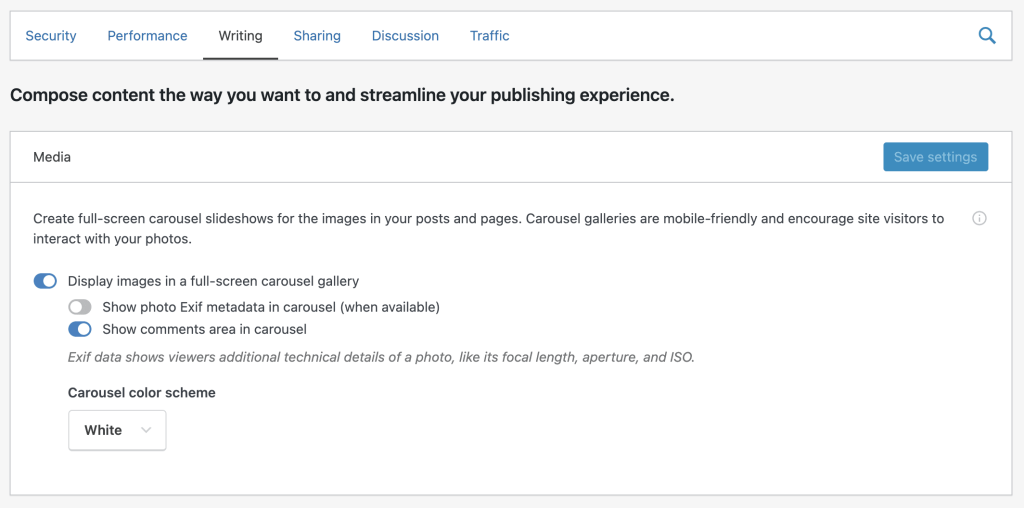
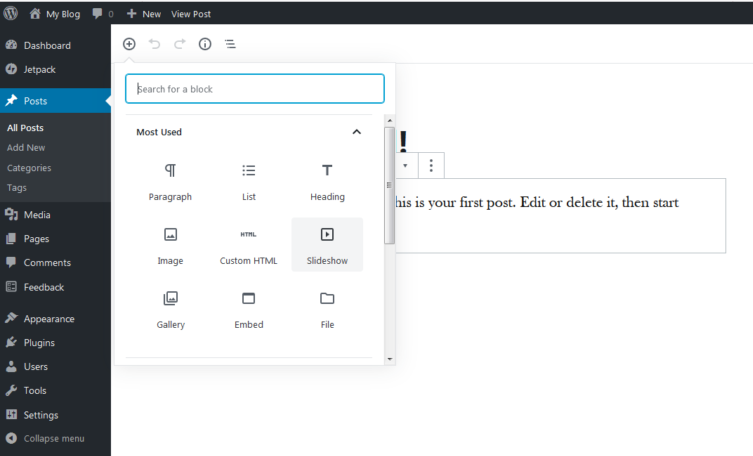
When you enable the feature, Jetpack will automatically save the change. This completes the activation of the feature for the Jetpack slideshow. The option for the slideshow will appear in your block options when creating a post or page. To see it, simply edit or create a post/page, then click on Add a block and search for “slideshow.”
Add Jetpack Slideshows to Pages or Posts
Jetpack provides a Slideshow block on all Jetpack-connected sites, allowing you to easily insert an image slideshow into a post or page. Search for Slideshow block from the Jetpack block selector and you can insert it into your WordPress content.
Next, you need to add images to your slideshow. The block comes with 3 options for you to choose from
- Drag images from your computer onto the Slideshow block.
- Click the Upload button and select images from your computer to upload.
- Select images you have already uploaded from your Media Library.

Once you’ve selected your images, click Create a new gallery.
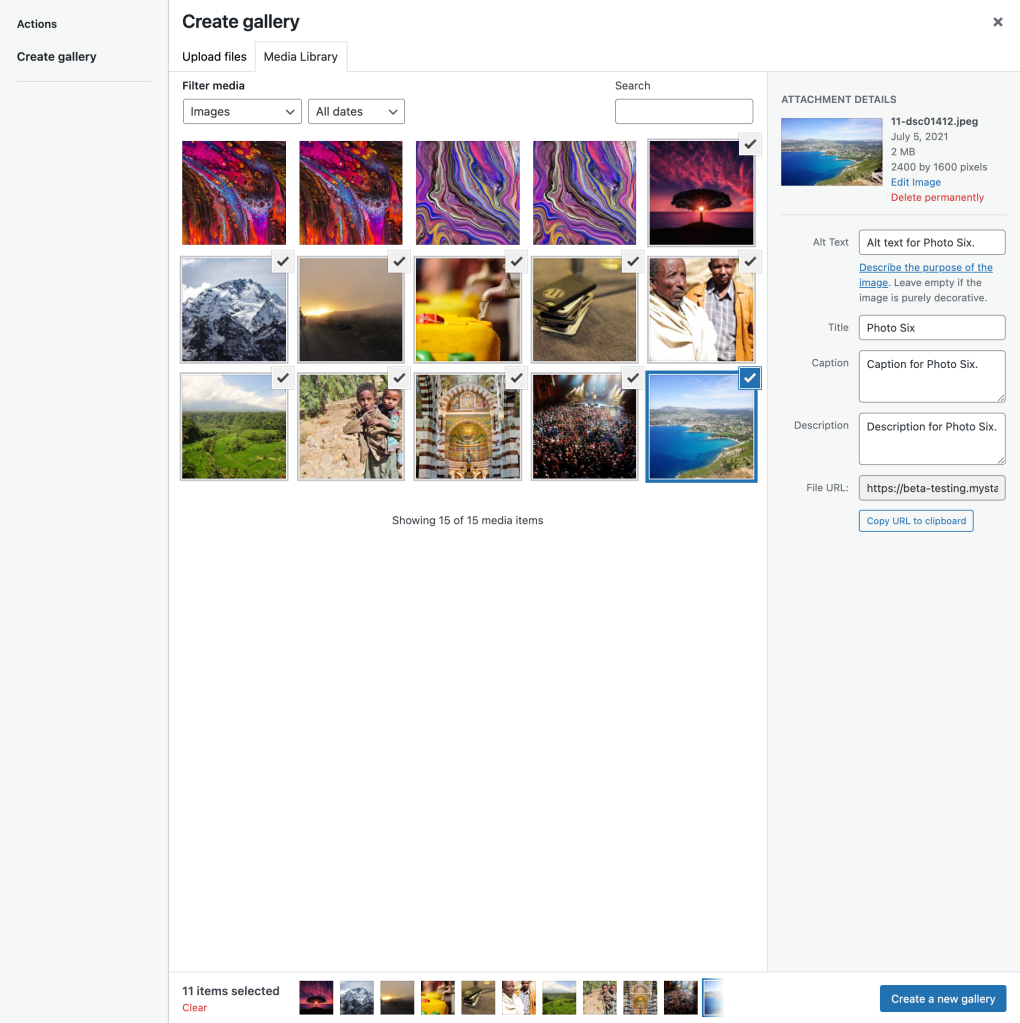
It’s possible for you to drag the images to rearrange their orders. You can also include image alt texts, titles, captions, and descriptions. Once your gallery is ready, click Insert Gallery.

It’s time to preview your slideshow right in the block editor.
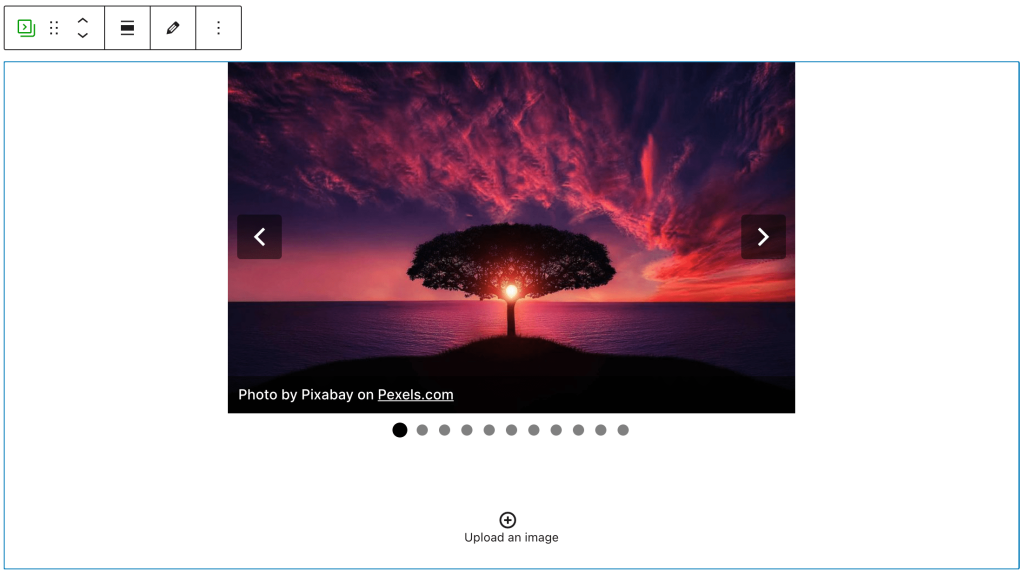
In case you want to edit the slideshow, just click on the block to open the block toolbar. It includes many options for you to customize your slideshow such as autoplay the slideshow, add your preferred effect to the slide transitions, or set up the image size.

Save or update your post/page and you’re done. Keep in mind that this slideshow will only work if you have Jetpack installed.
How to Create Slideshow in WordPress with MetaSlider
With over 700,000+ active installations, MetaSlider proves such a veteran wizard in WordPress slideshow creation niches. The plugin gives you the power to create a gorgeous and SEO-optimized slider, slideshow, carousel, or gallery within a few minutes.
More than that, the Pro version will wow you with its ability to create many advanced slides, such as animated layer slides, post feed slides, video slides, HTML overlay slides, and tons more.
MetaSlider makes sure that all the slideshows created are responsive and SEO-focuses.
To create slideshows in WordPress using MetaSlider, you need to have the plugin installed and activated on your site. After that,
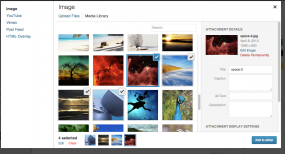
- In the MetaSlide tab in your WordPress dashboard, hit Add Slide to open the Media Manager and select “Image” from the left.
- Upload your new images or use existing images in the Media Library to use as slides.
- Press the Add To Slider button. The Media Manager popup will disappear and the slides will be loaded into your slideshow.
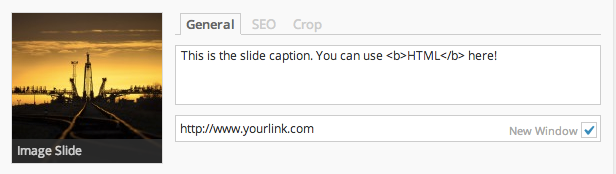
(Image Source) - Configure your slideshow.
- In the General tab, add your slide caption and URL. In case you want the link to open in the new browser window, check the “New Window” box.
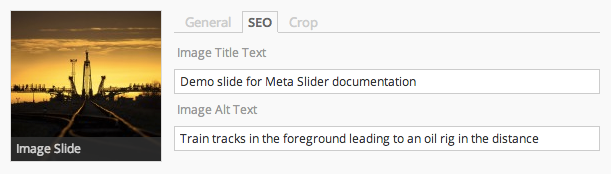
- Switch to the SEO tab to set the image title and alt text for your slide. While the Title text should provide additional information about the slide, the alt text aims to describe the image itself.
- Crop your images in the Crop tab if you find some of the slides don’t focus on the right part.
5. Hit the Add Slide button to add more pictures.
6. Click Preview to see what it will look like.
7. Click the Save button once you’re happy with your slideshow.
Get Your Slideshows Ready Now!
This post has shown you how to create WordPress slideshows hassle-freely. You can either add slideshows to WordPress using Jetpack or MetaSlider plugins.
In particular, Jetpack handles simple slideshows. If you’re already opting for Jetpack to secure your site, plus, looking for a straightforward solution on slideshow creation, Jetpack should be your ideal pick.
In the meantime, MetaSlider has brought to the table a variety of slider options, such as images, videos, HTML sliders, etc. It best suits eCommerce sites wishing to showcase numerous items or photography sites wanting to display high-pixel and SEO-optimized images.
A slideshow helps add a visual impact to your site, which significantly catches users’ eyes and retain them stay on your site longer. Get gorgeous slideshows ready on your WordPress site now!
