With ordinary WordPress site owners, there’s nothing more important than the content uploaded on websites.
Since there are so many security issues arising in recent years, WordPress users have started to find the ultimate ways to shield their precious content using passwords.
But if you set a password to protect pages on a website, you need to ensure the protection won’t conflict with the applied page builder. Opting for Divi Visual Builder proves the wise choice for this issue.
In this article, we’ll walk you through the steps to create and customize password-protected pages in Divi Builder, then follow the process to protect multiple pages.
- How to Create a Password Protect Page in Divi without Using a Plugin
- How to Customize a Password Protect Page in Divi
- How to Password Protect Multiple Pages in Divi with a Plugin
How to Create Password-Protected Pages in Divi without Using a Plugin
The Divi Visual Builder doesn’t give an option to create a password-protected page. So, you can take advantage of the WordPress default features in case there are only a couple of posts or pages needed to protect.
In your admin dashboard, open the page or post that you want to password protect. In a Publish section on the right side, search for the Visibility option with the eye icon, and hit Edit.
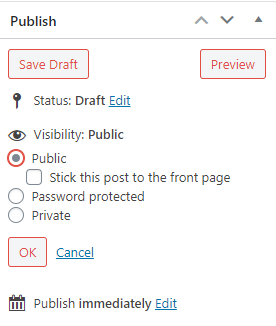
There will be three options for you to set the visibility of a post including public, private, and password-protected. Simply check on the Password Protected option if you want to lock your post or page.
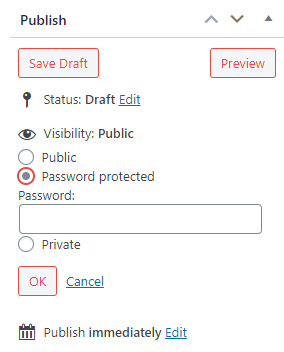
The box where you can input your password will appear right below the option. Once done, click OK. Now your post/page is covered by a password form generated by WordPress. Only users entering the correct password are able to access the content.
How to Customize Password-Protected Pages in Divi
Sometimes your password-protected pages in Divi aren’t as appealing as you expect, you need to customize them to match your website layout. It’s possible to change the padding, width, and button colors of the password form by using some simple CSS.
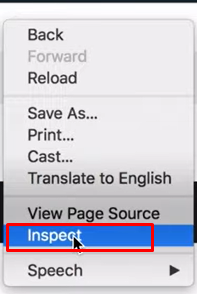
In the password-protected page, right-click on the empty space and hit Inspect.
A window of code will appear in the below picture. Look for the et_password_protected_form section in which you can input the CSS code.

Following is the formula for this step:
.et_password_protected_form {

min-height: initial;

padding: 100px;

max-width: 700px;

margin: auto;

}


.et_password_protected_form .et_submit_button {

background: #8dc63f;

color: white!important;

border: 2px solid #8dc63f;

}

.et_password_protected_form .et_submit_button:hover {

background: white;

color: #8dc63f!important;

}

@media (max-width: 479px) {

.et_password_protected_form {

padding: 40px;

}

}
Don’t forget to adjust the pixel size of the password form and the color of the submit button that you want to customize.
Thanks to WordPress and Divi Builder’s drag-and-drop feature, you’re able to keep your pages safe right in the front-end. Also, you can customize password-protected pages in Divi with ease.
However, both WordPress and Divi Builder don’t support passwords to protect multiple pages/posts. You still need a powerful plugin that enables you to password protect multiple pages on your website. It will automatically generate well-defended passwords to make sure any other password hacks couldn’t break through your content easily.
How to Password Protect Multiple Pages in Divi with a Plugin
What if the content you want to protect is not merely a single post or page, but tens or hundreds of ones instead? It would be tough and time-consuming to protect them manually one by one, not even mentioning you must come up with a unique password for each page.
Luckily, Password Protect WordPress (PPWP) Pro stays top-of-mind method to keep multiple pages safe. It offers the Group Protection extension to help you group pages and posts then secure them seamlessly.
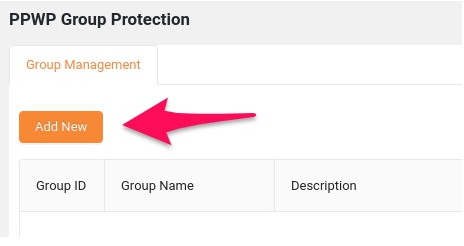
Once installing PPWP Pro and Group Protection extension successfully, open the Password Protect WordPress and switch to the Group Management section. Click on the Add New button to create a new group.
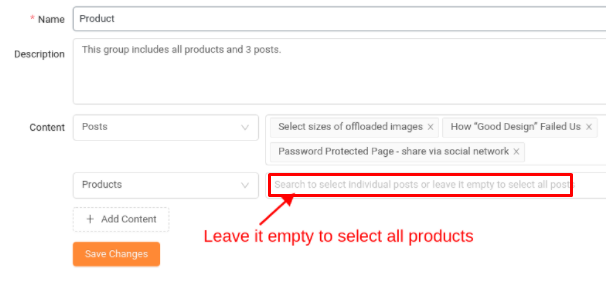
Enter a group name, and add a description if needed. In the Content section, there’s a drop-down menu for you to select which post types to put in the group. You can choose the options of posts, pages, products, or a mix of three.
Once done, hit Save Changes and the group is generated. Visit Group Protection settings and click on Manage to edit the group’s setting. Switch to the Add New Password tab to set a password for the group.
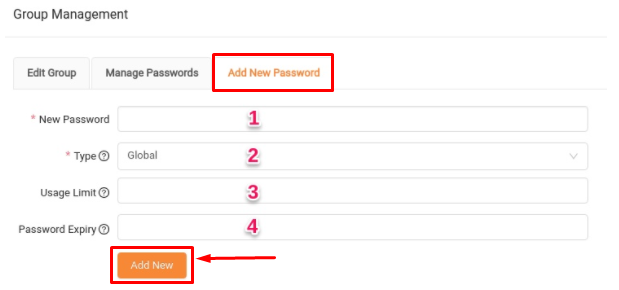
Notes:
- Enter a strong password to unlock all the involved elements.
- In the Type option, you can select user roles who can use the password to access your protected content. Global means anyone on the Internet, while Roles consists of certain users you want to restrict access to.
- Usage Limit enables you to set how many times users can enter the password to unlock the group’s items.
- Password Expiry is where you set the password expiration date. After the expiration time, no one can view your password form.
Ready to Customize Password-Protected Pages in Divi
You’ve gone through our simple instructions to customize a password protect page in Divi as well as protect multiple pages. Now you can protect pages, posts individually, in groups, or even modify the protected pages without any interruption or incompatibility when using Divi Builder.
If you stumble into any problems about how to customize password-protected pages in Divi, do not hesitate to leave your comments below.
