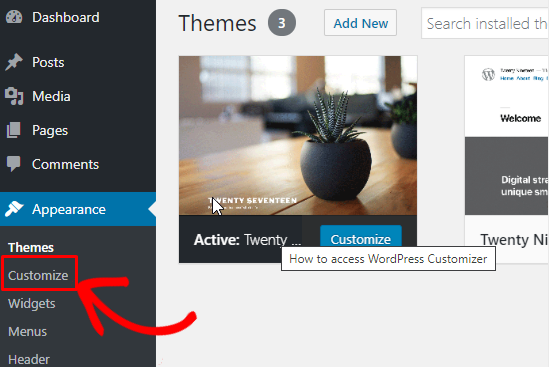
The Theme Customizer is renowned as the most approachable feature of WordPress. It enables you to dramatically change the appearance and functionality of your website from a flexible interface only.
It’s certain that when using WordPress, you may need to upgrade your Customizer to modify page elements perfectly. And one of the best ways for that is adding extra sections.
In this article, we’ll take a look at 3 reasons why you should add extra sections to WordPress Customizer, and how to extend the Customizer by adding some additional sections, controls, etc.
Why You Should Add Extra Sections to WordPress Customizer
There are 3 main reasons for upgrading WordPress Customizer by adding extra sections:
Firstly, sections refer to UI boxes for Customizer controls. Through sections, you will easily change your own website design in real-time to enhance the users’ experience.

Secondly, inserting sections into WordPress Customizer enables you to modify and tweak themes within WordPress itself. Inside the sections panel, you can take advantage of the live preview to see the effects of your changes on different screen sizes at that time.
Best of all, you can easily add sections to WordPress Customizer and customize your theme without any technical skills, even if you’re non-tech-savvy.
Extend the WordPress Customizer
To interact with Theme Customizer, you need to use the customize_register action hook. By taking this way, $wp_customize object will be loaded automatically to the function. Afterward, all customizations will be displayed through this $wp_customize object. Additionally, this object proves an instance of WP_Customize_Manager class which takes all the heavy lifting.
We’ll walk you through 4 steps to extend the WordPress Customizer right now.
In case you want to extend WordPress Customizer functionalities using plugins, check out the top 5 plugins to extend the WordPress Customizer functions here.
#1 Add Settings to WordPress Customizer
The Customizer settings allow you to specify options related to modifying your user interface. That said, settings are values that you tweak when you need to make customizations to your posts.
By default, Customizer will automatically set up your theme through WordPress’s theme_mod features.
Simply add settings by applying the $wp_customize->add_setting() method to the WordPress Customizer as below:
$wp_customize->add_setting( 'header_textcolor' , array(

'default'   => '#000000',

'transport' => 'refresh',

) );
In terms of “refresh” for the concept of “transport”, it expresses how the Theme Customizer transfers data to the theme to display your changes. That means the structure illustrating the theme will literally refresh before changing.
Let’s scroll down to the next part to know how to insert additional sections to Customizer.
#2 Add Extra Sections to WordPress Customizer
As stated above, sections are where contain your Customizer controls. That means you can hold various controls in each section. To define a section, we need to use the $wp_customize->add_section() method.
Following is the formula for this step:
$wp_customize->add_section( 'mytheme_new_section_name' , array(

'title'      => __( 'Visible Section Name', 'mytheme' ),

'priority'   => 30,

) );
#3 Define a Control to Change the Value of the Setting Field
In WordPress, control is the principal Customizer object for creating the user interface. Control is linked to a single setting and a single section. Each setting is managed by a control object. As a result, adding a control is a must whenever you make a change in Customizer.
You have to embed the $wp_customize->add_control() method to the setting area.
$wp_customize->add_control( new WP_Customize_Color_Control( $wp_customize, 'link_color', array(

'label'      => __( 'Header Color', 'mytheme' ),

'section'    => 'your_section_id',

'settings'   => 'your_setting_id',

) ) );
After figuring 3 factors above, you need to follow the below instructions to generate the CSS.
#4 Set up CSS in the Customizer
If you want to create your desired design and look, you need to add custom CSS to your WordPress site. CSS is used to specify the color of a heading, or what font your content should be written in.
We’ll show you an example of colorizing the header. Simply install your CSS code to the Customizer panel as follows:
function mytheme_customize_css()

{

?>

<style type="text/css">

h1 { color: <?php echo get_theme_mod('header_color', '#000000'); ?>; }

</style>

<?php

}

add_action( 'wp_head', 'mytheme_customize_css');

Finally, you will get the result like that:

<style type="text/css">

.h1 {color:#ffffff;}

</style>
Once you’ve done those steps, your Theme Customizer will automatically function according to your new settings.
Maximize WordPress Customizer with Ease
Adding extra sections to WordPress Customizer proves the official way to put options together for your theme. To make your site more eye-catching, you need to customize a theme’s colors, fonts, and text within Customizer.
Do not hesitate to leave the comment below if you have any questions or new methods on how to add extra sections to WordPress Customizer. We highly appreciate your sharings and try to respond as soon as possible.
