If you once have been interrupted when filling a long form, you’ll know how frustrating it is to start over again. Things happen. There are many unexpected situations that prevent you from completing a form. It could be Internet disconnection, an urgent meeting, electricity disconnection, and so on.
It’s the moment you’ll realize that Save & Continue feature is essential, which saves you a lot of time filling the form from scratch.
In this article, let’s dive into how to utilize the function within WordPress in general and with Gravity Forms in particular.
Let’s get started!
- What’s Save and Continue Feature and Its Benefits
- How to Set Save & Continue Feature Up
- Bonus: PPWP Pro and Gravity Forms Integration
What’s Save and Continue Feature and Its Benefits
The name says it all. This function allows you to save the current filling and continue doing it later. It comes in handy when you expect users to fill out long forms such as surveys.
Save and Continue feature brings several advantages, particularly:
- Raising the percentage of customers completing long forms like surveys, questionnaires, application forms, etc.
- In case your customers take a rain-check deal to any interruptions, the filling information process is saved easily. They can continue with the form later instead of starting over.
How to Set Save & Continue Feature Up
In this section, we’ll walk you through steps to set up Save & Continue feature with Gravity Forms.
Let’s get started!
Step 1: On the left side of your WordPress admin, click on Forms.
Accordingly, a list of available forms will be displayed.

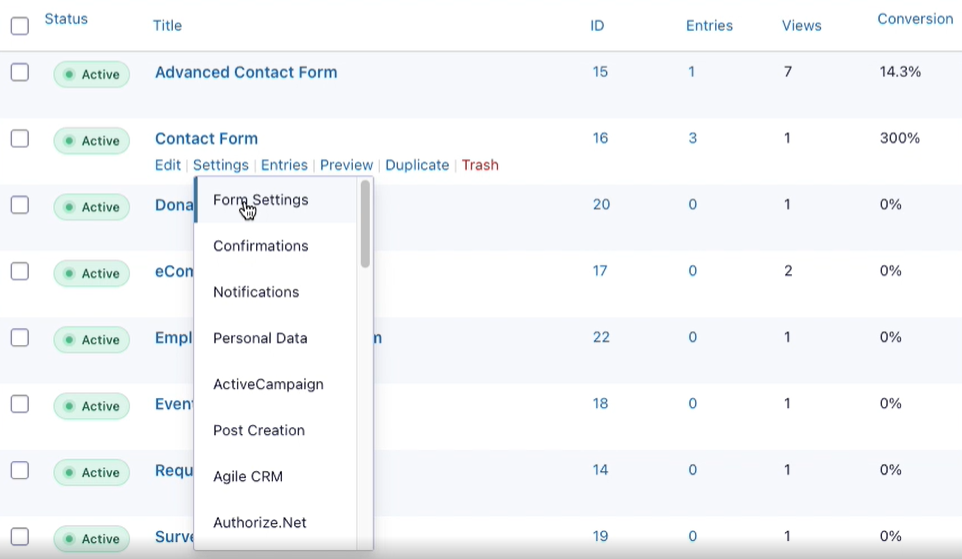
Step 2: Next, click on Settings at the form you want to enable Save & Continue function for, and select Form Settings.
Step 3: On the form settings page, choose Enable Save and Continue.
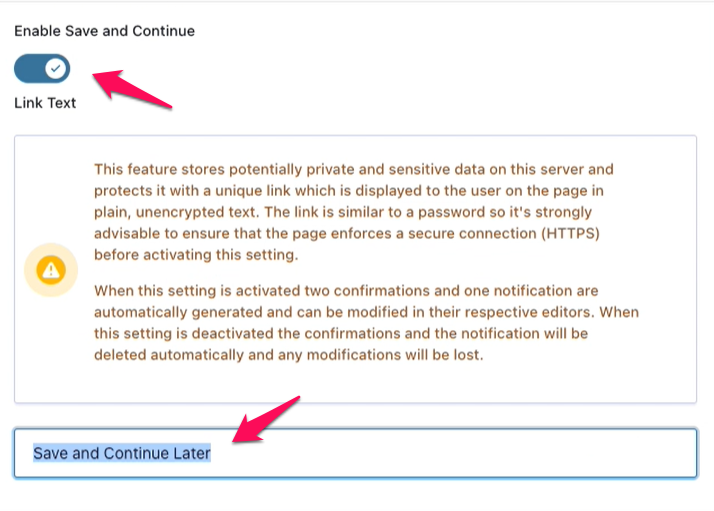
Feel free to customize the Link Text to your liking.
Step 4: Click Save Settings once you’re happy with your setup.
Upon activation, your users will see a Save and Continue link next to the submit button.
When they want to leave for a while and come back to the form at a convenient time, simply click the link.
A URL will appear. The link will be sent to their provided emails.
That’s it!
Bonus: PPWP Pro and Gravity Forms Integration
If you’re seeking a method to protect your content while willing to collect users’ information via Gravity Form, this section is for you.
We’ll introduce you to a powerful password-protect plugin called Password Protect WordPress (PPWP) Pro. This plugin integrates well with Gravity Forms to assist you to send passwords or Quick Access Links to users to unlock protected content after form submissions.
These features are effective when you sell content via Gravity Forms or aim to get more data for marketing campaigns.
Now, let’s discover how to set it up.
First and foremost, you’ll need PPWP Pro and its Forms Integration extension installed on your site.
After activated, you’ll see a new section called PPWP Pro added to your form settings.
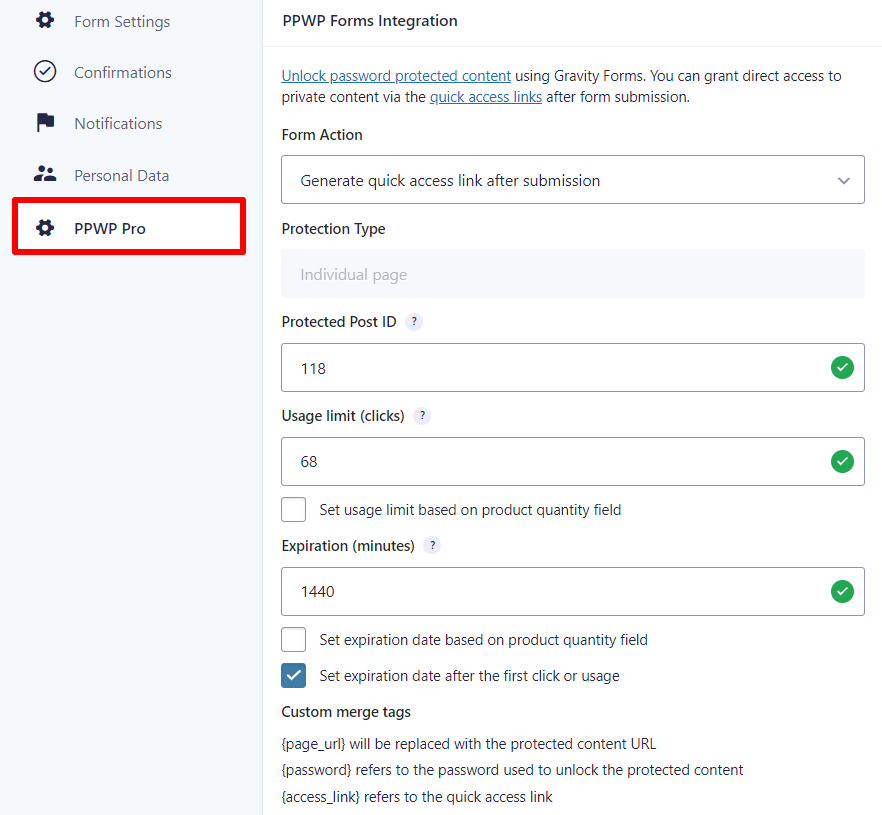
Once clicking on PPWP Pro, you’ll see a new screen where you can:
- Select the private content to be sent to users after form submission.
- Restrict passwords by clicks or time.
- Customize the message sent to your users upon form submissions.
Don’t forget to save all your changes.
As a result, your users will receive auto-generated passwords to access protected content via a Confirmation message or Notification email.
Make the Most of Gravity Forms today!
We’ve walked you through the benefits of using the Save and Continue function of Gravity Forms. It saves your users a lot of time filling out the form from the very beginning.
Simply enable the option under the Gravity Forms settings page to set it up. Your users can get unique links that allow them to reach the point where they stopped.
In this article, we’ve also brought the PPWP Pro plugin to your attention. This plugin perfectly integrates with Gravity Forms facilitating selling protected content. Once a user submits the form, a random password/quick access link will automatically generate.
Have you had Gravity Forms installed on your site yet?
How’s your experience with the plugin so far?
Share your experience with us in the comment section below!
