Securing premium content against unauthorized access is like locking your house from thieves. There are a lot of locks for you to choose from. However, you would only go for the one that is the most suitable for your house style.
The same go for securing your content and making the entry gate fancy and consistent with your website design.
WordPress’s default password protection feature is probably the first thing that crosses your mind when intending to protect a page. It’s no doubt that this built-in function can fit your basic needs, e.g. protecting a single page with a single password. However, the customization comes with a lot of limitations that only tech-savvy can handle well.
If you want to bring the protection and customization to a higher level, there are a ton of plugins available to help you achieve all you need. One of them that must be mentioned is Password Protect WordPress (PPWP) plugin.
In this article, we’ll dive into how to set up and customize password-protected pages using WordPress built-in functions and the PPWP plugin.
Let’s get started!
Customize WordPress Default Password Forms
WordPress comes with a built-in content visibility function for you to control access to your protected content when editing.
In this section, we’ll guide you on how to protect a page and customize the password form without using any plugins.
How to Password Protect Pages
Under the Pages or Posts section in your admin dashboard, open the page that you want to protect.
At the top right corner of your Edit page screen, you’ll see the Visibility option under the Publish section.
Here, click “Edit” then select “Password protected”.
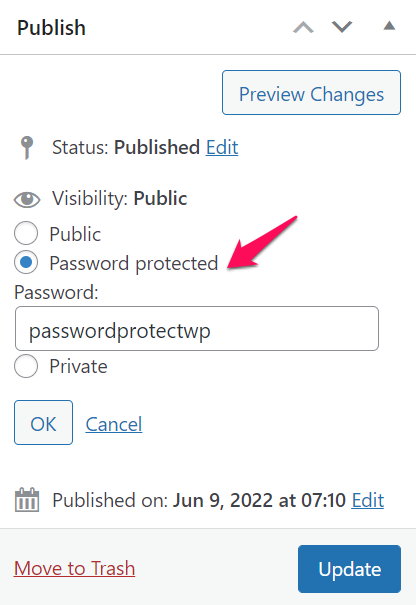
Enter your desired password in the “Password:” box, then press OK.
Your content visibility will be changed to Password Protected as per the attached screenshot.
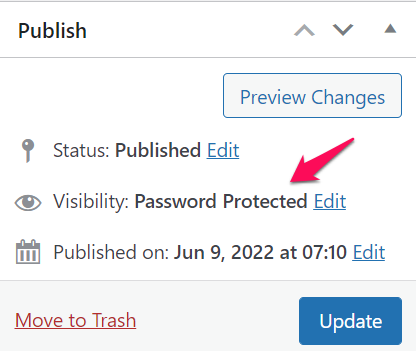
Don’t forget to update your content once you’re done editing so that all your changes will be saved.
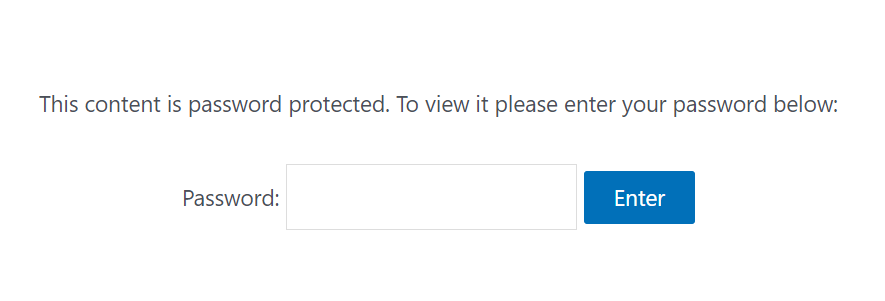
How to Customize WordPress Password Protect Pages
By default, your password form would look like this:
To change the defaul text, simply add the following codes to your (child) theme’s functions.php file or Code Snippets plugin.
function my_custom_password_form() {
    global $post;
    $label = 'pwbox-' . ( empty( $post->ID ) ? rand() : $post->ID );
    $output = '
    <div class="boldgrid-section">
        <div class="container">
            <form action="' . esc_url( site_url( 'wp-login.php?action=postpass', 'login_post' ) ) . '" class="form-inline post-password-form" method="post">
                <p>' . __( 'This content is password protected. This is a custom message. To view it please enter your password below:' ) . '</p>
                <label for="' . $label . '">' . __( 'Password:' ) . ' <input name="post_password" id="' . $label . '" type="password" size="20" class="form-control" /></label><button type="submit" name="Submit" class="button-primary">' . esc_attr_x( 'Enter', 'post password form' ) . '</button>
            </form>
        </div>

    </div>';
return $output;
}
add_filter('the_password_form', 'my_custom_password_form', 99);
Style password input fields
<input name="post_password" id="' . $label . '" type="password" style="background: #ffffff; border:1px solid #999; color:#333333; padding:10px;" size="20" />
Stype the submit button
.button {
    background-color: #000;
    color:#fff;
    border: 0;
    font-family: Impact, Arial, sans-serif;
    margin: 0;
    height: 33px;
    padding: 0px 6px 6px 6px;
    font-size: 15px;
    cursor: pointer;
}
Customize Password Forms Using PPWP Plugins
While WordPress can provide you with basic password protection function, it’s hard to scale. To be more specific, that built-in function only allows you to:
- Protect a page with a single password.
- Even though you can protect different pages with the same password, you still have to unlock them one by one.
- You can’t protect the entire site or content sections.
- All customization tasks must be done via coding, which isn’t a good call for WordPress beginners.
It’s when PPWP plugins come in handy. The plugins give you much more advanced features, including but not limited to:
- Protect all types of content, e.g. entire site, single pages, and content sections with multiple passwords.
- Unlock multiple protected content at once.
- Integrate well with WordPress Customizer, bringing many customization options to make your password form attractive.
In the next section, we’ll guide you through steps to protect single pages, content sections, and the entire site with the PPWP plugin.
How to Protect WordPress Content with PPWP Plugins
Password Protect WordPress plugins give you a comprehensive solution to protect any types of content. You don’t need to install different plugins to serve different purposes.
Now, let’s jump into detailed guides on protecting different types of content using PPWP plugins.
Protect WordPress Single Pages
With PPWP Lite (Free) version, you can protect your single pages with multiple passwords.
Simply navigate to the Pages section, open the Edit page screen. Accordingly, you’ll see the “Password Protect WordPress” section, usually located on the right sidebar.
Add your passwords to the “Passwords” field, then press “Submit”.
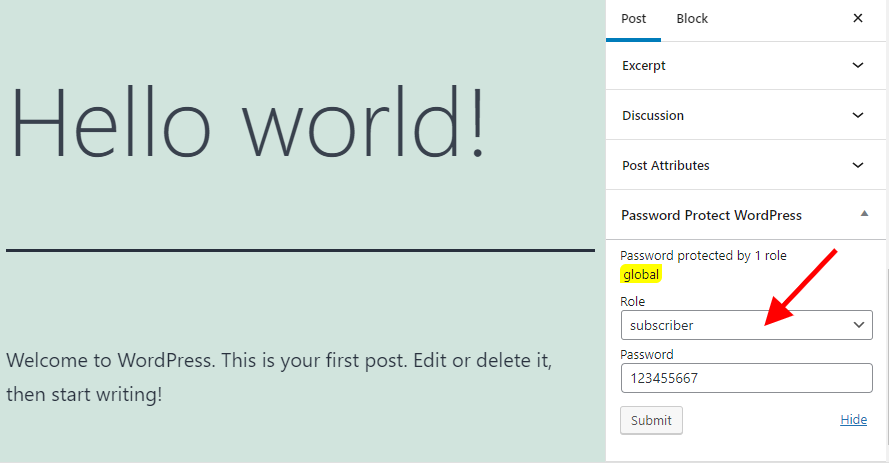
Your page is now protected.
You can consider getting the PPWP Pro version to manage passwords at the same place as well as experiencing much more advanced features such as:
- Restrict passwords based on time or usage.
- Protect parent-child pages.
Secure Content Sections
PPWP plugins provide you with Section Protection feature allowing you to secure any content without hassle.
Once activating the PPWP Lite (Free) plugin, navigate to Password Protect WordPress > Partial Protection > Section Protection under your admin dashboard.
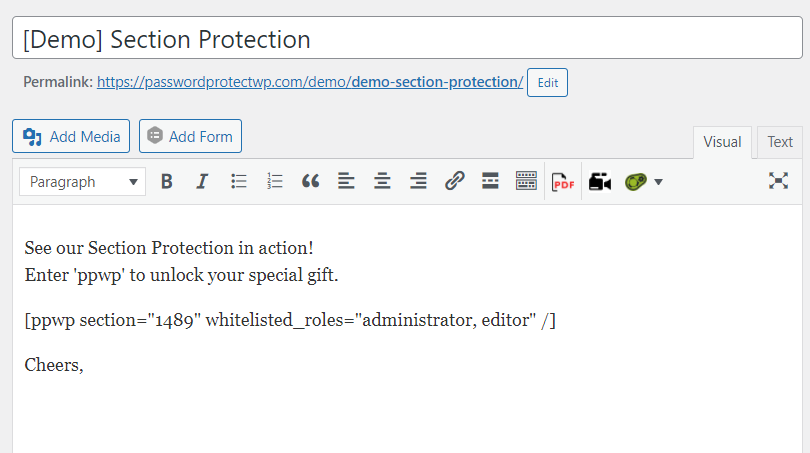
Create a new section template, add the content you want to protect there, and create passwords to unlock the protected section.
Once done, simply embed your created section into any pages, posts, or custom post types on your site.
Safeguard Entire Site just with a Click
What if you want to hide your whole site from public access?
It’s possible with the PPWP Lite plugin too.
All you need to do is turn on the “Password Protect Entire Site” option under Password Protect WordPress > Sitewide Protection.
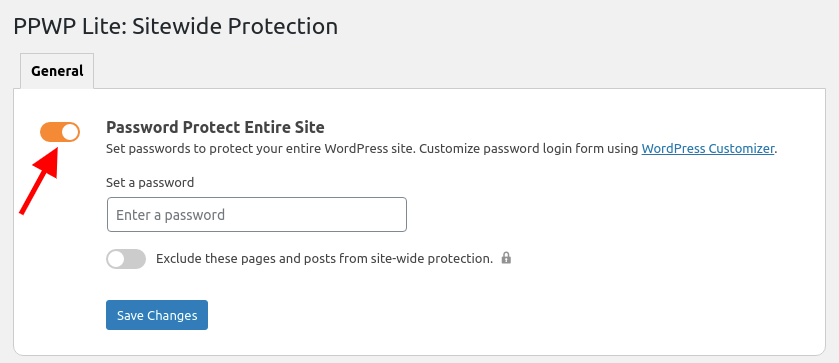
Please note that with the Lite version, you can create one password only.
To create multiple passwords for your protected site, install its premium version.
How to Customize PPWP Password Forms
Having your own styled password forms is never easier with the PPWP plugin. The plugin integrates well with WordPress Customizer, providing you with a user-friendly UI to customize your WordPress password-protected pages. Actually, you don’t need to touch a line of code.
Please follow our step-by-step guide below to customize your password forms.
Step 1: Navigate to Appearance > Customize under your admin dashboard.
You’ll see 3 options listed at the bottom of the displayed page as per the attached screenshot.
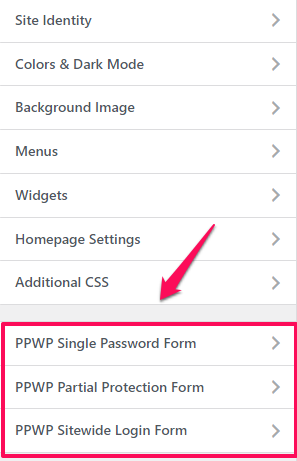
Select one depending on the password form you’d like to customize. In this example, let’s go for the “PPWP Single Password Form” option.
Step 2: Click on the “Password Forms” section to customize your password forms.
This option enables you to adjust the below information:
- Background color
- Password form headline
- Description above form
- Description below form
- Password labels
- Password reveal button
Don’t forget to press “Publish” when you’re done.
Step 3: Back to PPWP Singe Password Form then select the “Error Messages” option.
This option allows you to display your own messages when users:
- Enter wrong passwords
- Fail reCAPTCHA verification
Feel free to adjust font size, text color, and background color to your liking.
Again, don’t forget to press the “Publish” button for all your settings to be saved.
Your changes will be applied to all single password forms on your site. It works seamlessly with all editors and page builders such as Divi, and BeaverBuilder.
In case you’re using the Elementor page builder, you can also style your partial password forms directly via Elementor edit page.
Customize WordPress Protected Pages Like a Pro!
We’ve just walked you through a detailed guide on protecting content and customizing password forms using WordPress’s default function and the PPWP Lite plugin.
Apparently, PPWP Lite proves itself to be more advanced features, which provide you with:
- an all-in-one solution to secure single pages, content sections, and the entire site.
- a user-friendly UI to customize your password forms.
And the most important thing, the plugin is totally free.
Only when you need more advanced password protection features, do you need to upgrade it to the premium version.
Do PPWP plugins interest you?
How do you customize your password protect pages?
Let us know in the comment section below!
