Almost all website owners want to provide as many as contact channels for users to reach out to them easier. Phone or chat support proves themselves convenient in case of real-time assistance. In the meantime, emails or contact forms are preferred when users don’t have much time to join online conversations, or simply they find it’s hard to communicate directly.
If you take a look at our website, you’ll see we’re offering 3 contact methods, i.e. chat support, email support, and contact forms. From our experience, contact forms is the best for troubleshooting purposes since we can require our users to provide us with enough information to address issues.
Is it difficult for us to create that contact form?
The answer is “No”. It’s very straightforward.
When searching for “contact form” on the WordPress directory, you’ll be presented with thousands of results. Most of them are totally free and easy to use.
You can also notice that Contact Form 7 is ranked in the 1st position, which is trusted by more than 5 million WordPress users.
In this article, let’s dive into Contact Form 7!
- How to Install Contact Form 7 Plugin
- How to Create a Form Using Contact Form 7
- How to Configure Contact Form 7 Mail Settings
How to Install Contact Form 7 Plugin
Contact Form 7 plugin is totally free. So, you can absolutely download and install it directly via WordPress directory.
To do that, simply navigate to “Plugins” > “Add New” under your admin dashboard.
In the search box, fill in “contact form”. The Contact Form 7 plugin is listed in the first place.
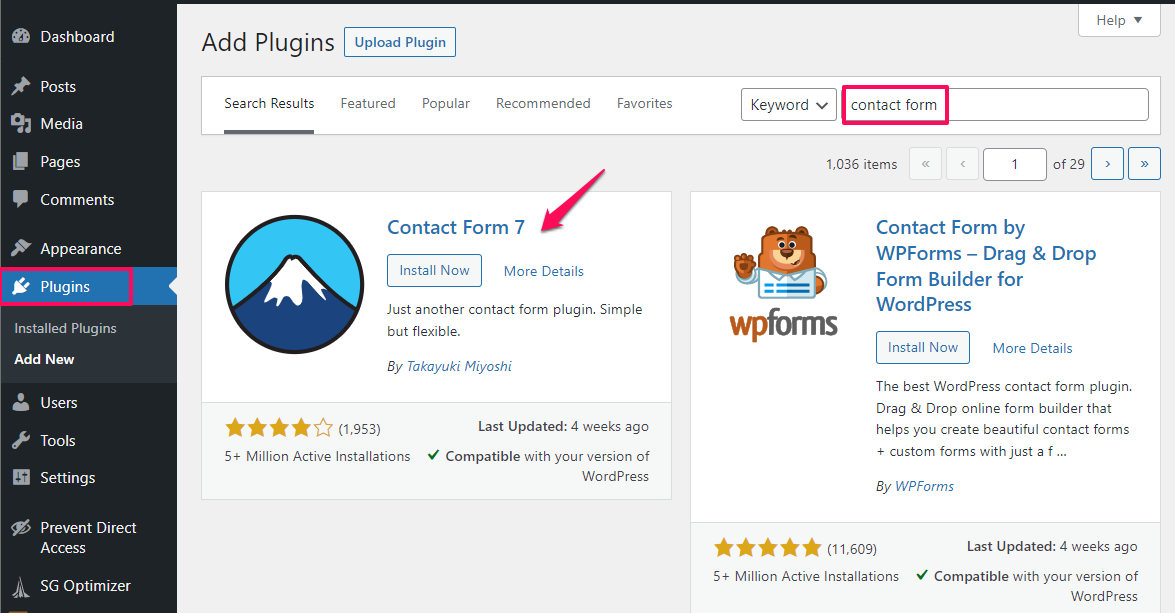
Press “Install Now”, then “Activate” to add the plugin to your site and you’re done.
How to Create a Form Using Contact Form 7
Upon activation, a new “Contact” section will be added to your admin dashboard panel.
Click on “Contact”, and you’ll see a default form named “Contact form 1”.
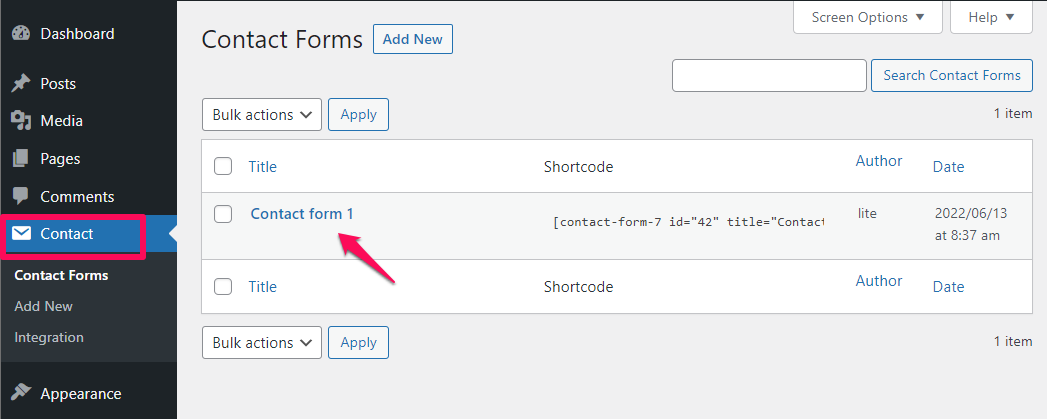
Click Edit button under the form title to adjust your form template, mail, and message settings.
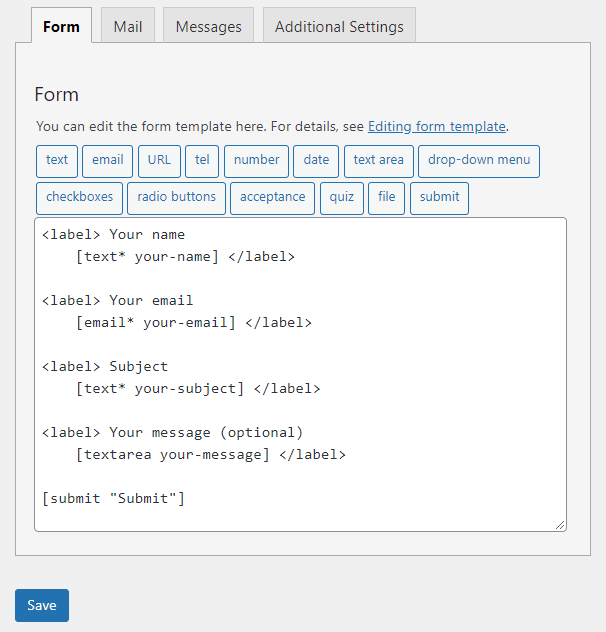
Contact Form 7 plugin comes with a lot of custom tags allowing you to customize the form to your liking.
In this example, we’d like to require users to provide their telephone numbers.
Here are our setup steps:
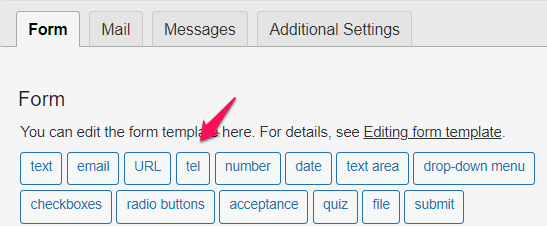
Step 1: Click on tel tag located above your form template
Step 2: Customize the input field
- Tick the “Required field” checkbox if you’d like to
- Give your field a name
- Determine the default value
- Add ID attribute and Class attribute if need be
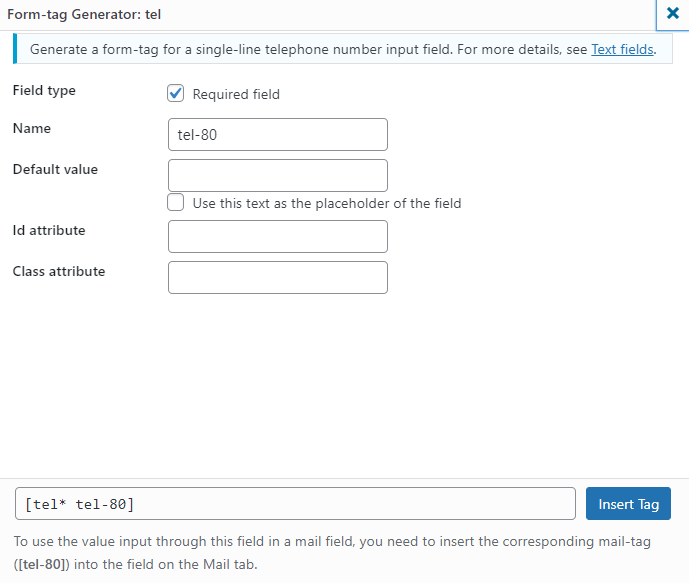
Once you’re happy with your settings, press “Insert Tag”.
Step 3: Customize field label
Simply wrap your tags within <label> code as follows:
<label> Your telephone number
[tel* tel-80] </label>
That’s all!
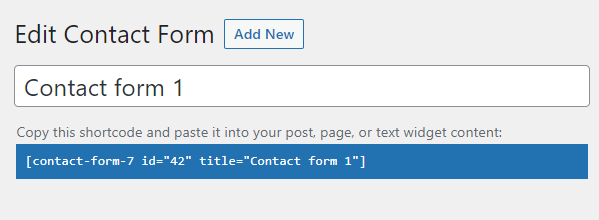
Now all you need to do is copy the contact form shortcode and embed it to the place you want to display the form on your site.
Your contact form will look like this:
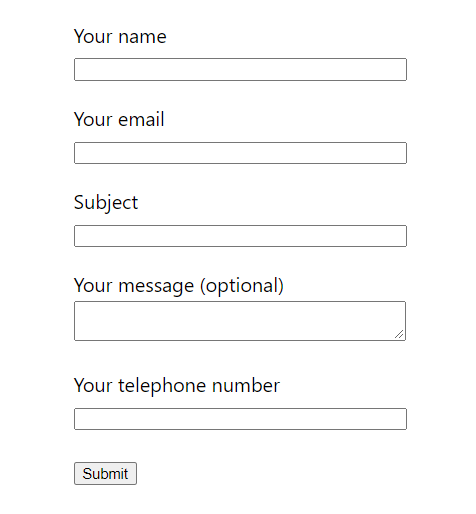
Feel free to customize the looks of your form accordingly.
It’s time to jump into the next part: how to configure Contact Form 7 mail settings.
How to Configure Contact Form 7 Mail Settings
By default, your users just receive a confirmation message after form submission. All emails are set to be sent to the site admin’s email addresses.
If you want to send users emails after form submissions, you need to adjust the settings in the Mail tab under your form settings.
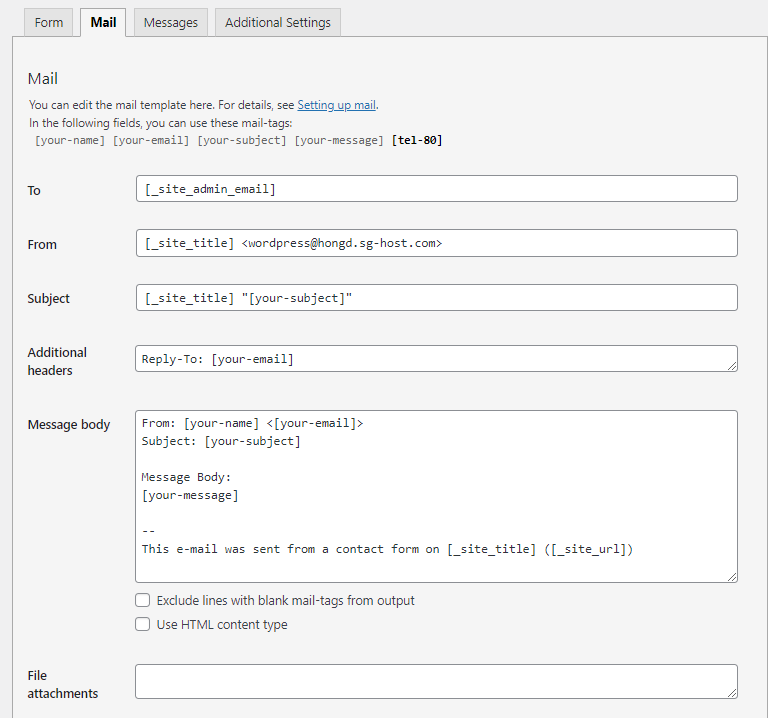
We’ll walk you through the usage of the listed fields so that you can understand what they’re used for.
#1. To field: To which your confirmation emails will be sent.
We usually use the [your-email] mail tag here. Accordingly, confirmation emails will be sent to users’ provided emails.
#2 From field: Set sender email address here.
Please note that the email should be associated with your website domain. For example, our website is https://passwordprotectwp.com/, then the sender email should be something like [email protected].
Otherwise, you’ll see the configuration error as follows:

If you haven’t had an email with your domain name, please create one. Or else, your users will find no way to reply and communicate with you.
#3. Subject field: Define your email subject here.
By default, Contact Form 7 gets your users’ entered subjects. So make sure to define your own one here.
#4. Additional headers field: Add Cc or Bcc recipients of your email here.

#5. Message body field: Customize your message body here.
Feel free to include what you want to tell your users, e.g. your company info, guidelines, etc.
#6. File attachment field: Attach files that you want to send your submitted users here.
Bonus: A Great Application of Contact Form 7
Actually, you can apply Contact Form 7 in many different use cases.
One of them is sending users passwords or Quick Access Links (QALs) to access your protected content after form submissions.
It comes in handy when you want to sell access to your content, or give your users a gift to encourage them to submit forms.
First things first, you need PPWP Pro and its PPWP Forms Integration activated on your site.
Accordingly, you’ll see a new PPWP Pro section added to your contact form settings page as follows.
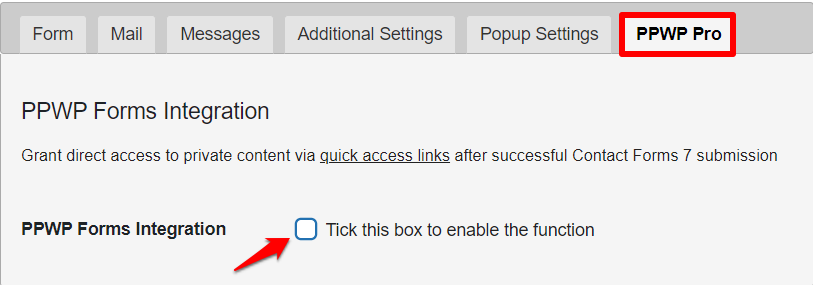
Configure all settings such as protected pages, password restrictions, and confirmation messages here.
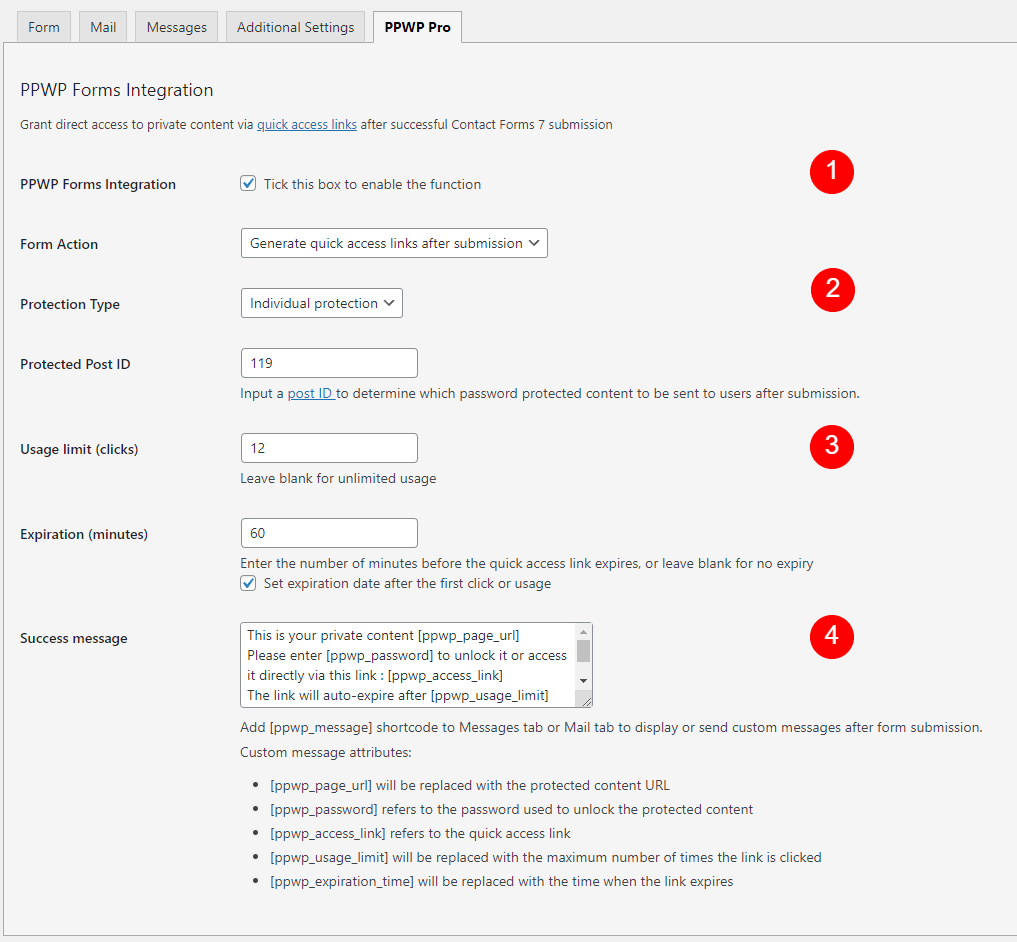
Once a user submits the form, he’ll receive a confirmation email containing a unique password/QAL to open your protected content.
These passwords or links will expire, depending on preset time or clicks.
Manage Contact Form 7 Like a Pro!
In this article, we’ve walked you through how to configure Contact Form 7 mail settings for Contact Form 7. By default, your users won’t receive any emails after submitting forms. Thus, don’t forget to adjust the settings accordingly to benefit from confirmation emails.
We’ve also introduced you to a powerful plugin that integrates well with the Contact Form 7 plugin – PPWP Pro. With this tool, you can protect your content with a click and automatically send passwords to access the protected content right after Contact Form 7 submissions.
All settings are pretty straightforward.
Are you ready to manage Contact Form 7 like a pro?
Is there anything else that we can provide you with?
Let us know in the comment section below!
