When offering private sales or a paid privilege on your WordPress site, you always want only authorized users to access the content. You can either create a membership website or block IP addresses. However, assigning passwords to these private pages turns out to be a better solution. Users no longer have to sign up or log in.
WordPress provides a default password protection feature allowing you to secure individual pages and posts with a password. In the case of locking WordPress pages using multiple passwords, this built-in feature becomes useless. You need to seek help from a third-party plugin.
When protecting content with many passwords and sharing them with different users, you can track password usages. You’re able to restrict access to specific users easily too.
In this article, we will dig deep into the main reasons for setting more than one password for WordPress pages and posts. Then, we will walk you through 4 ways to secure your content with many passwords.
Why Should You Protect Pages with Multiple Passwords?
#1 Personalize passwords
The best practices come to online classes or training websites where you have a lot of students. Each student should receive a different password to access protected learning materials.
When the course ends, only students upgrading their accounts or paying for the next courses can keep using the passwords. Others won’t be able to access the learning documents since their passwords expire.
#2 Reduce password sharing
If you protect premium WooCommerce product pages with a password, customers can share that password with their relatives and friends, along with the product page URL. These unwelcome consumers can get your products without registering.
The premium product pages should be locked with different passwords. You can expire these passwords after a given time or a number of usages. As a result, unauthorized buyers will have no chance to use them and purchase private products.
#3 Block malicious users
Using various passwords lets you track the usage of each of them and check whether there is any abuse of your password. If a password is entered a lot of times from numerous IP addresses, you can deactivate without affecting other users.
How to Protect WordPress Content with Many Passwords
We’ve discussed some purposes of setting several passwords to protect a WordPress page and post. It’s time to look into the next section, how to assign multiple passwords to WordPress content.
Only a few password protection plugins support securing a page with many passwords. Password Protect WordPress free plugin is by far the best option. You can use multiple passwords to protect individual posts as well as groups of content. Here are 4 ways to use PPWP and start setting various passwords to your content.
#1 Password protect individual pages
You are able to create passwords and protect your content right in the post’s edit screen or under the plugin’s popup.
Create passwords in edit screens
Follow these 6 simple steps to quickly generate passwords and make your WordPress content private.
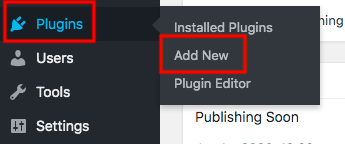
- Click Add New under the Plugins section in your WordPress admin dashboard
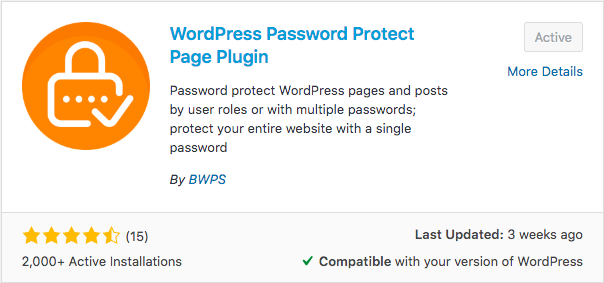
- Type “password protect wordpress” in the keyword box
- Install and activate the plugin
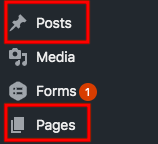
- Head to Pages or Posts in the WordPress navigation menu and choose your desired post
- Look for the Password Protect WordPress option at the top right corner of the post’s edit screen
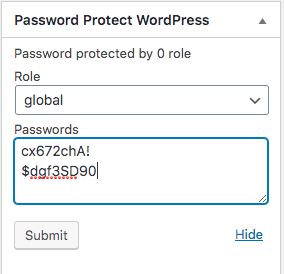
- Enter your passwords
The plugin allows you to set as many passwords as you would love to. Each password will be placed on a separate line. On top of that, it’s possible for you to apply roles to passwords.
Global passwords are assigned to all user roles. While specific roles can unlock the covered/protected/hidden pages or posts by entering the user role passwords, others, even knowing the correct passwords, have no chance of viewing it.
Generate numerous passwords in the plugin’s popup
To simplify the password protection process, PPWP provides you with popups to manage all your passwords in one place. This feature is available in the Pro version only.
You need to download the PPWP Pro zip file to upgrade the lite version, then:
- Go to Add New under Plugins in your WordPress dashboard

- Click the Upload Plugin button at the top of Add Plugins page
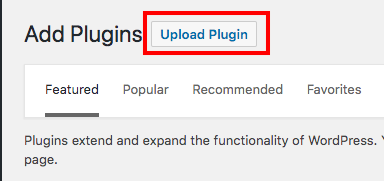
- Select the zip file you’ve downloaded
- Visit the Pages or Posts section

- Find the page you intend to protect with multiple passwords and click the link “Password protect” next to the Date column

- Enable the option “Password protect this page”
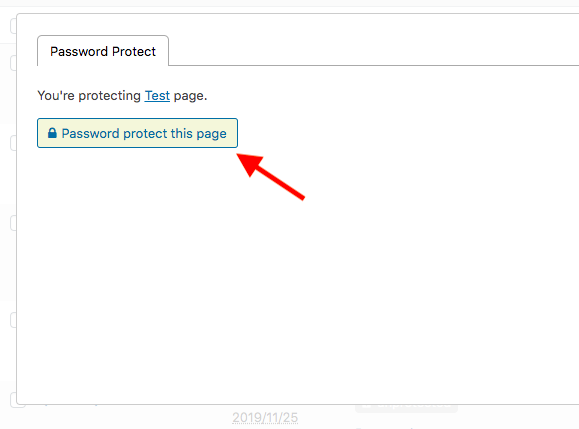
You can manage your password seamlessly in there. The “Auto-generate new password” button permits you to create new passwords with only one click. This random global password will never expire. Edit the password status, usage limit, and password expiry by clicking on the Edit icon in the Action column.
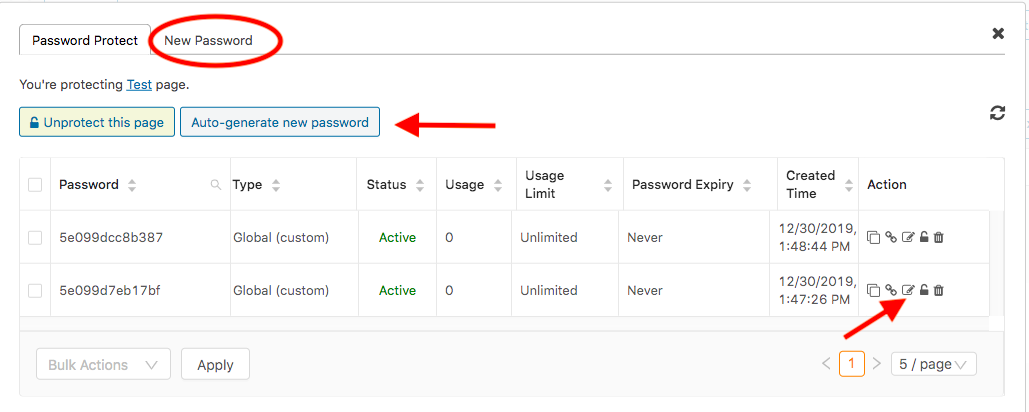
The Usage Limit prevents users from entering that password after a specific number of usages. The Password Expiry, meanwhile, will invalidate the password after a period of time.
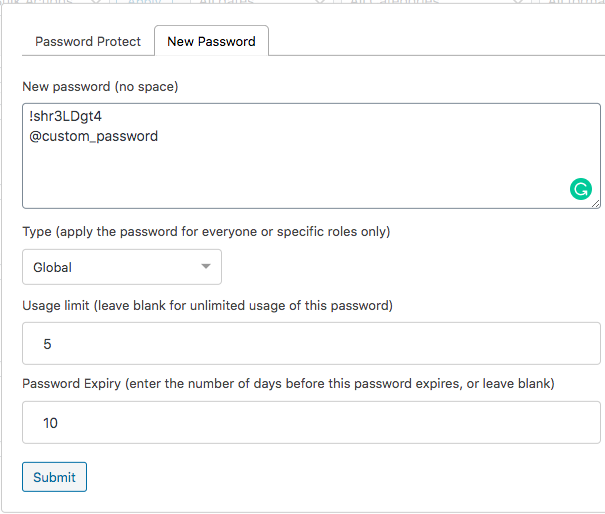
In case you’d like to customize your own passwords, move to the New Password tab. Enter your passwords in the New password (no space) box. Each password must be on a separate line. Set roles for passwords in the Type section if you don’t want all kinds of users to use these passwords and have access to your content.
#2 Use master passwords
PPWP offers another way to set numerous passwords to your WordPress content, via master passwords. The master passwords permit users to unlock all content protected by PPWP Lite at once.
This method applies to posts already protected by the PPWP Lite version only. It doesn’t help secure all your content. The section #1 Password protect individual pages has covered how to protect pages and posts with multiple passwords.
To start generating multiple master passwords, you need to:
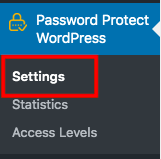
- Visit the plugin Settings page
- Go to the Master Passwords tab
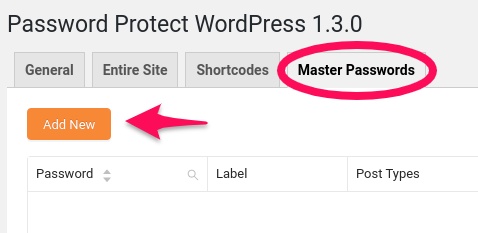
- Click Add New and enter your passwords. Similar to other features, master passwords also have usage limits and password expiry.
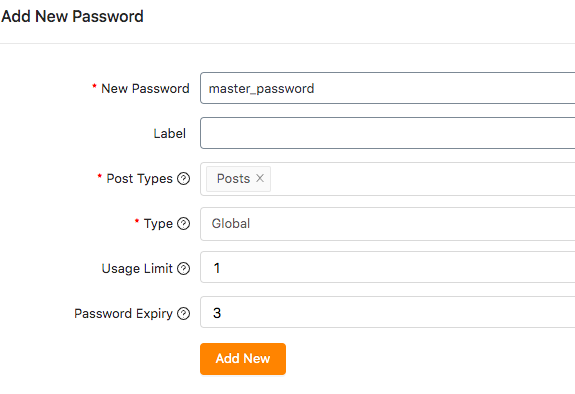
- Hit Add New button when you finish the settings
#3 Password protect groups
While the first method forces you to secure a single page at a time, you can gather related content and assign them many passwords together using the Group Protection extension.
Step 1: Create a group
- Download Group Protection extension, then upload and activate it in your WordPress website
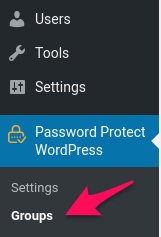
- Head to Groups under Password Protect WordPress section in your WordPress sidebar
- Click on Add New button to create a new group
- Select a post type
- Search particular posts by their titles or content
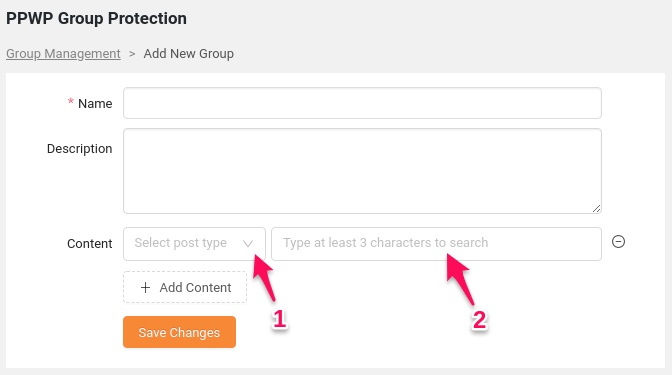
- Click the Save Changes button to save the group information
Step 2: Secure the group with multiple passwords
- Click Manage link next to the group that you want to password protect. Then, you will see a Group Management popup

- Switch to Add New Password tab and generate a password
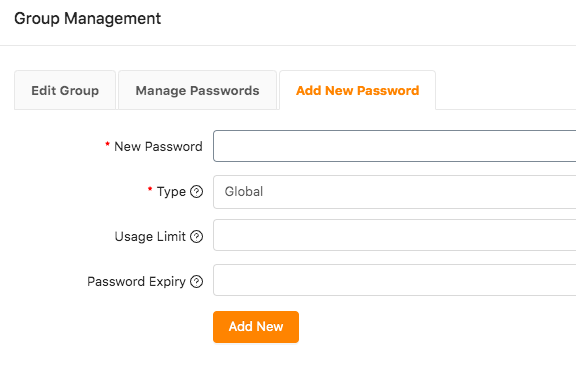
- Enter your passwords
- Set the password types as well as usage limit and password expiry
Create new passwords for your group by continuously clicking on the Add New button. When users enter one of these passwords to unlock a page or post, the rest of the group will become accessible too.
#4 Create access levels using multiple passwords
Organize your categories by levels
Not all posts, as well as categories, are equal in value. Some can be offered for free whereas the others ask for users’ payment or subscriptions. Those having access to the higher-level content are definitely able to view all posts in lower-levels.
PPWP Pro and its Password Access Levels extension allow you to set levels for WordPress categories and protect each level with multiple passwords.
To create access levels for categories and add passwords, you have to download and install Password Access Levels extension, along with PPWP Pro plugin.
To assign access levels to categories, firstly, create a base including all categories that you want to restrict access to. These 5 steps show you how to do that:
- Head to the Access Levels section under Password Protect WordPress menu and open the popup screen
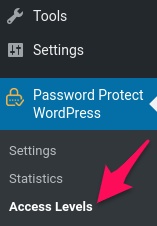
- Click “Add New”
- Fill in the form with the base name and its description
- Choose base categories from the dropdown list
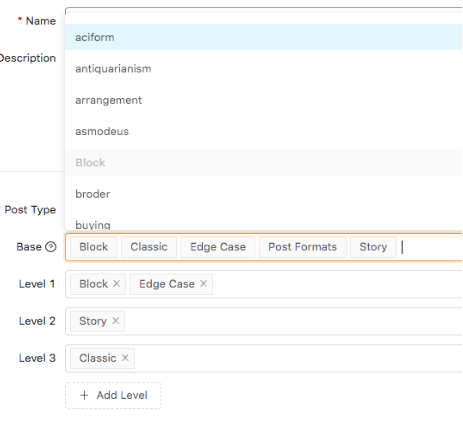
- Set a level for each category. We can see from the example that the Classic category will have a higher level than Story or Block categories.
You should notice that each category must belong to one level only. Additionally, if you don’t set levels to any category in the base list, it will be assigned the Level 0 – the lowest level – by default.
It’s possible for you to choose WooCommerce product categories or any other custom post type categories and assign access levels to them.
After setting levels for base categories, you can start password protecting category content in the Manage Password tab.
Protect categories with many passwords
Other password protection plugins permit you to lock one category at a time. Access Levels extension, meanwhile, enables you to password protect various categories at the same time by levels. In other words, if you shield a level with a password, all categories belonging to that level will be protected simultaneously.
To password protect categories by levels, follow the guide below:
- Go to the Add New Passwords tab in the Access Level popup screen
- Enter your password
- Fill in the level of which you want to password protect categories
- Decide password types. Global passwords mean any person with this password can see the private categories. In case you choose password roles, only certain roles using that password are able to open the content.
- Provide password usage limits and password expiry
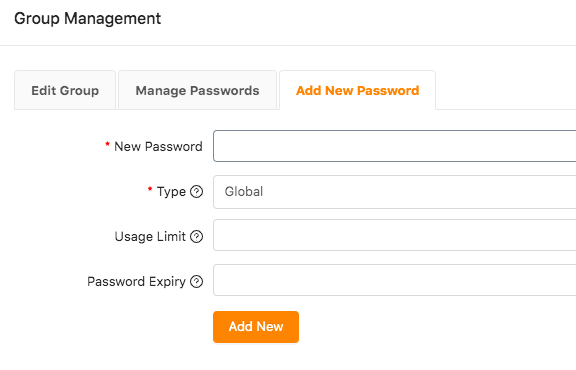
From the example above, all posts within level 3 categories are secure with a password now. When users enter a password to unlock one of these posts, they can access other posts in that category as well as posts of categories in level 1 and 2 automatically.
Once adding a new post to a protected category, the post will have the protection you specified for that category. This post will have the same passwords as other posts in the category as well as posts in other categories of the same level.
Generating multiple passwords for a level
The ultra-cool is that you can manage and customize your password easily using PPWP Pro.
Password Protect WordPress Pro enables you to create as many passwords for a level as you would like to. So you can set different passwords and share with your users.
Protect Your WordPress Content with Multiple Passwords today!
We can’t deny the benefits of generating various passwords for private content. You are able to reduce password sharing by providing each user a different password and expire it after a number of usages or a given time.
Thanks to PPWP Lite and Pro, assigning numerous passwords to WordPress pages and posts has never been easier. You can set many passwords for individual posts in the page or post edit screen and a Password Management popup. Grouping related content together and securing that group with more than one password is also supported.
Still have a burning question? Let us know in the comments below!
