Are you struggling to find the smartest way to keep your WordPress site secure without using passwords? In this article, we have handpicked the best WordPress passwordless plugins that are of use to your website.
In the digital world, passwords seem to be the most popular way to improve security. With a password, you can access private data while unauthorized people cannot.
Despite its outstanding benefits, in the long run, passwords raise a matter of inconvenience when you have multiple accounts and passwords to remember.
To resolve that concern, an alternative solution called passwordless has been developed which helps you bypass content without having to enter any password. In the previous article, we have shown why passwordless authentication is a highly recommended security method.
As for WordPress, passwordless authentication has been applied in granting direct access to either your admin dashboard or protected content.
And don’t let you wait any longer, as we have introduced at the beginning of this article, the following are the 3 best plugins that support you to manage passwordless authentication.
Temporary Login Without Password
Rating 5 out of 5 stars, Temporary Login Without Password is a must-try plugin. If you want to generate temporary access links to your WordPress admin site without usernames and passwords, this plugin is a key.
It comes in handy when one asks for temporary access permission to your admin dashboard, for example, a developer or an editor. With this plugin, you no longer have to set up an account with a username and password for every single request. Instead, you just need to generate a temporary access link. As such, no password needed.
What’s more, you can set the link expiration which will automatically expire after a given time. A temporary user, therefore, can’t log in after your time limits.
It can be said that this plugin indeed brings a lot of advantages to your business.
First, it saves your time of manually generating a username and password whenever someone requests temporary access to your WordPress admin site.
On top of that, the plugin improves your site’s security. Since the access link will auto-deactivate after the pre-set time, you don’t have to deactivate every single username or password when someone doesn’t belong to your program anymore.
Quick Guide on Using Temporary Login Without Password Plugin
Temporary Login Without Password plugin can be found in your WordPress directory without any hassle.
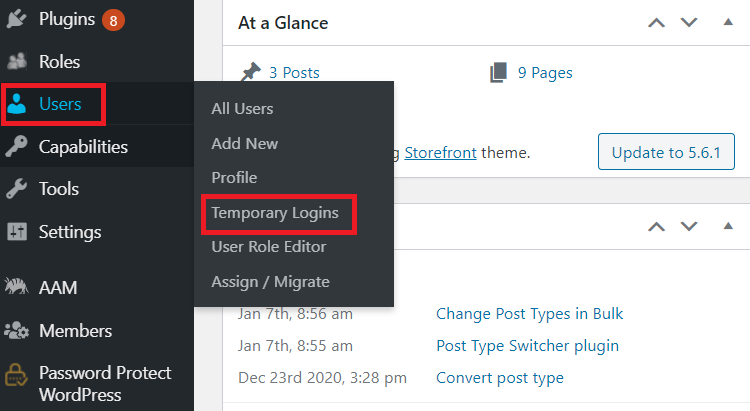
Once installing and activating the plugin, go to Users > Temporary Logins.
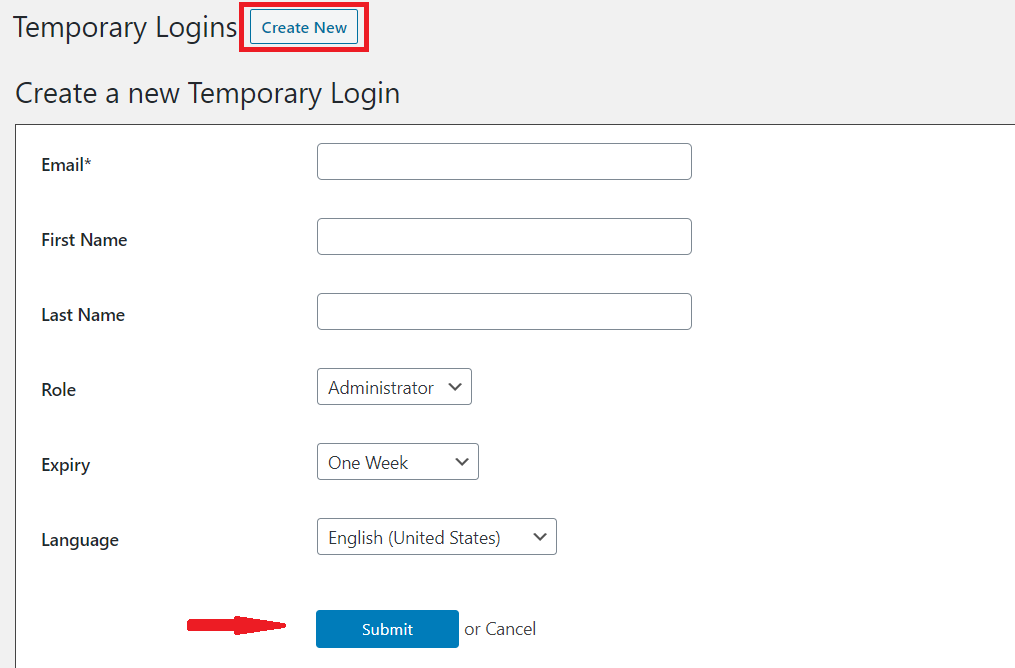
On a new screen, click Create New then input values in required fields. When you’re done, remember to press Submit.
After your submission, the plugin will automatically generate a temporary login link. You can send this link to your users either manually or automatically.
Now, scroll down and you can check who you’ve given temporary links to and their URLs expiry.

In addition to tracking fields, e.g. user emails, last logged in, and expiry, you can choose to disable/ delete/edit/email login link/copy login link under Actions column.
That’s it!
Passwordless Login
Now, let’s move to another outstanding plugin called Passwordless Login. Instead of using passwords, this plugin assists you in giving access permission to your WordPress page and widget with a shortcode.
Passwordless Login allows you to ask users to type their username or email when trying to access your website. After receiving an access request, plugins will automatically create a temporary authorization that will become invalid in 10 mins.
Meanwhile, a link and the token will be sent to the user’s email. Now, they only have to click that link and input an authorization code to access the content they requested.
Quick Guide on Using Passwordless Login Plugin
After installing and activating the Passwordless Login plugin, go to Users > Passwordless Login, you can see the instruction in the new displaying screen.
In order to create a passwordless login form in the front-end, you should add the [passwordless-login] shortcode to a page.
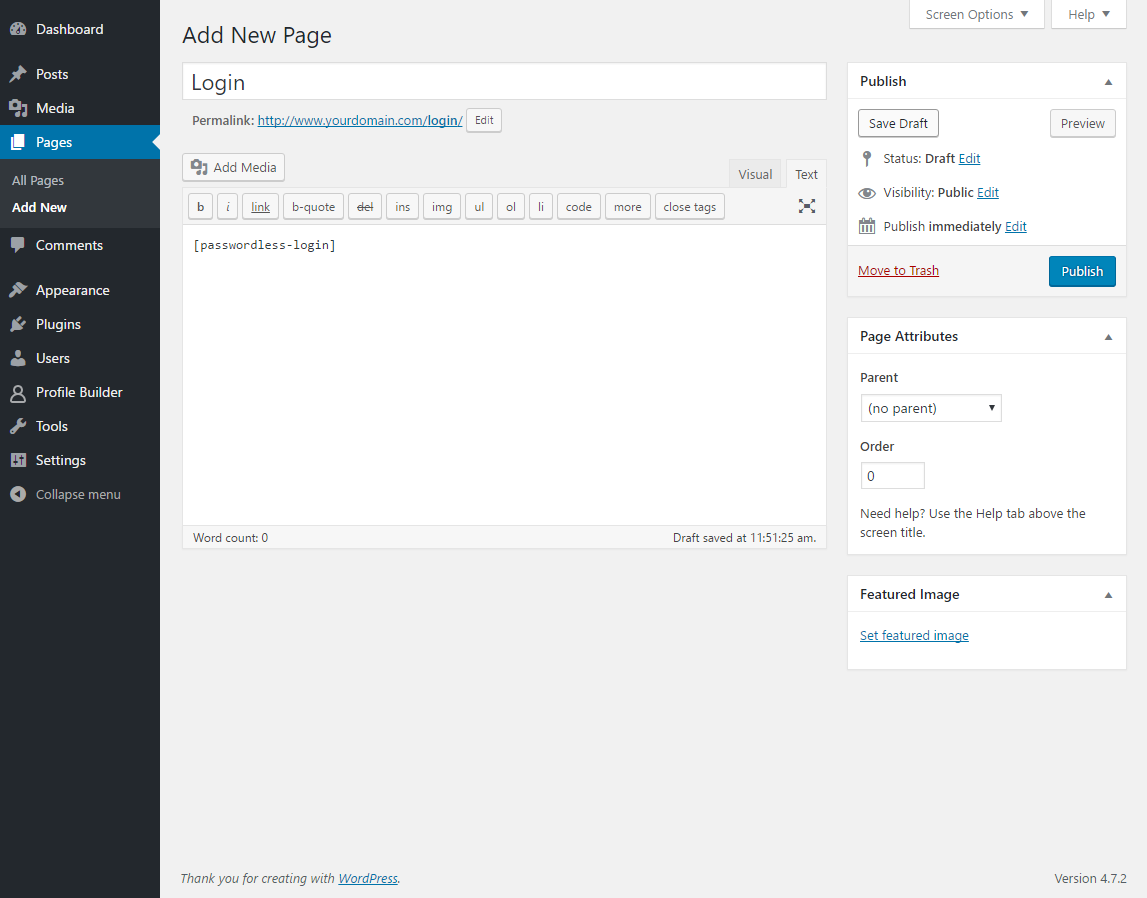
Once you’re done, click Publish.
Now, when users want to access your page, they’re asked to enter their email or username.
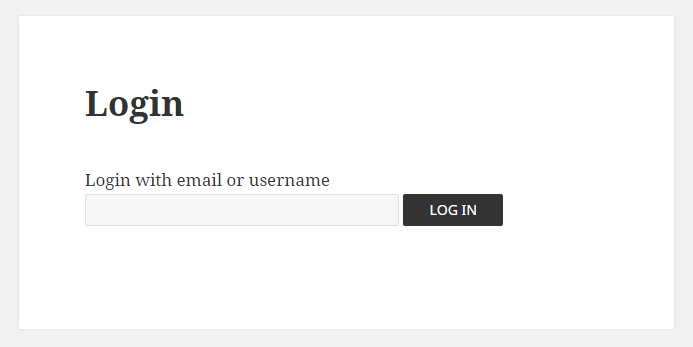
After successfully submitting the email/username, users will receive a confirmation prompting them to check their email.
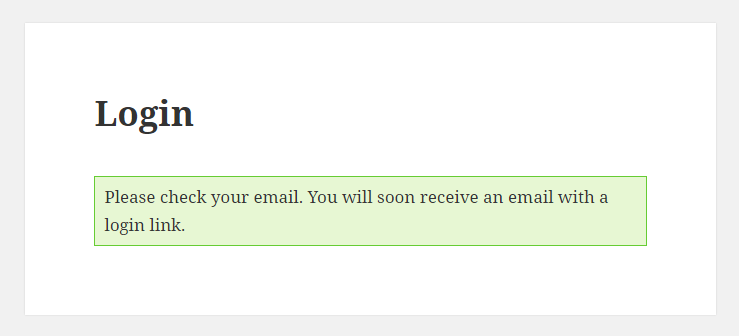
Meanwhile, an email that contains an access link expiring in 10 mins is sent.

Besides protecting pages, you can also add the shortcode to your widget in the sidebar by going to Appearance > Widgets and add the [passwordless-login] inside the content box of a Text Widget.
Once you’re done, press Save.
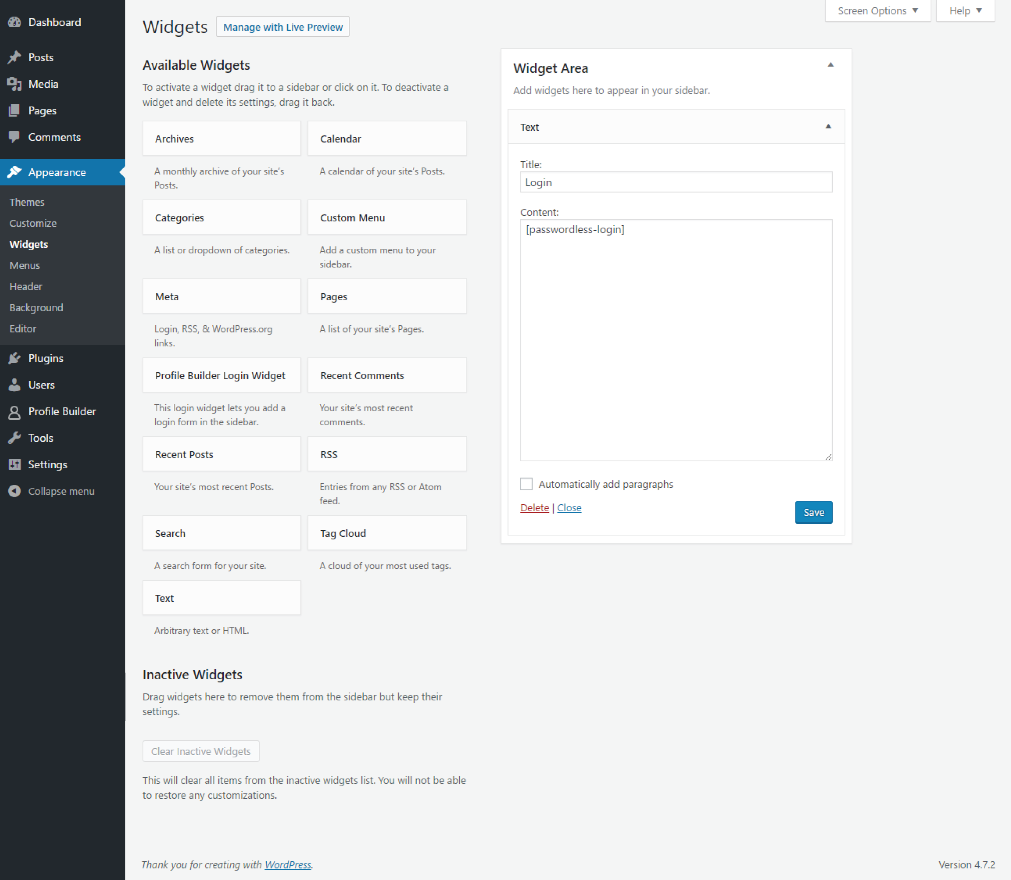
Here’s a passwordless login widget in the front end.
Passwordless Authentication
If you have protected content and intend to bypass it without forcing users to type in a password, Passwordless Authentication works like a charm.
At the moment, there are two methods integrated in this plugin: contact forms and Google reCAPTCHA.
As such, when users want to access your protected content, they only need to fill in a contact form or pass Google reCAPTCHA.
Quick Guide on Using Passwordless Authentication
Please note that you should have the PPWP Pro plugin to protect your content before using Passwordless Authentication extension.
Access Protected Content by Fulfilling Contact Forms
Passwordless Authentication integrates with most of the popular contact form plugins. For example, Contact Form 7, Gravity Forms, Formidable Form, WPForms, Ninja Forms.
Now, let’s say you’re using Contact Form 7.
After protecting your content with PPWP Pro and creating a contact form, go to Password Protect WordPress > Passwordless Authentication to assign the form to protected content.
Here, enable the “Protect Content using Passwordless Authentication” option.
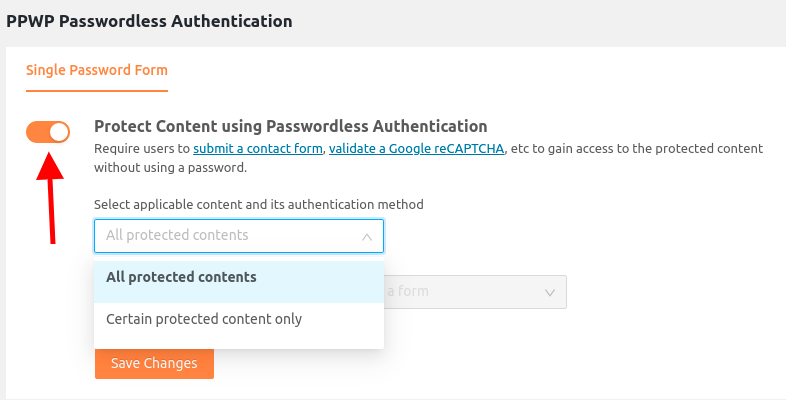
You can choose to display the contact form either in all protected content or in specific content only.
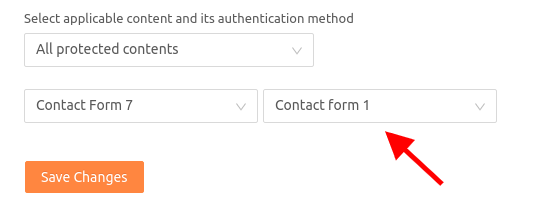
After you save your settings, the contact form will be shown on the protected pages as below.
At this point, instead of entering a password, users are asked to fulfill your form in order to access the secured content.
In fact, you can collect your user’s information for further needs. In some cases, it can be considered as a contribution to your marketing efforts.
And, kindly note that the password form will display as usual if the contact form plugin is deactivated.
Access Protected Content by Passing Google ReCAPTCHA
When you want to grant everyone access to your content while protecting it from spam, using Passwordless with Google reCAPTCHA option is your key.
After you have configured reCAPTCHA on your site, go to PassPassword Protect WordPress > Passwordless Authentication to assign reCAPTCHA to protected content.
Here, enable the “Protect Content using Passwordless Authentication” option then choose Google reCAPTCHA v2 in the dropdown.
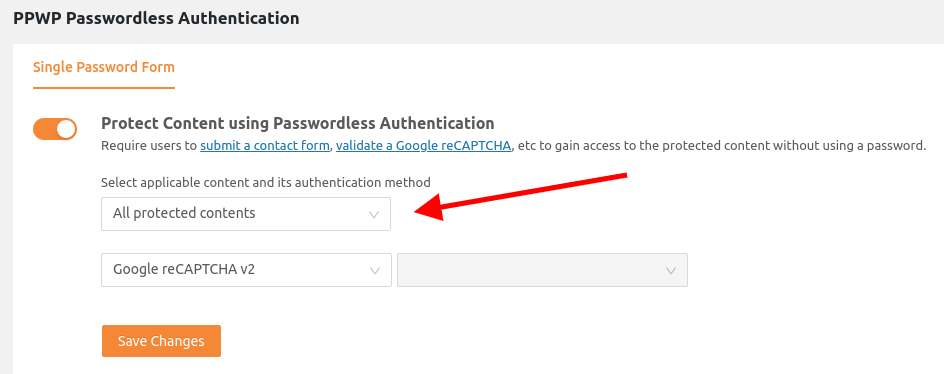
After you save your settings, the reCAPTCHA checkbox will be shown on the protected pages as below.
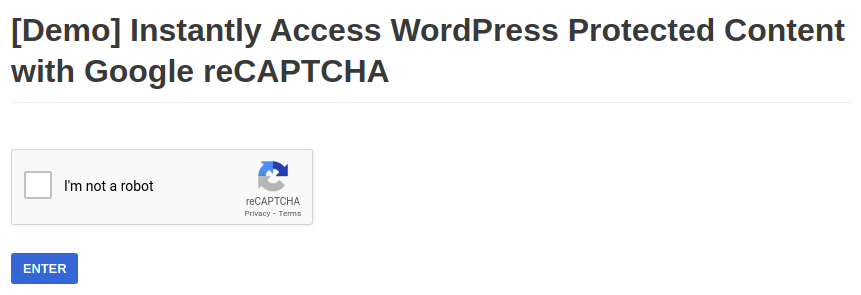
Once users pass Google reCAPTCHA verification, they’ll be able to access your protected content immediately.
You’re done!
Wrapping Up
In this article, we have introduced 3 best plugins that help you keep your WordPress site secure without using passwords.
If you want to grant temporary access to your WordPress admin site, consider Temporary Login Without Password plugin to ease your work.
If you intend to protect your WordPress page or widget from the public, you should refer to the Passwordless Login plugin.
Finally, in case you have protected content with the PPWP Pro plugin and somehow no longer plan to force users to enter a password to access it, use Passwordless Authentication. Now, they only have to fulfill a custom form or pass the reCAPTCHA test instead. It sounds simple, doesn’t it?
By the way, are you using any passwordless plugin that haven’t been mentioned? Let us know in the comments box below.
