There might be times when you want to have your WordPress content password protected. It can be private blog posts available for subscribers only. Or you offer customer-specific products for just premium users.
Whatever the reasons are, we’re sure that you don’t want users who already unlocked the content to re-enter passwords every time they access it. This period of time should vary, depending on specific usages.
WordPress lets you check if a user has previously logged into a protected page, even other areas of your site via cookies. You’re also able to permit them to re-access this content without having to provide a password in a given time. In fact, this method requires coding familiarity.
In this article, let me show you how to adjust password cookie expiration time easier with a simple plugin. Before digging into detail, we’ll go through what the WordPress cookie is and how WordPress password protection works.
What is a WordPress cookie?
Cookies refer to files storing the user’s browser data of a website. They’re commonly used to save user’s login credentials, pages users have visited, and items they’ve added to cart, etc.
Marketers also use cookies information to learn about the user’s browsing behaviors and experience so that they can provide a better marketing strategy. In fact, users can delete cookies from their web browser for some privacy reasons.
There are 2 types of cookies in WordPress by default: session cookies and comments cookies. The former is set when someone logs into your site with an email and a password or just a password. The latter, meanwhile, tracks their email, username, and URL once a user leaves a comment.
WordPress expires the login cookies in every 15 days but it takes comment cookies 347.222 days or 30000000 seconds to be deleted from your database.
How password protection works in WordPress
WordPress comes equipped with a built-in feature allowing you to lock your website. Upon protection, your pages or posts will be covered with a password form forcing visitors to enter the correct password to read the content.
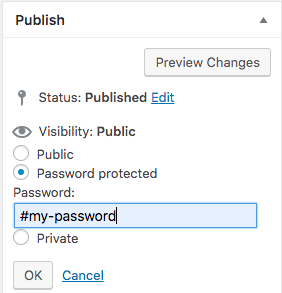
By default, WordPress stores the password as a cookie that will expire 10 days after it is created. If you lock multiple pages with a password, users just need to enter the password once and are able to view all other private content. This means that WordPress has saved their cookies and will send them directly to the secure content without asking for filling the password form.
How to change password cookie expiration time in WordPress
You might plan to adjust the cookie detection time for several reasons. You provide a one-day event via a password protected page and want users to access it on that day only.
To do so, you need to add the post_password_expires filter to your WordPress functions.php file. The process is broken down as follows:
- Go to Appearance → Theme Editor in your WordPress dashboard
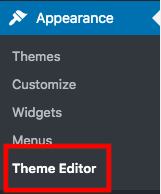
- Click on the Theme Functions functions.php file on the left-hand navigation menu
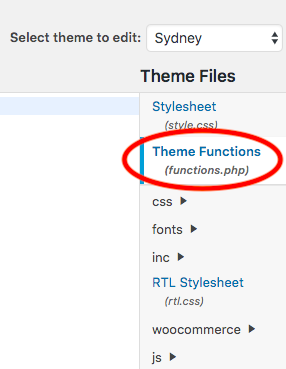
- Enter this code to the file
function mind_set_cookie_expire( $time ) { return time() + 86400; // 1 day } add_filter( 'post_password_expires', 'mind_set_cookie_expire' ); - Update the file
We use seconds for the return time in line number 3. You can replace it with your custom period of time.
This method suits those getting familiar with coding. For non-tech-savvy people, it would be a challenge. We recommend you using the Password Protect WordPress Pro plugin to easily adjust the password cookie expiration time. It’ll also blow your mind with numerous other cool and powerful features.
Ready?
Use Password Protect WordPress Pro to Change WordPress Password Protected Page Cookie Timeout
The plugin essentially secures your WordPress pages, posts, custom post types with one or multiple passwords. It supports categories, parent & child pages, and the entire site protection too.
On top of that, you can set a cookie detection time in which users don’t have to re-enter passwords to view the private content right in the plugin Settings page.
These 3 steps help you get started with the plugin:
- Download the PPWP Pro plugin
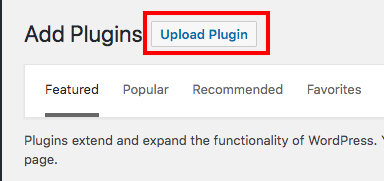
- Head to Plugins → Add New in your WordPress admin screen
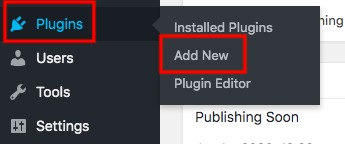
- Click Upload Plugin and open the plugin’s zip file you’ve downloaded
- Enter the license key sent to your email and activate the plugin
- Visit the Password Protect WordPress Settings page
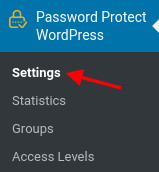
- Look for the Cookie Expiration Time option
- Set a custom day to expire user cookies. The default time is 7 days.

- Save your changes
Remember that this cookie setting applies to the protected content only. So, you must set a password for your pages or posts.
This guide shows you how to lock your content with the plugin.
- Move to Pages or Posts section in the WordPress backend navigation menu
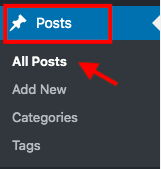
- Choose your desire post
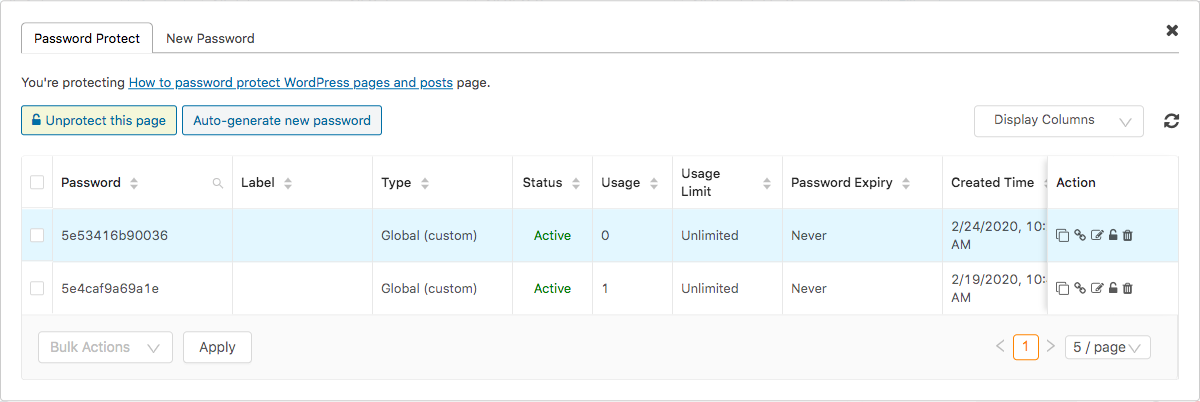
- Click Password protection link then hit the Password Protect this page button

- Auto-generate a password or create your own one
Limit password usage
PPWP Pro plugin proves powerful and efficient to manage your passwords. You can expire your passwords by usage or period of time. The auto-generated ones will exist forever unless you delete them.
On the other hand, you can set custom usage limits and expiry time for specific passwords. This means users won’t be able to use that password again once it expires.
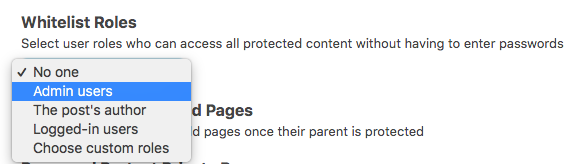
Grant direct access to whitelisted user roles
Another case to use WordPress cookies comes to whitelisting roles. It’s not necessary for some regular users like Admins or Editors to re-login or enter passwords to access their content.
That’s why PPWP Pro comes up with the Whitelisted Roles feature enabling you to give certain users roles the right to open the protected content without having to enter passwords.
To do so, simply select your desired roles right in the PPWP Pro Settings page.
Make use of WordPress password protected pages and cookies
WordPress saves user’s password cookies authorizing them to read your protected content without having to re-enter passwords in 10 days.
You can take 2 different paths to change the default cookie expiration time, either adding code to the functions.php file or using the Password Protect WordPress Pro plugin. The first method requires a little coding while the other is available in the paid version only.
There is a lot you can do with PPWP Pro. Apart from securing pages and posts, you’re able to protect a whole category and the entire website with just a single click.
Install Password Protect WordPress Pro and set a custom page cookie timeout for your WordPress protected content.
