Most WordPress site owners focus on building efficient SEO strategies. And so do we. To know if your strategy is on the right track, you need to know how many people visit your site, who they are, where they come from, and what exactly they do when landing on your WordPress site. In other words, you need to track WordPress user page views.
Accordingly, you can determine what are the visitors’ favorite pages, and what are the articles that attract them to yours. From that, you can work out the best plan to attract more visitors and increase your site ranking.
Today, we’ll introduce 3 plugins that give you a helping hand in tracking your WordPress site’s user page views.
Let’s begin!
How to Track WordPress User Page Views
Different website setups will need specific tracking methods. In this section, we’ll introduce 3 different plugins for you to choose from.
- Track Total Page Views with MonsterInsights
- Track User Page Views Based on User Roles with User Insights
- Track User Page Views Based Entered Passwords PPWP Pro
Track Total Page Views with MonstersInsights
When it comes to tracking user page views, Google Analytics stands out to be the most popular tool.
With Google Analytics, you can get the number of your site visitors. You can also get data and metrics for your site, e.g. total audience numbers, topics of interest, and demographics.

Apparently, Google Analytics is the most powerful website analytics service available. However, it’s a bit complex for beginners.
It’s when the MonsterInsights plugin steps in. This plugin helps you arrange Google Analytics stats in a much more intuitive way.
Following is the step-to-step guide on how to utilize this plugin.
Step 1: Install the MonsterInsights Plugin
The plugin is available in both free and paid plans, so you can use whichever you like. The free version gives you basic features while the paid version provides more advanced tracking options.
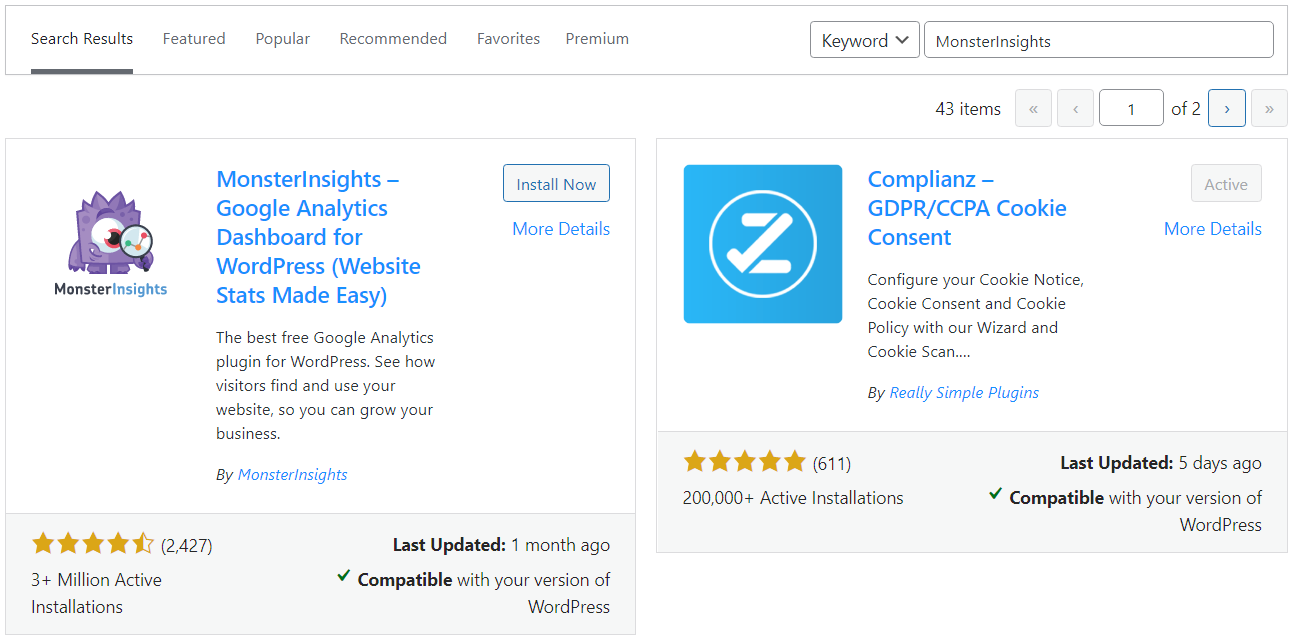
You can directly install the free plugin from the official WordPress plugin repository by typing MonsterInsights in the search box. This is available under Plugins > Add New in your WordPress admin dashboard.
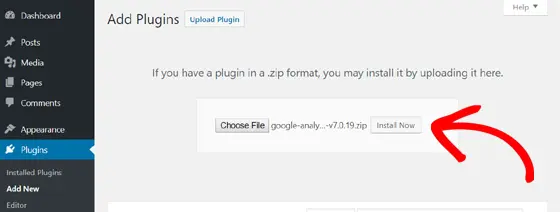
If you’ve got a premium version, simply go to Plugins > Add New > Upload Plugin to Install and Activate it on your site.
Step 2: Connect MonsterInsights with Google Analytics
After activating the plugin, you’ll need to connect it with Google Analytics.
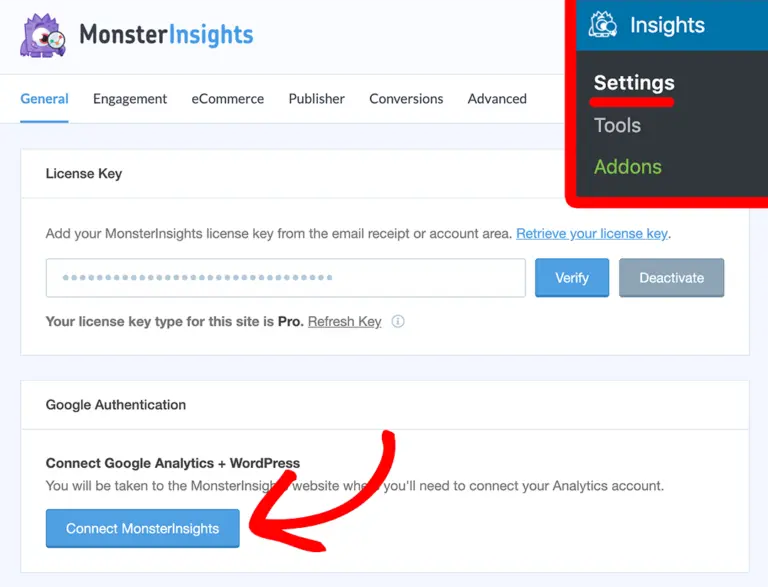
To achieve that, go to Insights > Settings in your WordPress admin panel. Here, click the Connect MonsterInsights button.
That’s it!
Once the setup process is complete, Google Analytics starts gathering your website visitors’ information. Accordingly, you can see how many visitors are on your WordPress site.
Here, we’ll show you 7 main Google Analytics reports that show user page views tracking data for your WordPress site.
- Overview report
- Real-Time Reports – The number of visitors are on your site right now
- Publishers report
- E-commerce report
- Search console report
- Custom dimensions report
- Forms report
As a side note, it might take Google a few hours to show you the tracked data for the first time.
Track User Page Views Based on User Roles
If you want to get the activities of specific users landing on your site, let’s utilize the Page Visit Tracking module of the Users Insights plugin.
This module allows you to find which pages your WordPress users visit while logged in. It also allows you to specify which post types to track, as well as the user roles for which this feature to be enabled.
Once enabled, Users Insights will record the visit every time the user opens one of the tracked pages/posts.
Sounds interesting?
Let’s make the most of the plugin by following the steps below.
Step 1: Install the User Insights Plugin
Since this is a premium plugin, you need to purchase a User Insights plugin’s license first.
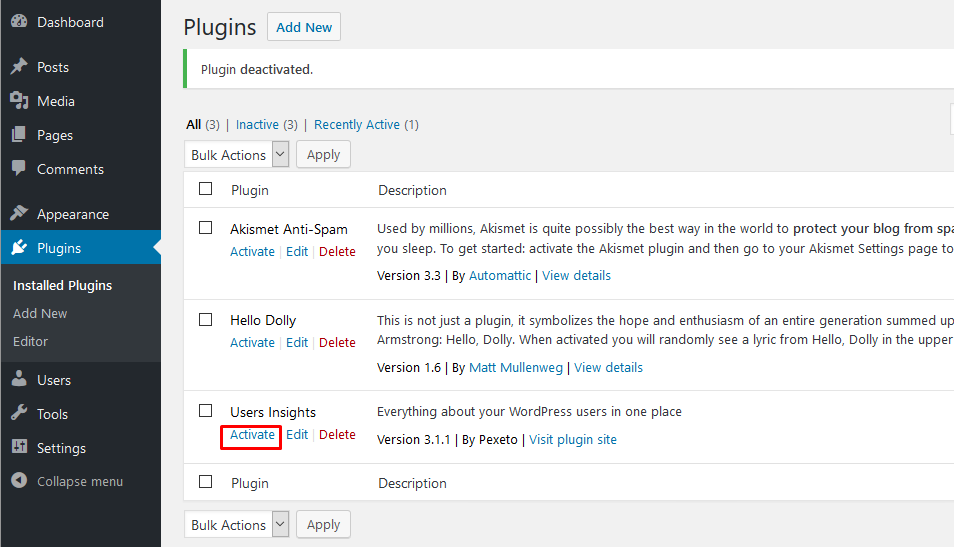
Once done, you’ll need to upload the plugin to your site by going to Plugins > Add New > Upload Plugin in your WordPress dashboard.
Don’t forget to Activate the plugin after that.
Step 2: Activate Page Visit Tracking Module
Navigate to the Module Options page and enable the Page Visit Tracking option.
Once done, you can first select the roles of users, whose visits you’d like to record.
![]()
You can also choose specific post types to track from all of the public ones on your site.
![]()
Press Save changes and you’re done.
Now you can view the tracking by either searching your users based on page visits or viewing the page visit data in user profiles.
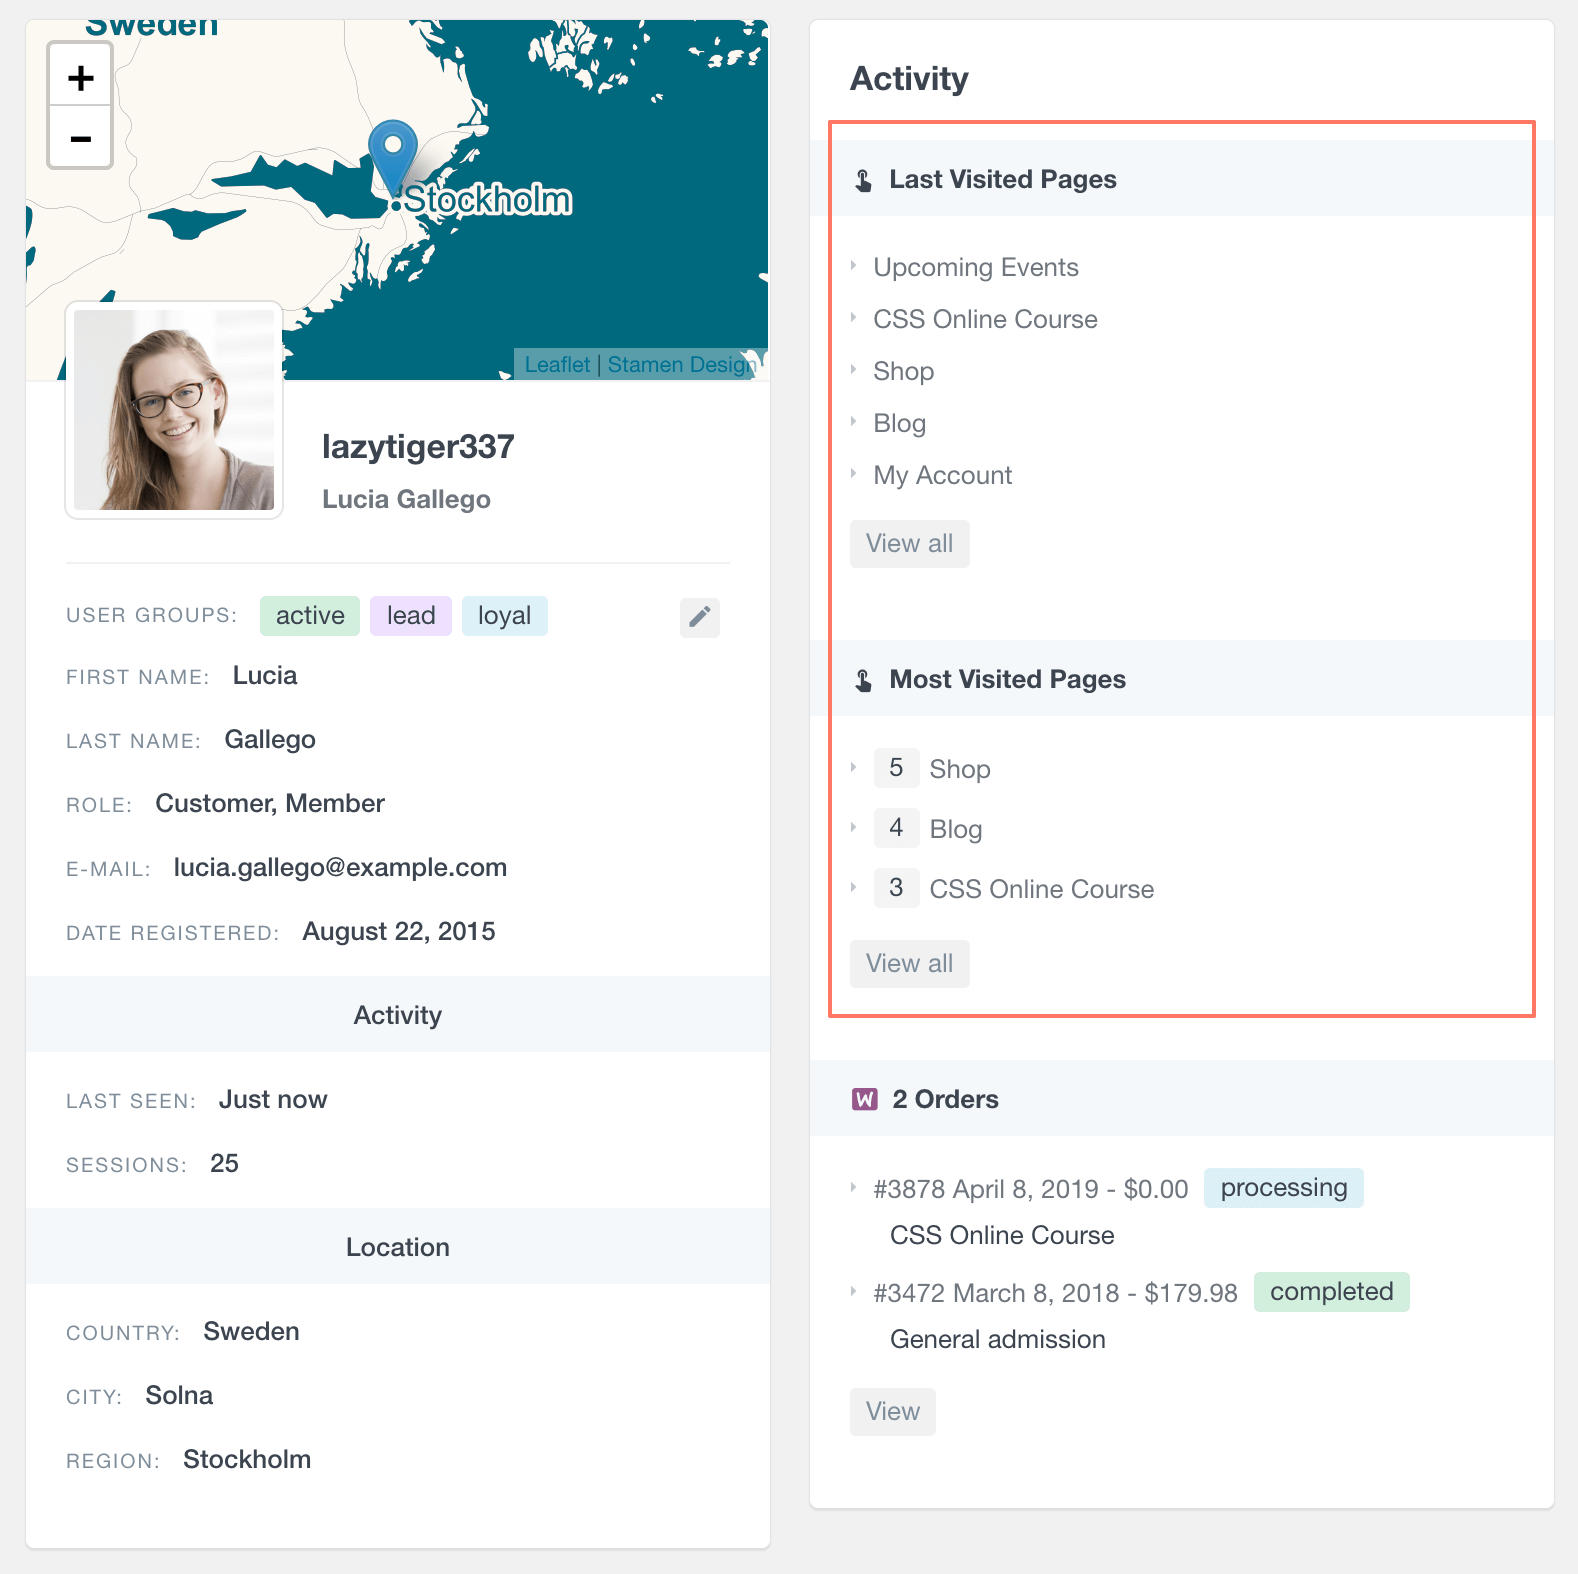
Keep in mind that Users Insights will start to track the user page views right after you activate the feature.
This means that past visit data will not be available. Additionally, users need to log in so their visits can be recorded.
Track User Page Views Based Entered Passwords
What if I want to password-protect my pages, can I track who visited them using the correct passwords?
Yes, you can achieve that with the PPWP Pro plugin and its PPWP Statistics extension.
The PPWP Pro plugin allows you to password-protect your content, including the entire site, single pages, partial content. Only those with correct passwords can access your private area.
Let’s say you’re running an online giveaway to boost your brand awareness. Only those with the right codes can access and make orders from you. Of course, you also want to get the visitor information to use in the upcoming marketing program.
That’s when you need real-time tracking. Let’s PPWP Statistics extension gives you a helping hand.
Here is the step-to-step guide on how to achieve that.
Step 1: Install PPWP Pro and PPWP Statistics.
Once you’ve purchased the PPWP Pro plugin and its PPWP Statistics extension, you’ll receive 2 zip files.
At this point, navigate to Plugins > Add New > Upload Plugin in your WordPress dashboard to upload plugin files.
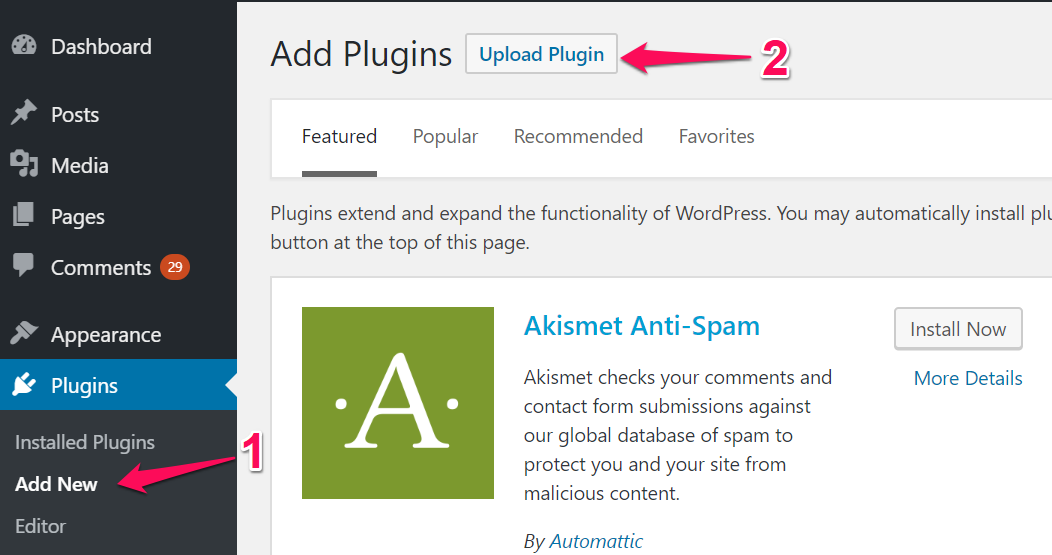
Next, click Install Now and Activate to get the plugin up on your site.
Step 2: Protect Content with PPWP Pro
PPWP Pro allows you to protect the entire site, single pages, and partial content.
#1 Protect the entire site
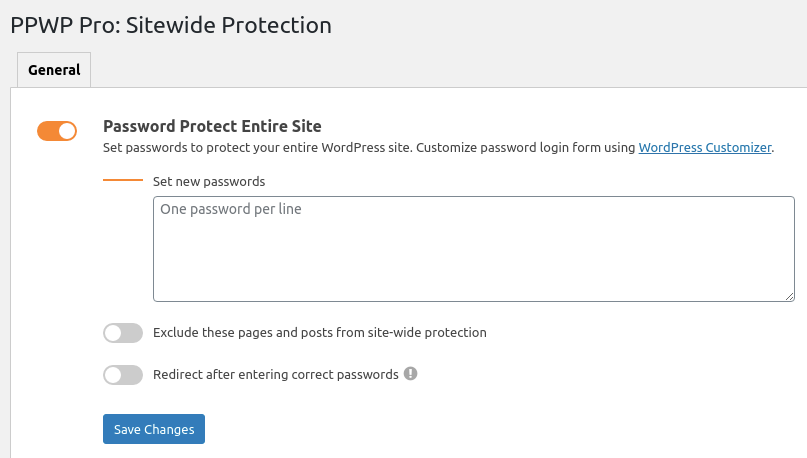
To protect the entire site, go to Password Protect WordPress > Sitewide Protection submenu from your admin dashboard.
Here, turn on the Password Protect Entire Site option then input your passwords.
#2 Protect single pages
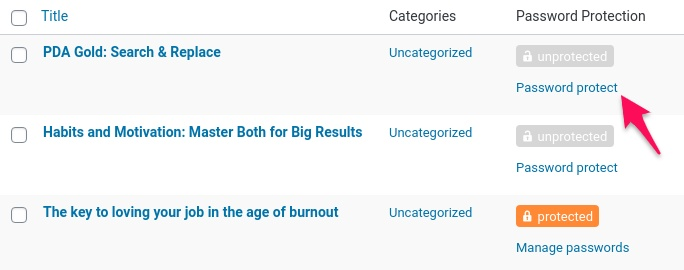
Upon plugin’s activation, you will see a new “Password Protection” column under the Pages or Posts screen.
Click on Password protect and then Password protect this page under the popup to lock your private content. Our plugin will auto-generate a new password after protection.
#3 Protect partial content
To protect a section of a page, you just need to wrap it with the shortcode below:
[ppwp passwords= "password1 password2"] Your content [/ppwp]
Replace the “password1” and “password2” with your own passwords. That’s all. Now once the users unlock your protected content with passwords, stats will be recorded in the PPWP Statistics extension.
Step 3: View Password Usage Tracking
Navigate to Password Protect WordPress > Statistics from your admin dashboard.
Here, you can choose which password types to get the record.
![]()
You can see who visited the private content, when and from where they accessed it, as well as how many times a specific password is used. All these stats can also be exported to a CSV file.
It also allows you to view the IP addresses to know where your users come from.

That’s it!
Which Methods Do You Prefer to Track User Page Views?
We’ve shown you 3 different methods to track user page views on your WordPress website.
Depending on your specific needs, you can choose one, or all of the listed plugins.
When the MonsterInsights plugin captures general information of all visitors on your site, UsersInsights gives you detailed activities of specific user roles.
In case you want to track who accessed your password-protected content, PPWP Pro and its PPWP Statistics extension are worth it!
Which methods best suit your use case?
Let us know in the comment section below!
