Despite the dramatic growth of social marketing, email marketing still plays a significant part in any marketing strategy. About 7 out of 10 people prefer to communicate with businesses via emails. Not only is it fast but you can reach out to a large number of prospects at the rate of a few pennies per message.
You can use email sequences to leverage sales, generate new customers, and retain them. Besides sending emails for sales and promotion, you’re also able to provide receivers with product and business information through new blog posts.
Instead of visiting your site, looking for the Blog section, and finding the latest article, they can be notified of the newly published post right in their mailbox. It’s convenient for users and helps increase the time they spend on your site.
When it comes to email marketing providers, we just love MailChimp, the best and easiest tool. It can be integrated seamlessly with WordPress to create beautiful and branded emails to enhance your reputation.
Need more proof? Let’s break down why you should use MailChimp to send new blog posts to users. Then, we’ll look at the detailed guide to integrating this email marketing platform with your WordPress site as well as discovering a bonus tip on emailing new articles to members only.
- 5 reasons to use MailChimp
- Get started with MailChimp
- Add a signup form to your WordPress blog
- Auto-send new blogs to subscribers
- Send password protected content to users
5 Reasons for Using MailChimp to Send WordPress Blog Posts
Trusted by dozens of millions of users, MailChimp has become the most popular and beginner-friendly email marketing service. Here are the top 5 reasons why people love it:
#1 Cost-saving solution
MailChimp offers both free and premium versions so that small and medium to large-size businesses can try it out. If you just start your email marketing journey, you should make use of the Lite service. It allows you to send up to 12,000 emails to 2,000 subscribers monthly.
When your email list grows over time, you can consider upgrading to a paid account. There are 3 different paying plans, including Essential, Standard, and Premium. They each come with a set of top features supporting you in optimizing your email marketing campaign.
#2 Simplicity and friendliness
You’re just a non-tech email marketer and looking for a flexible and easy-to-use email marketing tool? you shouldn’t miss out on MailChimp. Not a single line of code is required when creating emails. And the drag-and-drop visual editor allows you to add text, images, links, and captions easily.
In addition, you don’t have to worry about mobile user experience since emails are automatically responsive and mobile-friendly.
#3 Cool features
Apart from capturing and sending emails, MailChimp gives a lot of powerful and advanced marketing automation. You’re enabled to create a better strategy via A/B testing to see which type of titles that users would prefer and click on the most.
On top of that, setting up RSS to email subscription and auto-responders have never been easier. This email marketing service offers hassle-free WordPress integrations. “You can add a signup form to any post or page and give visitors the opportunity to join your list wherever they are on your website.”
#4 Quick support capability
MailChimp is loved for its effectiveness and customer service. The support team stays reachable all the time to deliver fantastic, speedy, and friendly responses.
With the vast Knowledge Base, you can access all user guides and tutorial videos about how to get started and make the most of your account.
#5 Result tracking
To understand the marketing results, MailChimp gives you insights on your campaign performance. You can see exactly how many subscribers you’ve got, how many emails opened, and who’s opened them via comprehensive reports. Even the most popular day in the week or readers’ locations are also visible.
From this report, you can know which areas you can continuously develop and where to improve.
Getting Started with MailChimp
There are 2 main steps to integrate MailChimp with WordPress. Firstly, register a MailChimp account. Then, create a signup form on your site so that users can subscribe and join your email list. After that, add this signup form to your WordPress blog.
Step 1: Create a MailChimp account
A MailChimp account is required when you integrate this email marketing tool with your WordPress site. To create an account for your own:
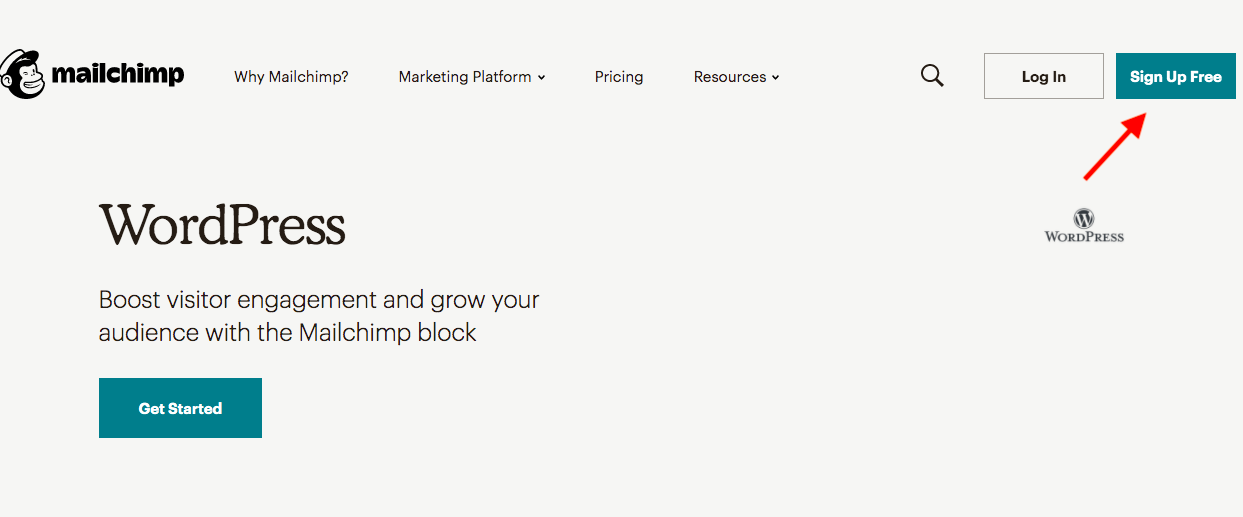
- Visit the MailChimp website and click the Sign Up Free button
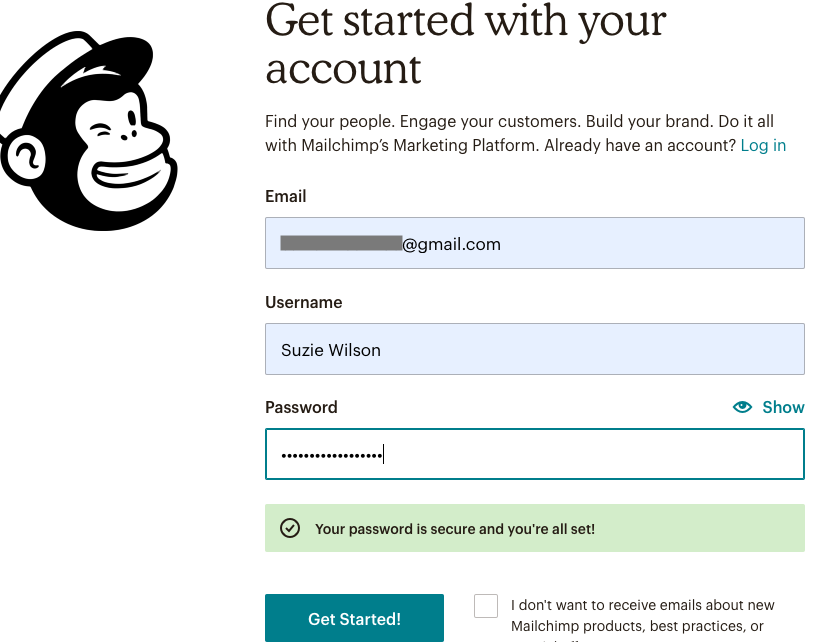
- Fill in the form with your email, username, and password then hit Get Started
- Go to your mailbox and activate your MailChimp account
Step 2: Create an Audience
After logging in, you’ll be redirected to a dashboard. To add your email list, you need to:
- Head to Audience in the navigation menu at the top of the dashboard

- Click Import Your Contacts to import your subscriber data to MailChimp. The imported CSV file should include 1 column for subscribers’ email addresses, 1 for their first name, and 1 for their last name. You can also create another column for additional information.

- In case you want to add new contacts manually, choose “Add a contact”

Once you create a free MailChimp account, it’s time to build your email list by adding a signup form to your site. This is where visitors can subscribe, become your member, and receive new articles frequently.
Add a MailChimp Signup Form to Your WordPress Blog
You might struggle to have new website visitors and subscribers.
To achieve that, you first have to create an attractive and eye-catching signup form. A confusing form containing many fields hardly encourages users to leave their contact info. It’s suggested to ask for email addresses and probably the first name only.
It’s possible for you to add a MailChimp signup form to your WordPress blog without a plugin’s assistance. However, this method takes a bit longer and requires your RSS feed URL.
That’s why you’re recommended installing the MailChimp for WP plugin.
Step 1: Contact your MailChimp account with MailChimp for WP plugin
Receiving a 4.8 out of 5-star rating with over 1 million active users, MailChimp for WP has been the best opt-in form builder for your WordPress site.
This guide shows you how to install and start using the plugin.
- Go to Add New under Plugins in your WordPress dashboard

- Type “mailchimp for WP” in the keyword box

- Install and activate the plugin
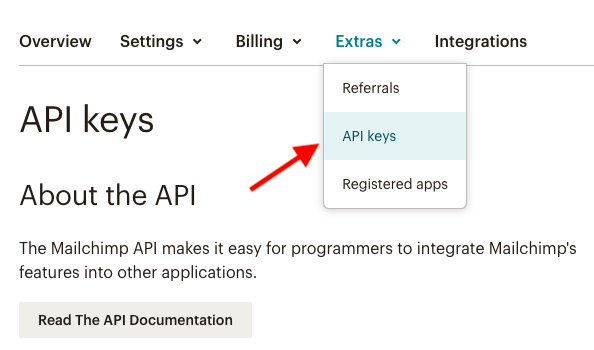
- Get your API key by going back to your MailChimp account → Extras → API keys. Create a new API key if you don’t have one.
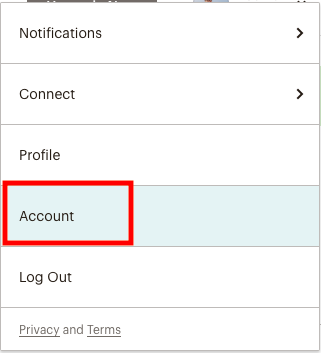
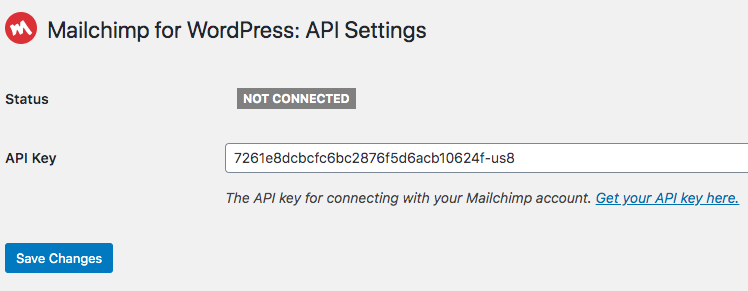
- Copy and paste your API key in the MailChimp for WP plugin settings page and save your changes
Step 2: Create a signup form
You can generate a signup form and put it on your WordPress site now.
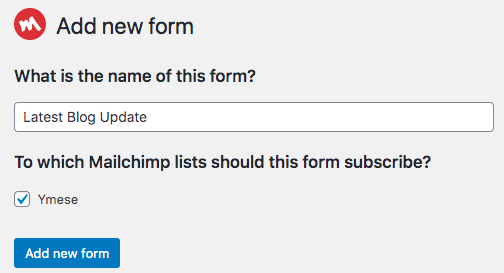
- Head to MC4WP → Forms in your WordPress dashboard and fill in the form’s title
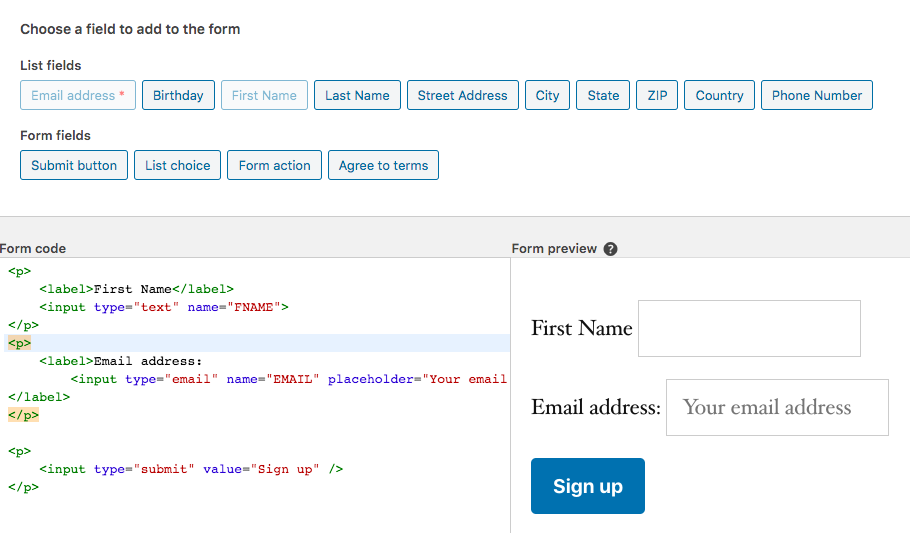
- Add fields to the form and save your changes
- Set extra settings like the automated messages and the redirect URL in the Messages and Settings tabs
- Choose the design and format of the form by selecting Form Style
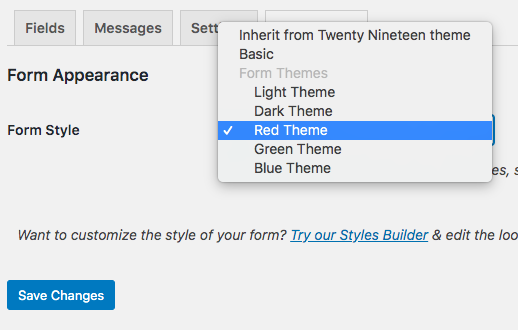
Step 4: Insert the signup form to your blog
You can add the signup form to your WordPress site in various ways, from entering a shortcode to using the MailChimp widget.
- Copy the shortcode in the Form section of your MailChimp for WordPress plugin (MC4WP)
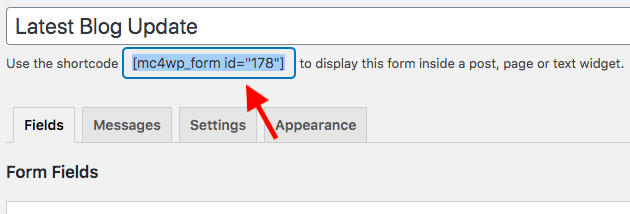
- Move to your desired post or page and paste it anywhere you want
For the second method, you need to:
- Click Appearance → Widgets then drag and drop the widget to your sidebar or footer
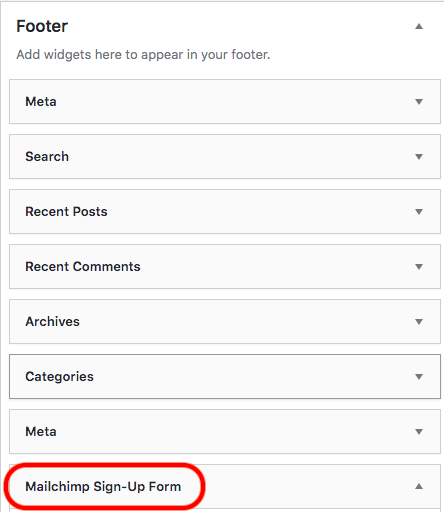
After creating a subscription form and displaying it on your WordPress site, you can engage users to sign up and receive your new blogs.
Send a Blog Post to Subscribers Automatically
With MailChimp’s RSS campaign, you’re able to update subscribers on newly published articles automatically.
Step 1: Get your RSS feed URL
Since WordPress creates an RSS feed including all your blog posts automatically, it will add the new article’s URL to the file every time you publish one. Take advantage of this feature, MailChimp pulls the content of any new articles in the RSS feed into emails and then adds it to your mail list.
Your site’s RSS feed will be https://your-domain.com/feed/
Step 2: Create an email campaign
- Click Create Campaign in your MailChimp Campaign dashboard
- Choose Email in the campaign type screen and go to the Automated → Share blog updates section
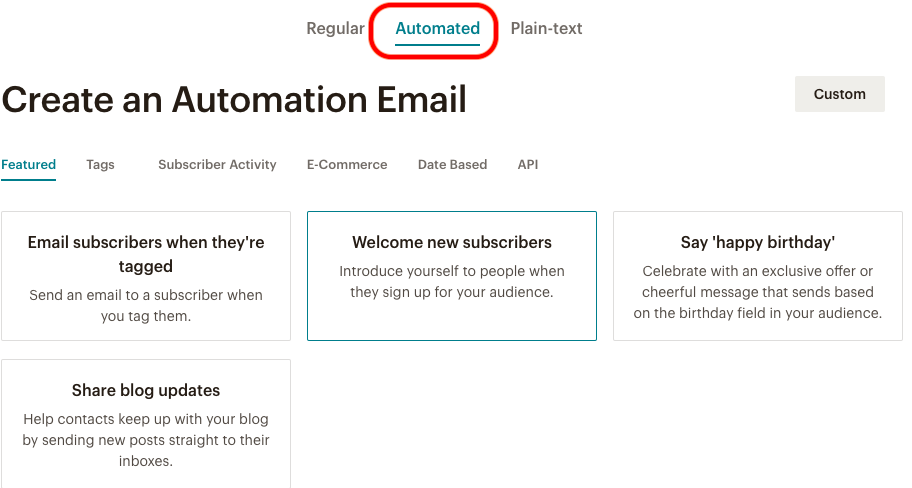
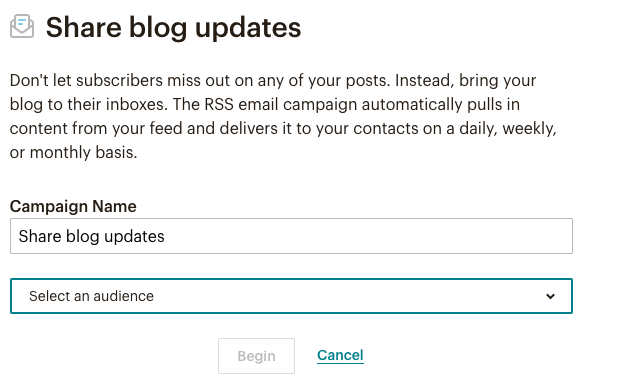
- Provide the campaign’s name and select an audience to send the email and click Begin
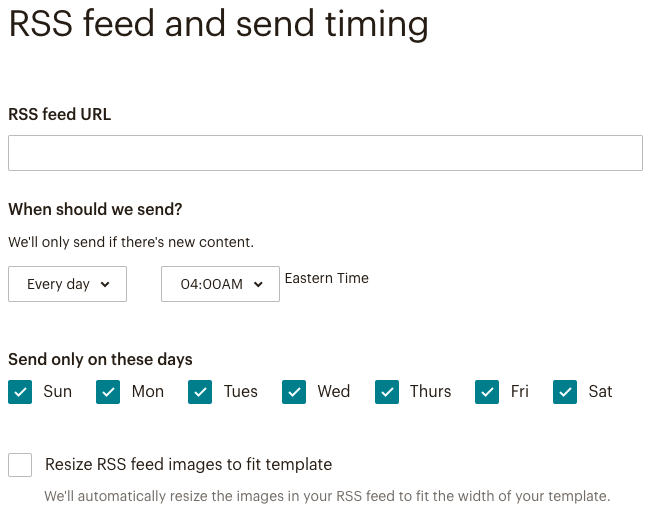
- Enter the RSS feed URL and the time to send the email then hit Next
- Tick the audience you would like to send the email to
- Fill in the Campaign info page with all the necessary information and continuously click Next
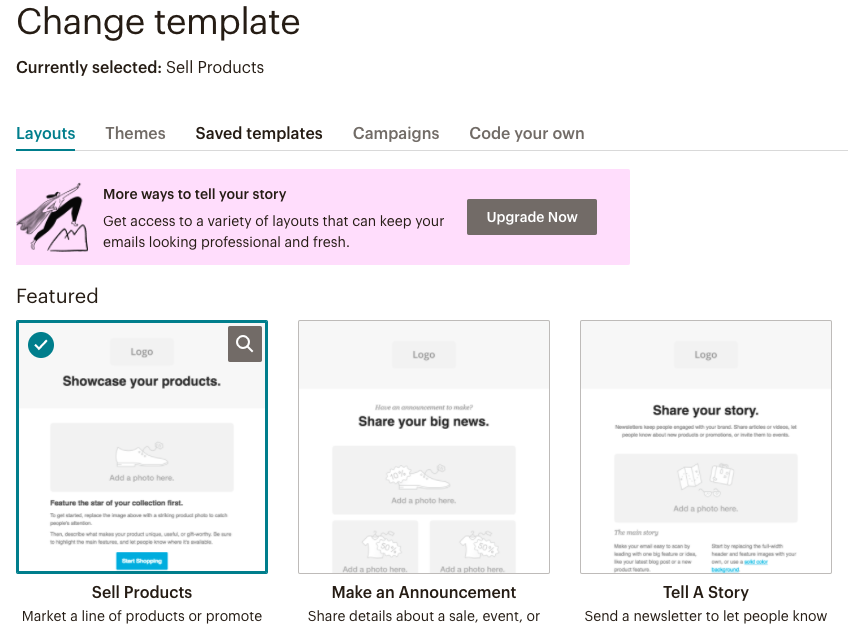
- Move to the Design tab and pick a template
Step 3: Design your Email
MailChimp won’t send new articles to your subscribers unless you include the RSS Header or RSS Items block in your email. Simply drag and drop this element from the Content tab to your email.
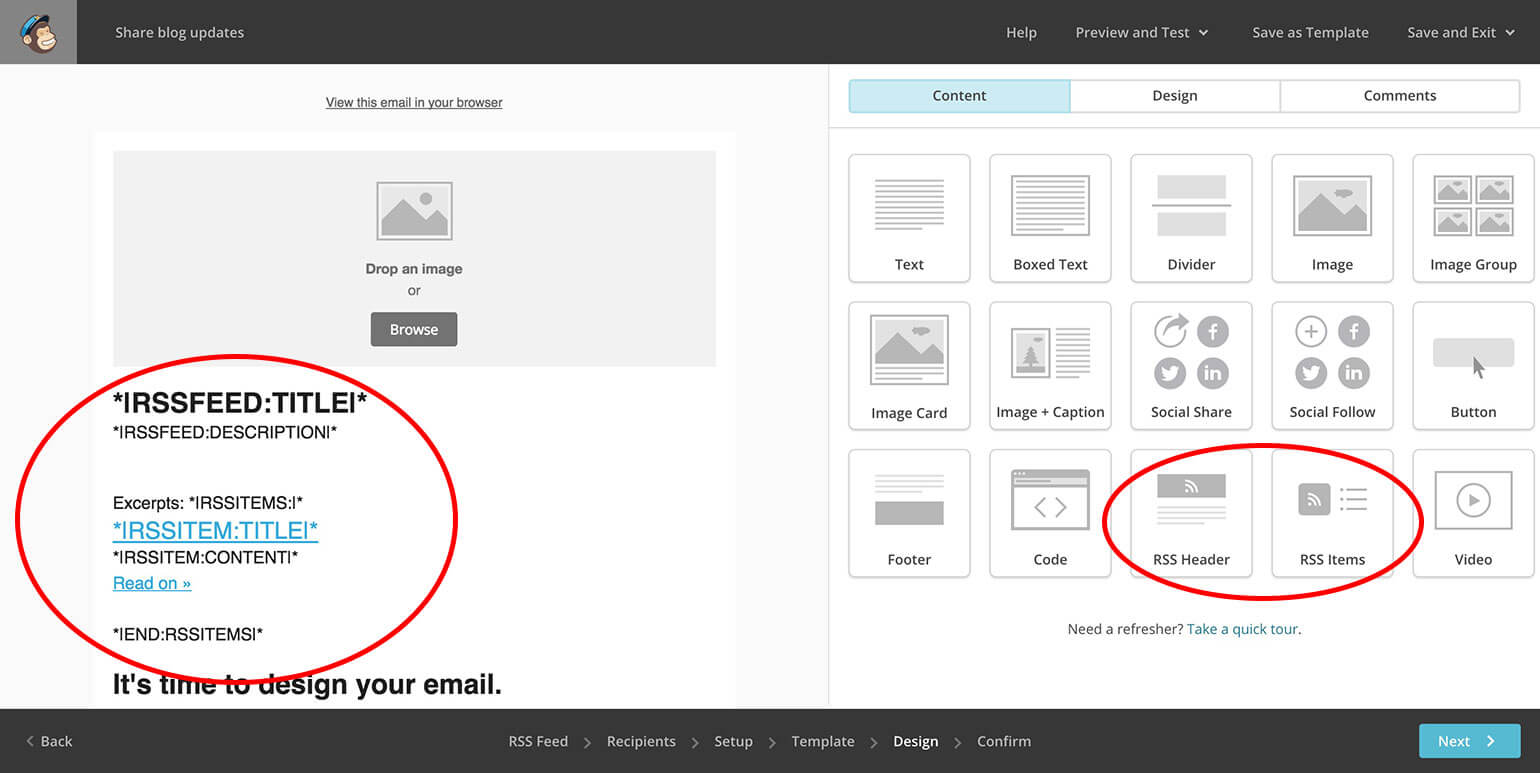
You can add other elements or style your email within the Design page. Once finishing, you should preview and test the emails.
- Enter preview mode – See how your email looks like on both mobiles and desktop screens
- Send a test email – Send a test email to yourself
Send Password Protected Content to Your Subscribers
You’ve created high-value content and don’t want all visitors but only your subscribers to access it. Just password protect these posts to prevent unauthorized users from opening them. Then, you can send subscribers passwords or bypass URLs to unlock these pages and posts.
Password Protect WordPress Pro plugins and its Mailchimp Integration extension prove the most powerful tools to support this.
The way these 2 plugins work is pretty simple. Once a subscriber signs up to your email list, a new password will be automatically created and stored on your MailChimp user’s list. You can embed this password in any of your email campaigns and send it to subscribers.
Use MailChimp to Send New Posts to Subscribers
Updating subscribers on new blog posts gives them additional information about your business and products without pushing them to make purchases all the time.
To send the latest posts, you need to create a signup form so that your site visitors can subscribe and be added to your email list. After that, set up your MailChimp RSS feed campaign and create an email template. As a result, once users sign up, they will get the new blog post automatically.
You’re able to create private content and send it to subscribers too. Just install the Password Protect WordPress Pro plugin and its Mailchimp Integration extension and they will help you handle the rest smoothly.
