Networking events are considered a powerful marketing asset to help any business grow. When holding a meetup, you’re building new relationships with potential clients, partners, and investors.
Since events turn around a single topic, you have a chance to introduce your business to the targeted audience. You can position yourself as an authority as well as increasing sales for the business.
It’s relatively simple to add events to your WordPress site if you have the right tool. Do you know that you can also restrict the specific attendees from registering for these events? If you’re looking for a solution to create a private meetup with a password, you’ve come to the right place.
In this article, we’ll discuss 3 main points: reasons why you should password protect WordPress events, how to add an event to your WordPress site, and the process of password protecting it.
Let’s get started with the basics!
Why Password Protecting WordPress Events?
There are several kinds of WordPress events you may not want all users to attend, for example, an internal training course or a workshop for the company’s employees. Similarly, some other member-only conferences are created just for special attendees like VIPs or vendors.
Another use case of protected events comes to the company’s internal training. Instead of providing personal training, you can gather newbies together and hold an orientation workshop at the same time. This process saves you a lot of time and effort. While everyone receives the same training, you can test if any performs more excellently than the others.
How to Create an Event on WordPress
Among dozens of plugins supporting event creation, WP Event Manager shows up as one of the best tools.
Trusted by more than 10 thousand users from pole to pole and receiving a 4.7-star rating, WP Event Manager provides a powerful solution to create and manage events on your WordPress site. You’re allowed to add event registration, bookings, or Google Calendar.
This feature-rich plugin makes it simple for you to set up and customize events. The plugin enables you to add, manage, and categorize event listings using the familiar WordPress UI within seconds.
WP Event Manager offers a free version available on the WordPress repository with a lot of useful features available. To extend the plugin capability, you can enjoy their Pro add-ons such as Calendar, Google Maps, Registrations, and more.
To create an event on your WordPress site, take 3 main steps below:
Step 1: Install the WP Event Manager plugin
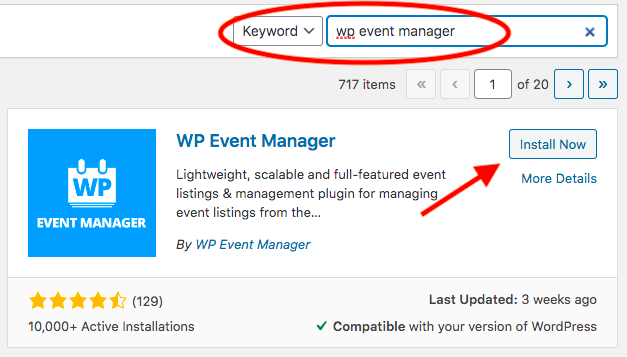
- Go to Plugins in your WordPress dashboard and choose Add New
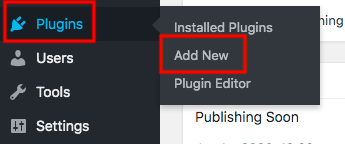
- Type “wp event manager” in the keyword box
- Install and activate the plugin
Step 2: Add a new event
Upon activation, the plugin will be inserted directly into your WordPress sidebar. To create an event:
- Visit the Event Manager section and click on Organizers

- Click Add New and fill in the name of the organizer as well as their important data like email or setting the logo
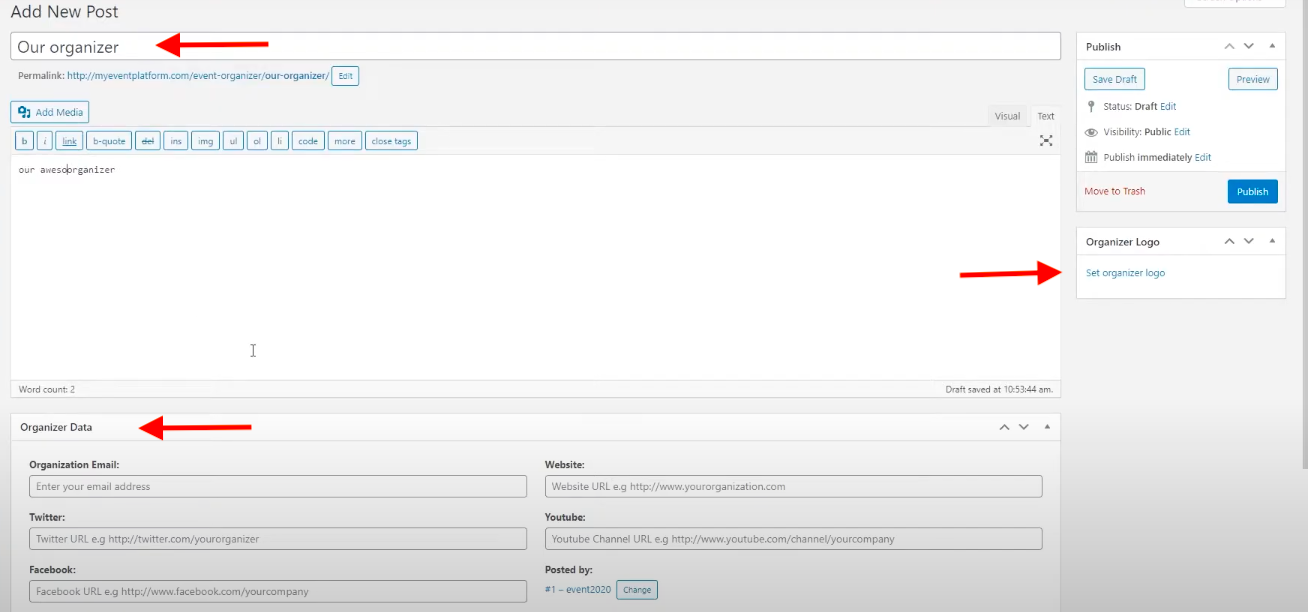
- Publish the organizer page
- Head to the Add New option under Event Manager
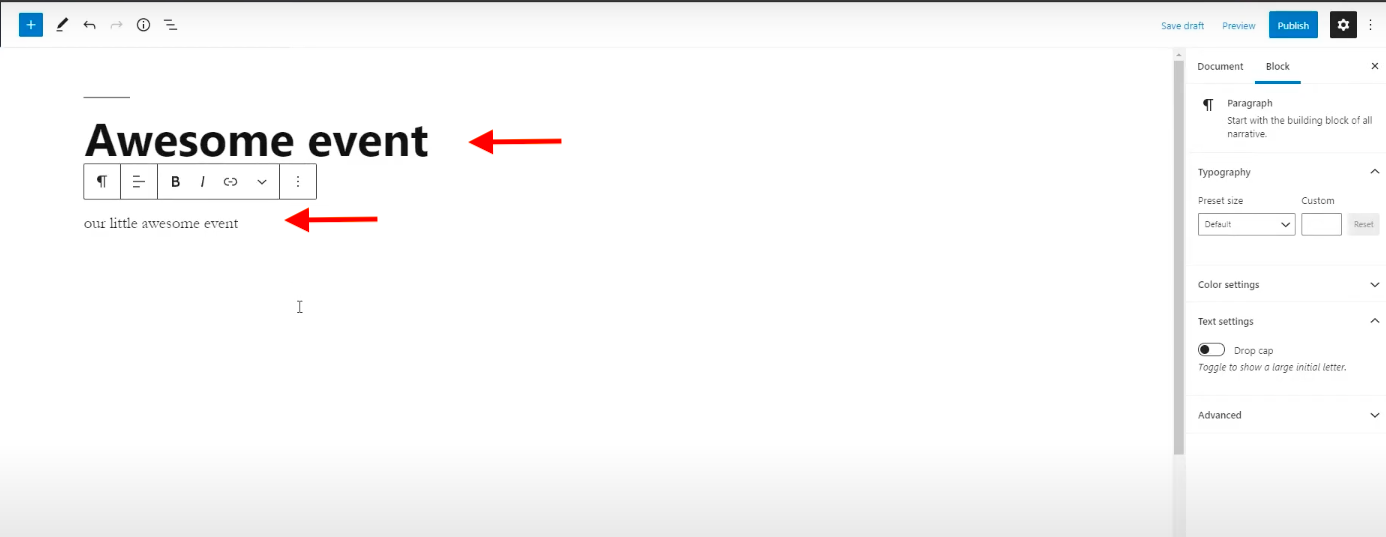
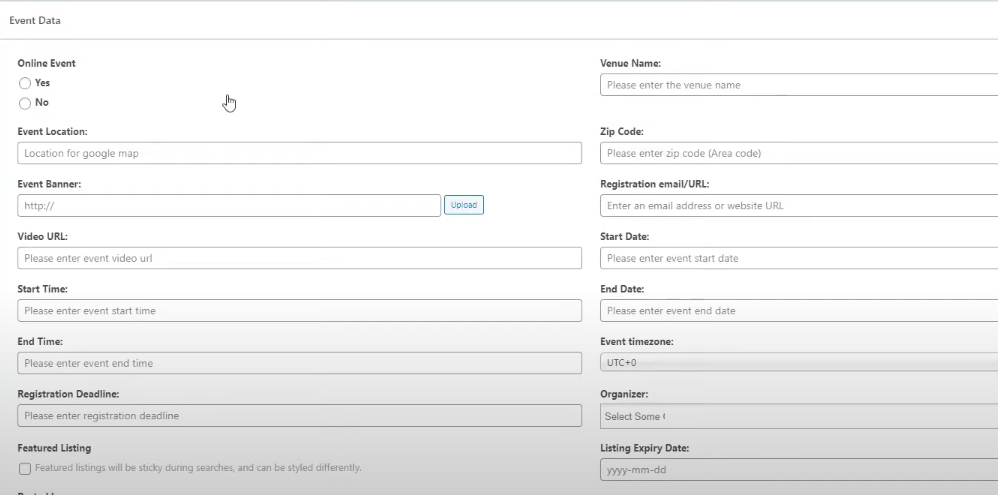
- Enter the event title, its description, and modifying its data
- Preview and publish your event
It’s possible for you to decide whether it’s an online or offline event. You can apply an event type to your newly added event. There are 20 different options for you to choose from, e.g. Appearance or Signing, Attraction, Camp, Trip, or Retreat, etc.
You can also create your own event type by going to Event Manager >> Event Types. In the “Add New Event type” area, enter the type name and slug. Then, pick a parent type (optional) and click the Add New Event type button.
How to Password Protect Events in WordPress
Some people choose to secure event pages using the WordPress default password protection feature. However, it locks the event with only one password, which means both logged-in and non-logged can use this password and access your member-only events. Due to those limitations, you need to seek help from a more effective third-party plugin.
You can use the Password Protect WordPress Pro plugin to restrict access to your WordPress meetups. The plugin primarily comes as a page, post, and entire site password protection solution. On top of that, you can keep folks from snooping around custom post types and events in particular.
The plugin works only when you install both Lite and Pro versions. Following this guide to set up and start using the plugin.
Step 1: Install PPWP Lite plugin
- Head to Plugins then click Add New in your WordPress dashboard
- Type “password protect wordpress” in the keyword box
- Install and activate the plugin
Step 2: Install PPWP Pro
- Download PPWP Pro plugin
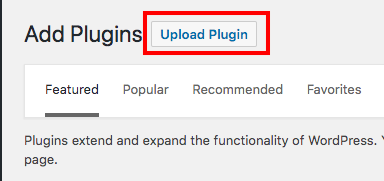
- Go to Add New under Plugins in your WordPress sidebar
- Click Upload Plugin and choose the zip file you’ve just downloaded
- Activate the plugin
Step 3: Password protect events
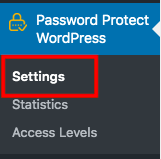
- Visit the plugin Settings page
- Select Events in the Post Type Protection option
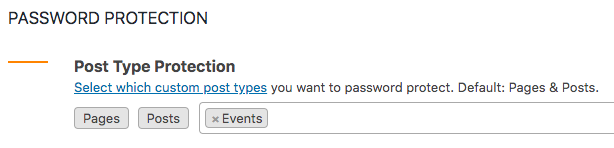
- Save your changes
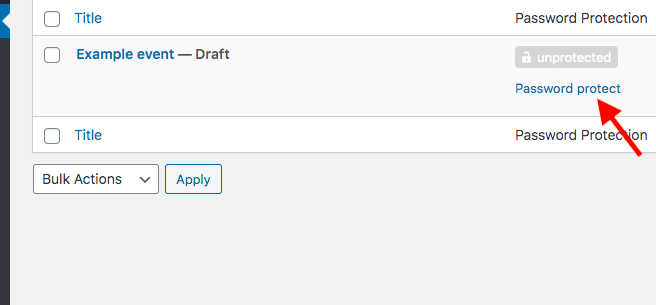
- Go to the Events page and find your desired event
- Click the link Password protect
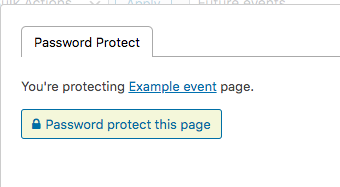
- Hit the Password protect this page button in a popup screen. A random password will be created automatically
- Generate your own password by going to the New Password tab
- Enter your password and other information
You’re enabled to expire passwords after a number of usages or a period of time. You can set user roles for each password. Global passwords authorize all users to fill in the password form. User role passwords, on the other hand, permit only specific logged-in users to join the event.
Would love to protect events while editing them? PPWP Pro supports that too.
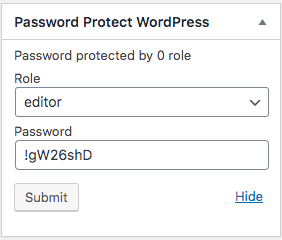
- Open and edit your desired event in your WordPress dashboard
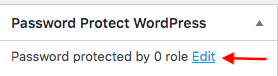
- Find the Password Protect WordPress section at the top right corner of the page
- Enter your passwords. Each password must be displayed on a separate line.
- Set roles for each password if necessary
Password protect multiple events at the same time
Locking individual events might take you a lot of time. You have to open each page, set passwords, and update the event page. That’s why PPPW Pro comes up with the multiple pages password protection feature. Here is how you can secure various events at the same time:
- Go to the plugin Settings page
- Scroll down to Password Protect Private Pages option
- Select Events in the dropdown list
- Enter your password
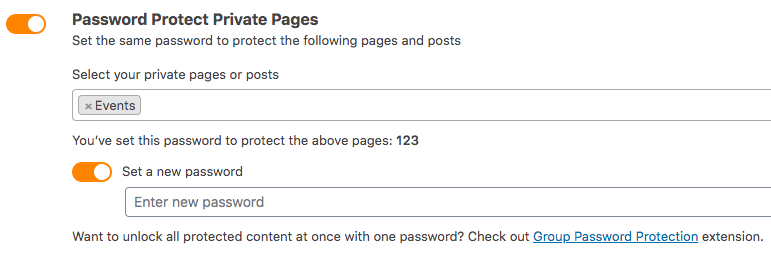
- Hit Save Changes
All your event pages are automatically protected with a password now. Users must enter correct passwords in order to access or join them.
Create Your Own Password Protected Events Today!
Holding events or meetups should be a part of your marketing strategy. They help you connect with clients, establish yourself as an authority, and increase sales.
Although you can add events to your WordPress site with code, we recommend using the WP Event Manager plugin. As the developers take all the hard work, all you need to do include installing the plugin, adding a new event, and entering the required information.
Once creating WordPress events, you should protect them with passwords. PPWP Pro allows you to restrict unwanted users from registering or joining the event with a few simple clicks.
If you have any questions about how to create a password protected event on your WordPress site, let us know in the comment below!
