We know that you’ve put a lot of time and effort to ensure that every link will lead to a specific page on your site. Unfortunately, there is always a chance that visitors click on broken links. At that time, they’ll be prompted to a 404 page, which is also known as an “error page” or “Page Not Found” page.
By default, this page only indicates that the web server could not find the requested page without any additional information. If your visitors get an error, why not present them with a more useful message than the default one?
In this article, we’ll guide you on how to add more information to your 404 pages. We’ll also show you 3 different methods to create your own eye-catching 404 page effortlessly.
Let’s go!
Why Making a WordPress Custom 404 Page
You, or your website’s visitors, will typically encounter a 404 Not Found error when trying to open a URL that doesn’t exist. Chances are you or your visitors have:
- Clicked a broken link
- Mistyped a URL
- Don’t have permission to access the URLs
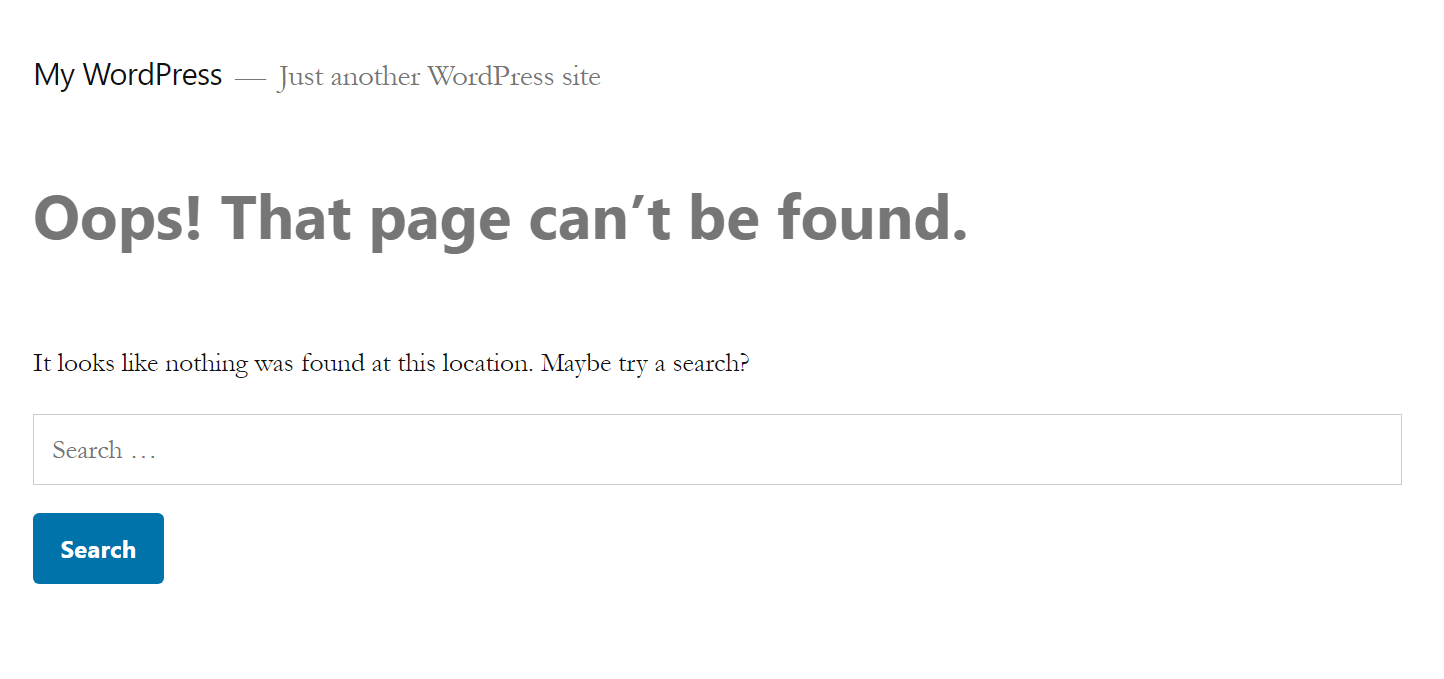
The default 404 page is something bland and unhelpful like this:
This can immediately frustrate your visitors. Also, when facing this error, their only choice is to hit the back button or go back to Google and search again. This will increase the bounce rate and affect your site SEO.
That’s why you should customize your 404 pages by adding a few more helpful links and possibly a little humor. Accordingly, your visitors will easily know where and how to access the right place.
How to Customize Your WordPress 404 Page
Overall, there are 3 basic methods to customize your 404 pages. In the following sections, we’ll walk you through one by one.
- Customize 404 Page by Editing Theme Editor
- Create Custom 404 Page via Page Builders
- Create Custom 404 Page Using Plugins
Customize 404 Page by Editing Theme Editor
Every theme has its own default 404 page template.
To customize this page, simply navigate to Appearance > Theme Editor in your admin dashboard.
In the list of theme files along the right side of the page, choose 404.php.
Here, edit the message text as you want then save your changes.
Below is the default 404.php of our theme:
<?php /** * The template for displaying 404 pages (not found) * * @link https://codex.wordpress.org/Creating_an_Error_404_Page * * @package WordPress * @subpackage Twenty_Nineteen * @since Twenty Nineteen 1.0 */ get_header(); ?> <div id="primary" class="content-area"> <main id="main" class="site-main"> <div class="error-404 not-found"> <header class="page-header"> <h1 class="page-title"><?php _e( 'Oops! That page can’t be found.', 'twentynineteen' ); ?></h1> </header><!-- .page-header --> <div class="page-content"> <p><?php _e( 'It looks like nothing was found at this location. Maybe try a search?', 'twentynineteen' ); ?></p> <?php get_search_form(); ?> </div><!-- .page-content --> </div><!-- .error-404 --> </main><!-- #main --> </div><!-- #primary --> <?php get_footer();
The default 404.php file will provide the user with your site’s basic navigation.
So, to change the error message your visitor sees, revise the text within the h1 heading and within the page-content class. If necessary, add a few more paragraphs below that.
Create Custom 404 Page via Page Builders
Currently, most page builders provide you with the option to create 404 pages. In this article, we’ll go with Elementor – one of the most popular page builders currently.
The plugin’s visual and drag-and-drop builder enables you to create your own custom 404 page with ease. With the Pro version, you can create a more user-friendly 404 page, add some of your own branding, and maybe even build a connection with some humor.
Now, let’s see how to have a stunning 404 page!
Step 1. Create a New 404 Page Template
Once you have Elementor Pro installed and activated, go to Templates > Theme Builder > Add New.
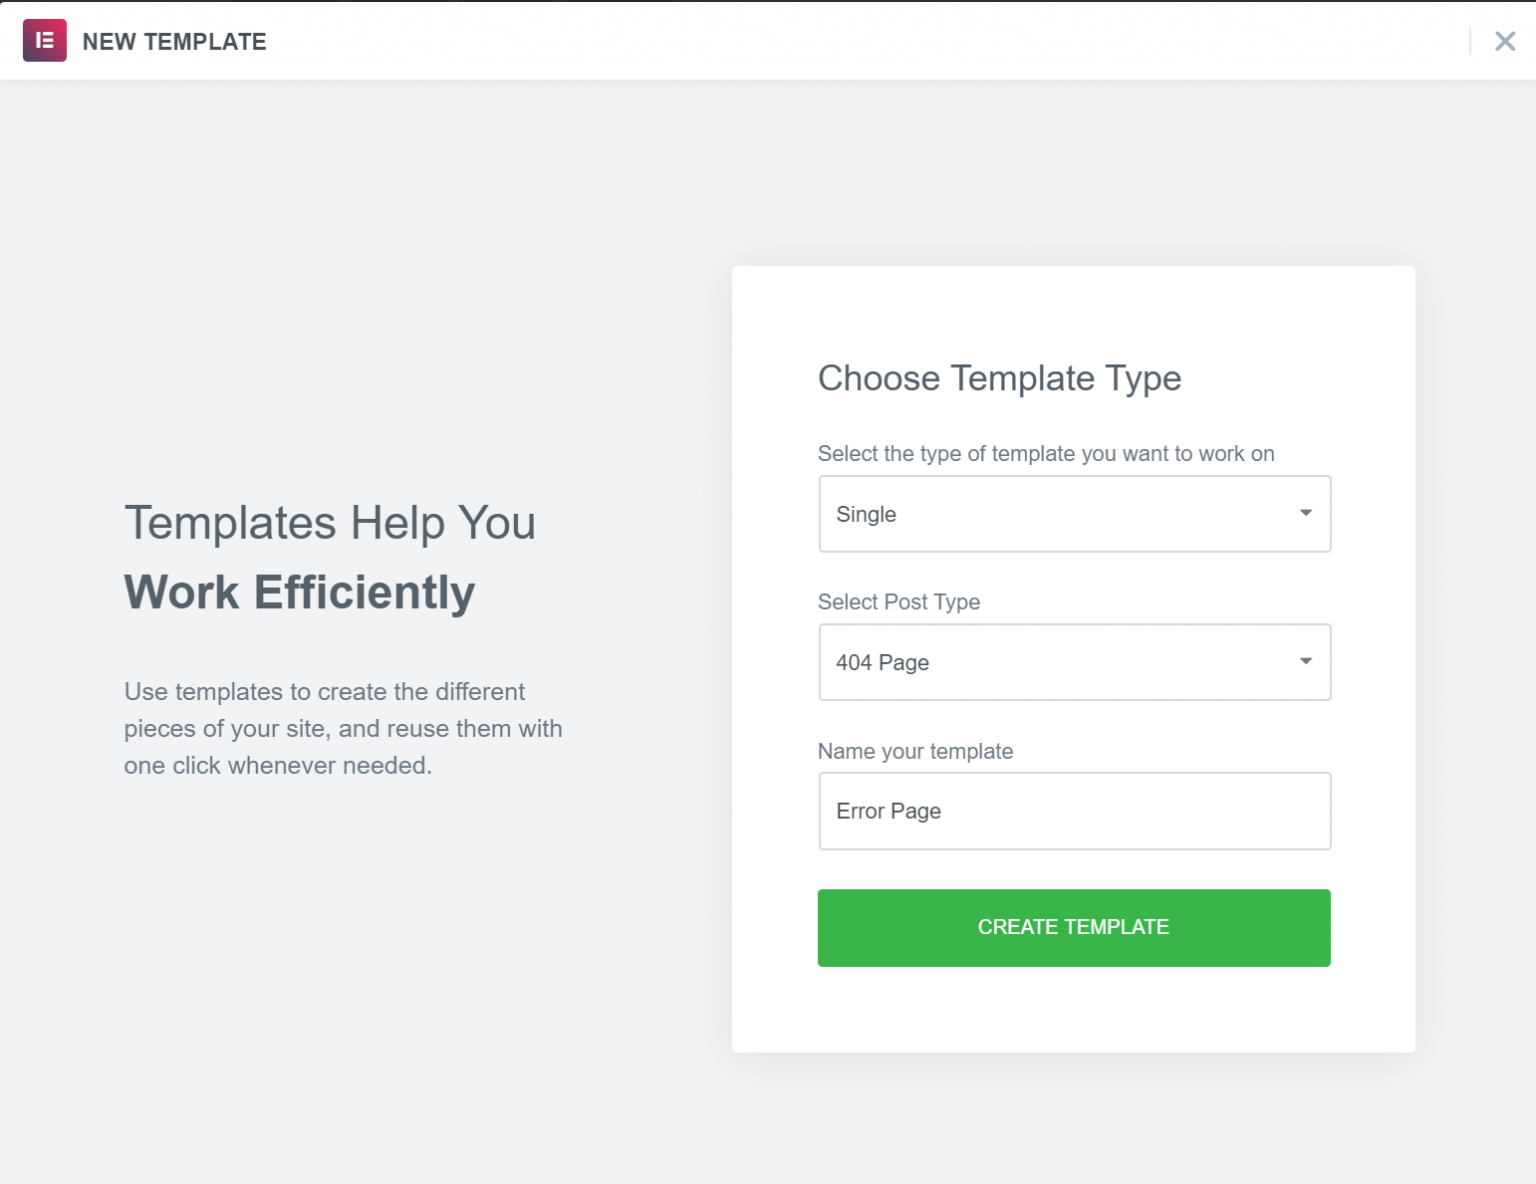
Here:
-
- Select the type of template you want to work on: Single
- Select Post Type: 404 Page
- Name your template: e.g. Error Page
Please notice that, don’t use “404” as the name for your template since it’ll cause issues with WordPress’ permalinks.
Once you’re done, click Create Template.
Step 2: Choose Pre-Made Template or Design a New One
Once pressed the Create Template button, you’ll see a list of 404 page templates.
You can get started by picking one of pre-designed templates and then customize it to your needs.
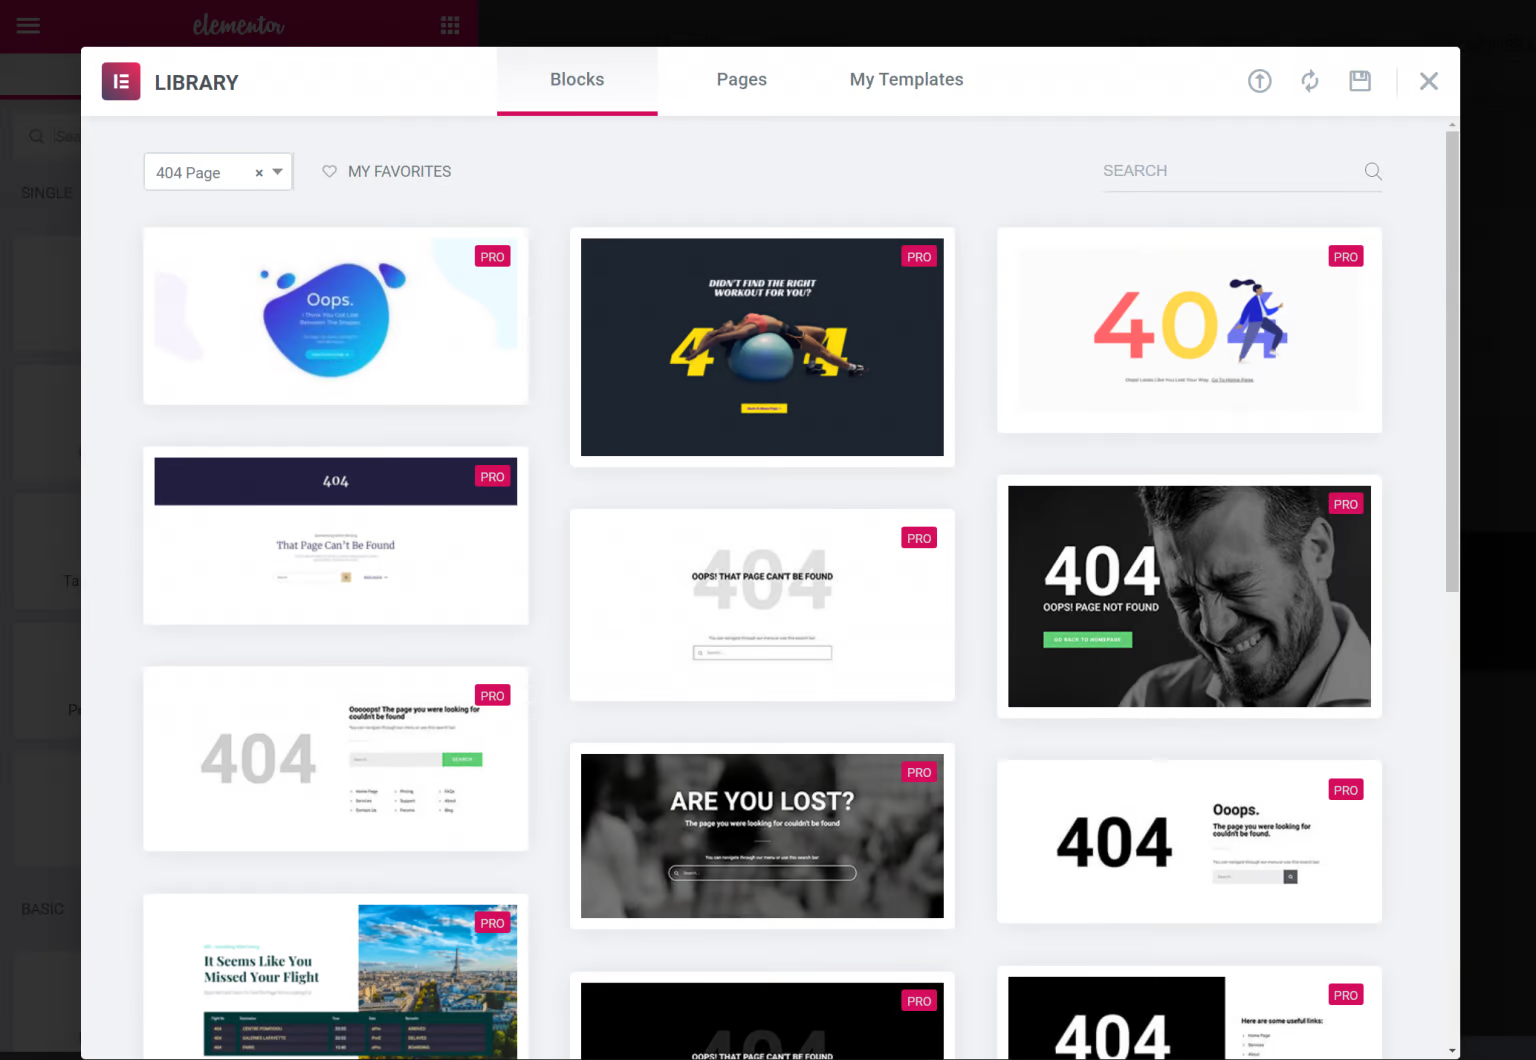
Or, you can just close the templates to build your own 404 page from scratch.
Step 3: Design and Customize Your 404 Page
No matter whether you use one of the pre-made templates or design your own page from scratch, you’re able to use the regular Elementor interface and all of the widgets to design your page.
For example, to add a search box to your 404 page, all you need to do is include the Search Form widget.
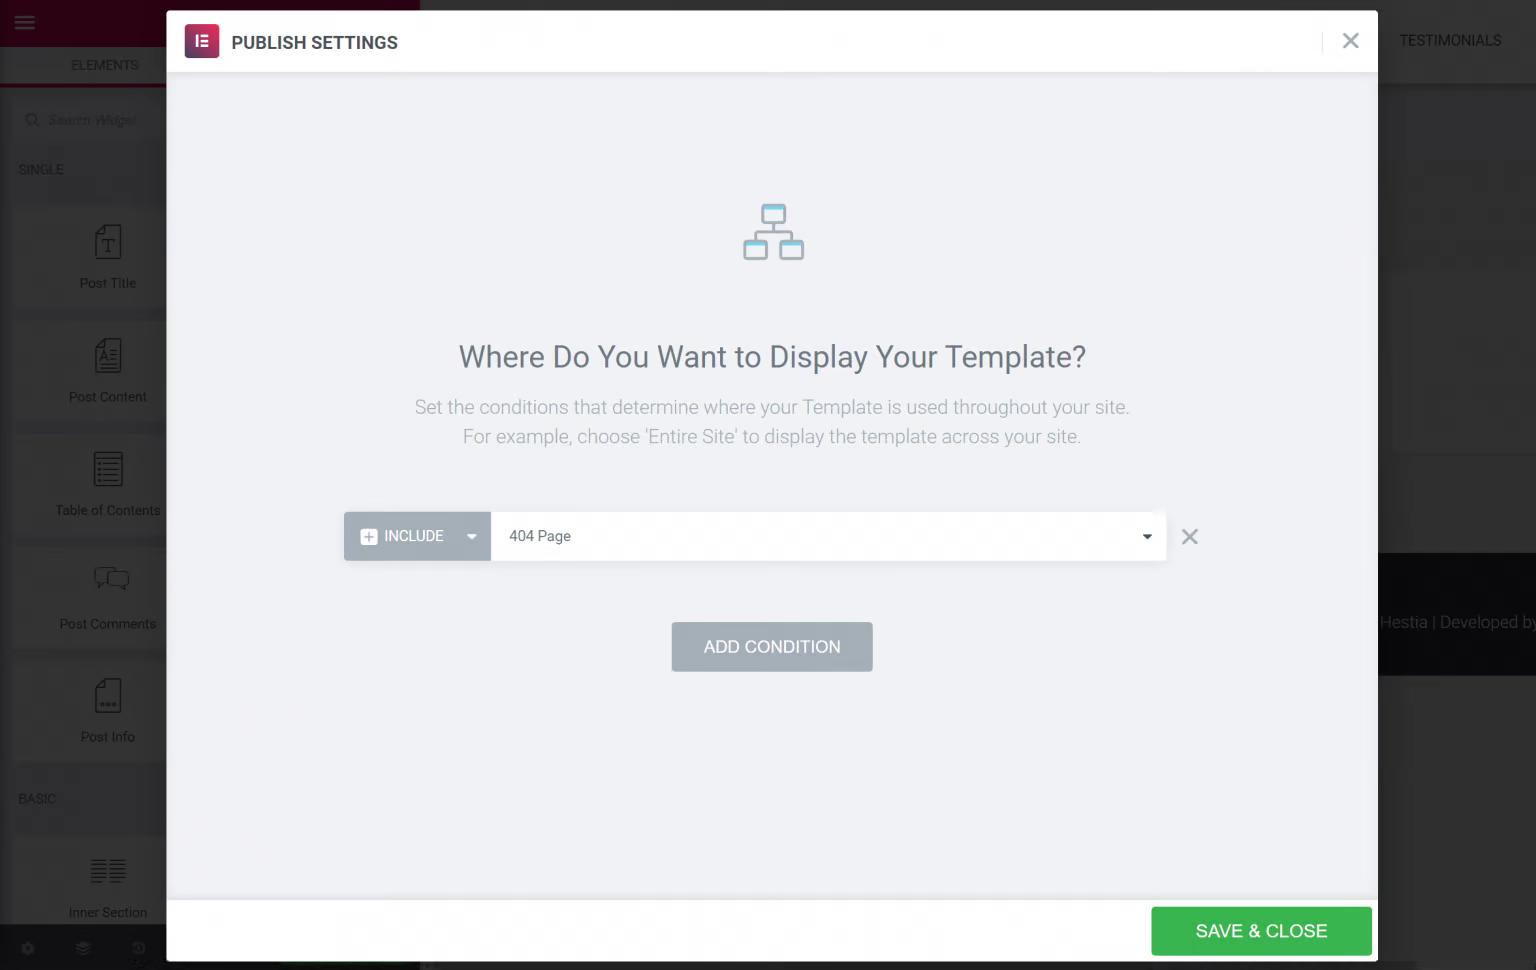
After finishing your design, click to Publish it.
You should then see that Elementor automatically selects the Include rule to display this template on your 404 page. To finish things out, all you need to do is click Save & Close.
That’s it!
Create Custom 404 Page Using Plugins
With 100,000+ active installations, the 404page – your smart custom 404 error page plugin proves the most used plugin to create a customized 404 error page in WordPress.
Now, let’s see how this plugin eases your work!
Step 1: Install the Plugin
Since 404page – your smart custom 404 error page is a totally free plugin, you can always download and install it from the WordPress plugin directory.
To do that, simply go to Plugins > Add New in your admin dashboard. Here, search for the 404page – your smart custom 404 error page plugin.
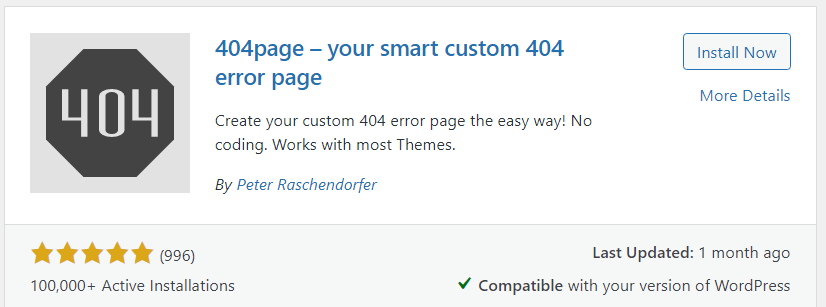
Click Install Now and then activate it.
Step 2: Create Your Custom 404 Page
To create your custom 404 error page, simply go to Pages > Add New and create a new page.
Here, you can add any information, images or text messages to your custom 404 page.
Step 3: Manage the Plugin’s Settings
Navigate to the Appearance → 404 Error Page section in the admin panel.
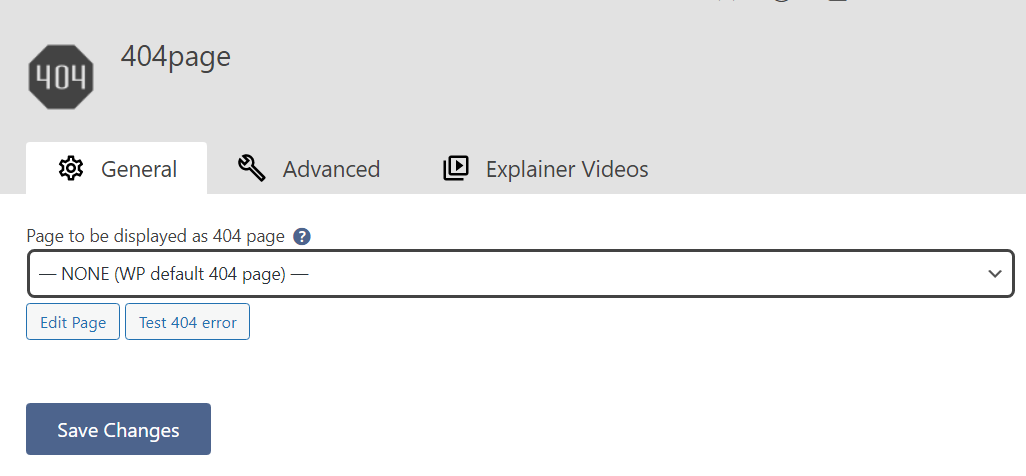
You can manage the plugin’s settings there. At this point, the plugin will show your site’s default 404 page.
For instance, this is the default 404 error page of the WordPress theme:
To choose the created custom page, let’s select your custom page in the Page to be displayed as 404 page’s dropdown menu under the General tab.
Don’t forget to press Save Changes once you’re done.
Once the page is selected and changes are saved, you can click the Test 404 error button to test it. Also, the Edit page button allows you to edit your custom 404 error page directly from here.
For more advanced settings options, switch to the Advanced tab where you can customize how your custom 404 page displays.
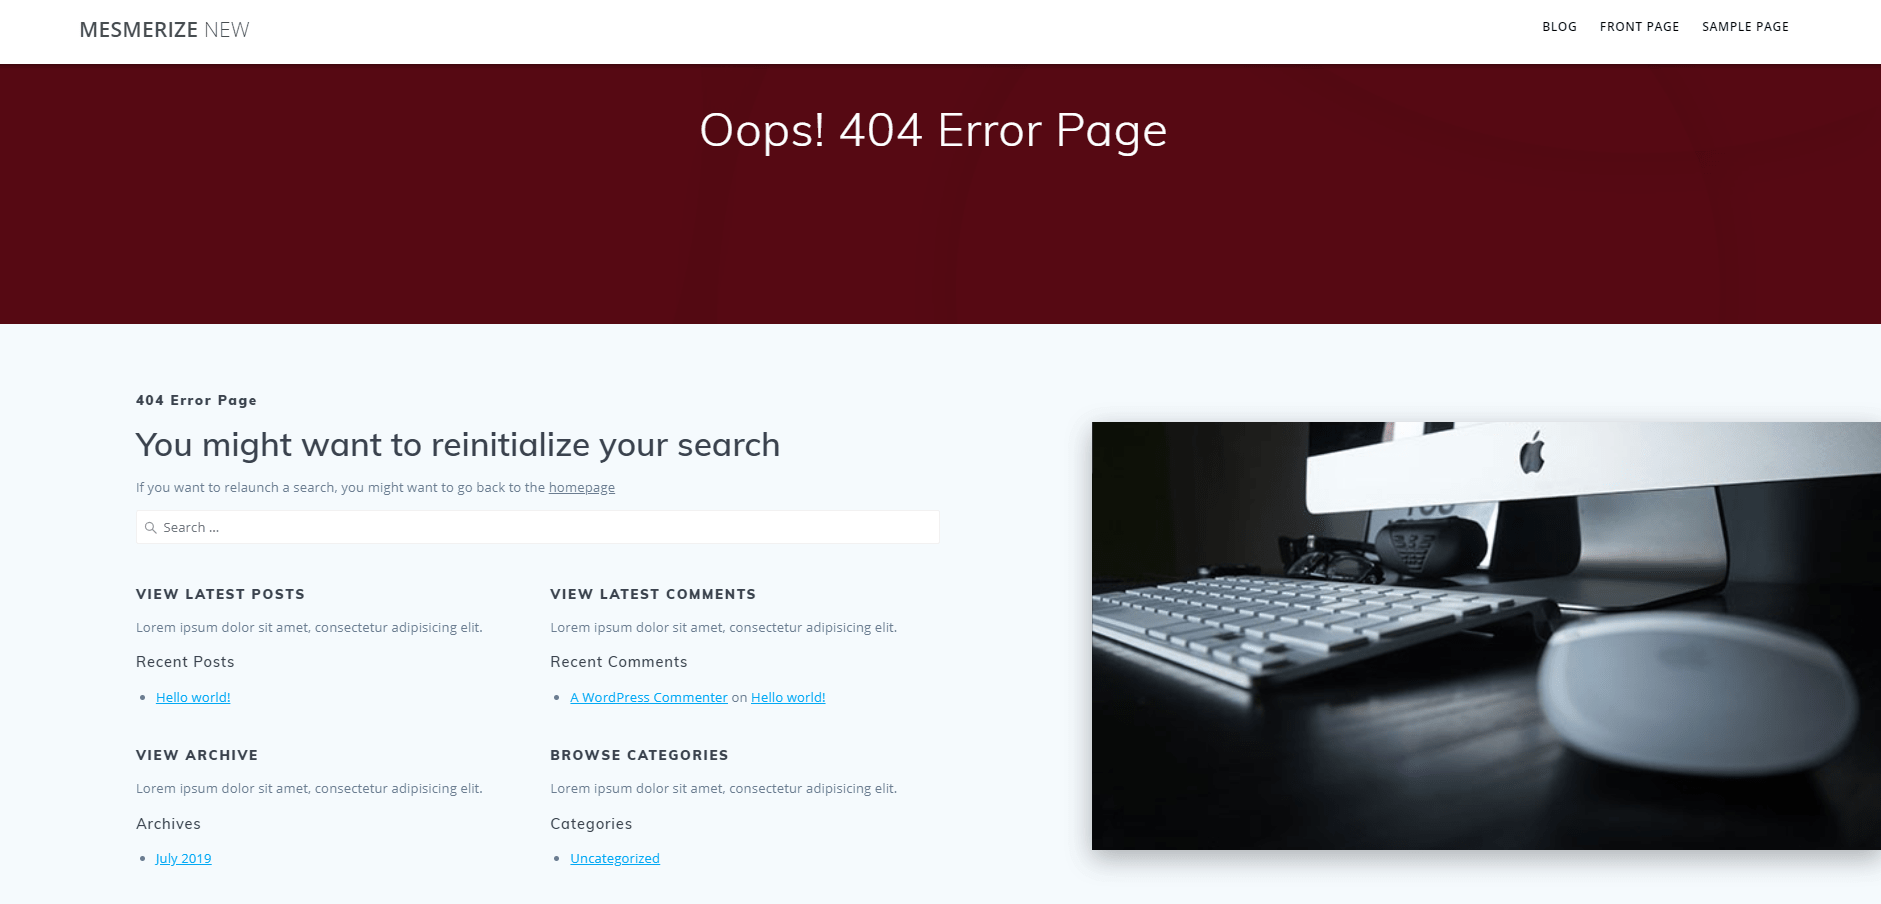
This is an example of 404-error page that we’ve customized with the 404 Page plugin:
You’re done!
Say Goodbye to Boring and Unhelpful 404 Page Today!
There are numerous easy ways to make your 404 page stunning and engaging. So why keep a boring one on your site?
To create a custom 404 page, you can edit the 404.php. file directly on your theme editor. That said, it requires a little coding knowledge.
If you’re non-tech-savvy, consider using page builders or plugins. In this article, we’ve guided how to create a custom 404 page using Elementor page builder and 404 plugin.
Now you have all necessary information at hand. What are you waiting for?
Let’s make your 404 page fancy now!
