Do you know that you can create a WordPress password-protected section?
The built-in WordPress function enables you to protect your content with a password. However, it’s limited in features. You can protect an entire page or post but cannot do the same with a part of it.
To overcome this limitation, you need support from a plugin.
This article will help you pick the right plugin and show you a way to password-protect a page section step-by-step. Plus, we’re going to discover some other powerful protection features such as access restriction and password bypass.
Read on!
- Why Do You Need a WordPress Password-Protected Section?
- #1 Protect a Section of a Page with Passwords
- #2 Manage WordPress Password-Protected Sections
- #3 Bypass Partial Protection with Quick Access Links
- #4 Whitelist Roles to Access Password-Protected Sections
- #5 Secure Multiple Sections with a Single Password Form
- #6 Unlock All Protected Sections with a Master Password
Why Do You Need a WordPress Password-Protected Section?
Password-protecting a part of page content benefits you in some cases. It allows you to protect important parts of a page without having to hide the entire page content.
Let’s say you’re a book writer or a blogger who just wants to publish the trailer and abstract of your book or article. Readers must pay or sign up to read all the content of your works.
Or, imagine you run an eCommerce store and sell digital products. Sometimes you may wish to hide your product download links on the product page without covering the product introduction. Only paid customers or members can access the protected link and download your product.
In those situations, the assistance from a plugin will enable you to protect a page section with passwords.
In the midst of plugins, PPWP Pro stands out as the most powerful tool to meet the demands. Let’s see how it can help you in action.
#1 Protect a Section of a Page with Passwords
PPWP Pro encourages you to protect not only the entire page but also partial page content.
- Install and activate the plugin.
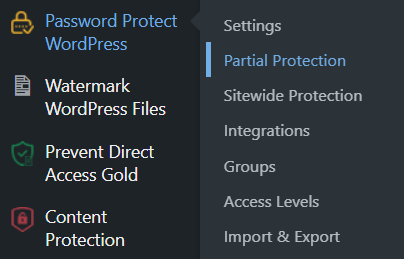
- Navigate to Password Protect WordPress → Partial Protection in the WordPress admin dashboard.
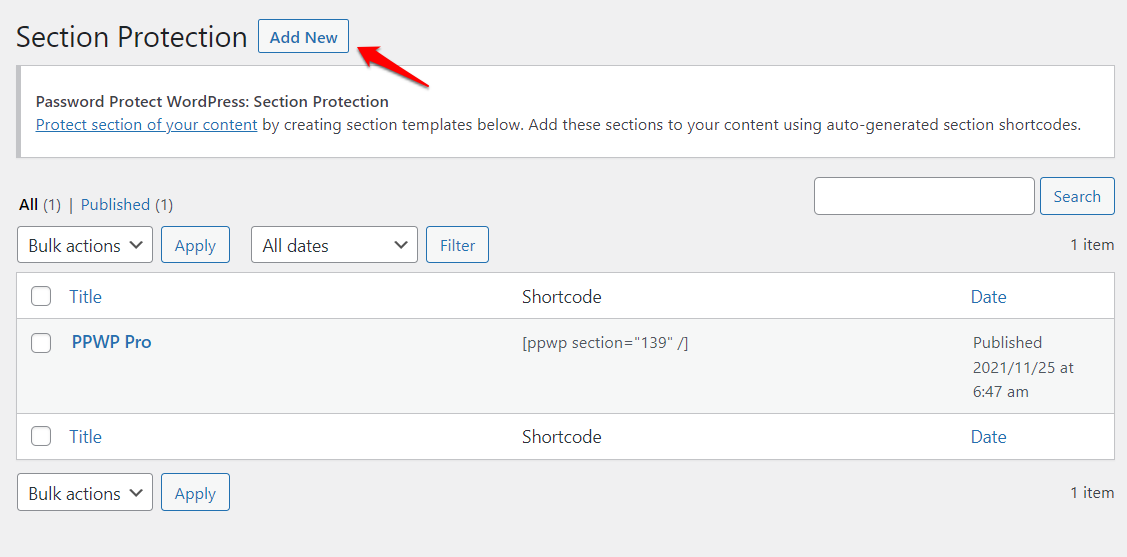
3. Switch to the Section Protection tab.

4. Select Add New to create a new content section.
5. Insert content and create passwords to protect it under the Passwords field. You can set as many passwords as you wish.
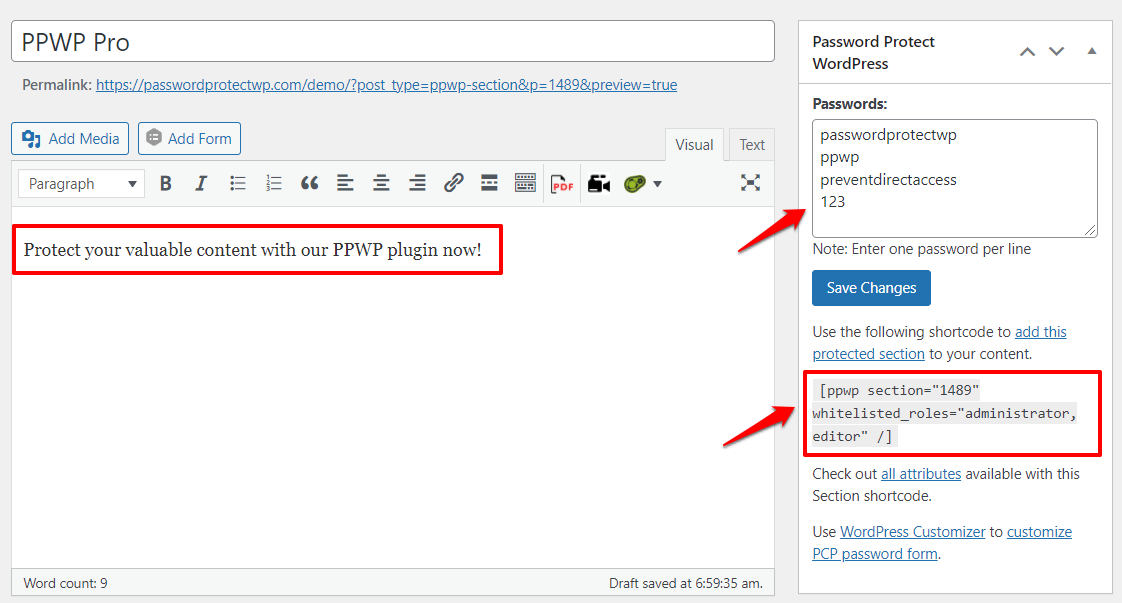
6. Press Save Changes and Publish your content section. Then the plugin will automatically generate a shortcode for that protected content section.
7. Embed the protected section into your page or post by copying and pasting the auto-generated shortcode.
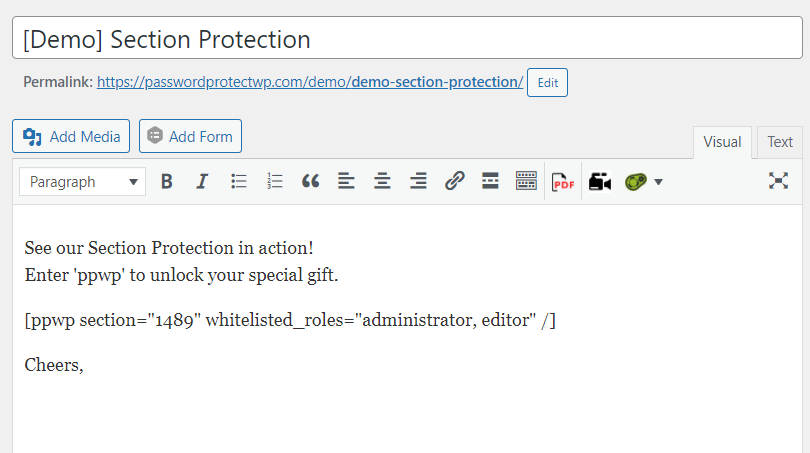
8. Hit the Publish button. Now, your page will look like this:
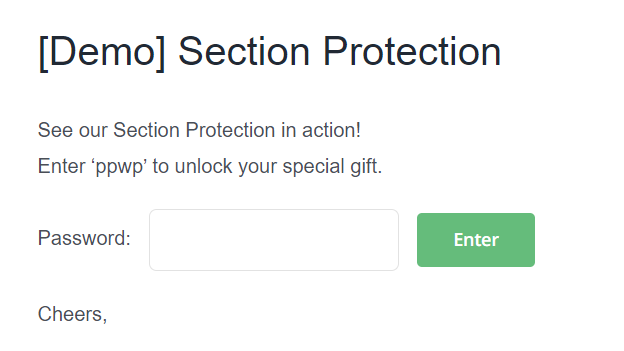
Site visitors must enter the correct passwords to view the protected content section.
#2 Manage WordPress Password-Protected Sections
PPWP Pro gives you an intuitive dashboard to manage all your password-protected content sections.
- Head over to Password Protect WordPress → Partial Protection in the WordPress admin dashboard.
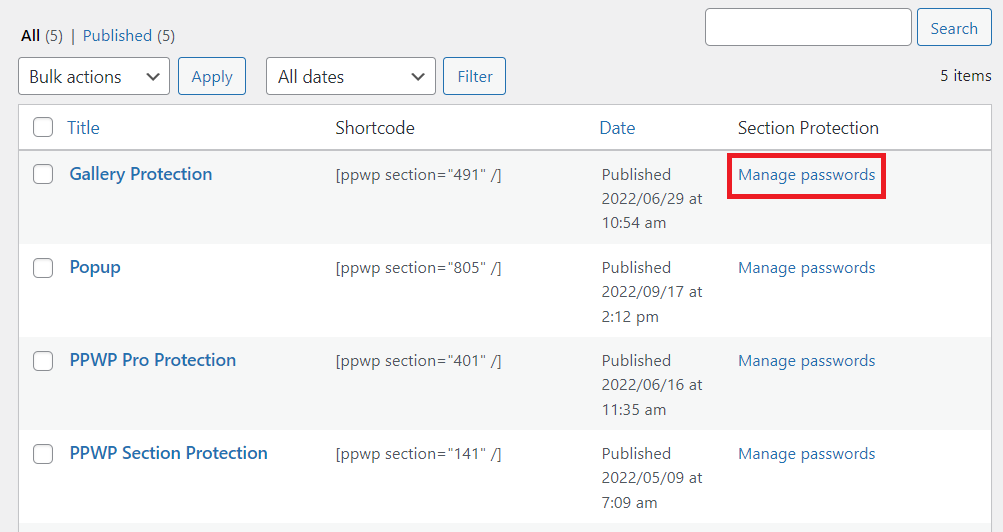
- Choose the Section Protection tab. Here you are able to view all the WordPress password-protected sections.
- Select Manage passwords. A popup will show up.
4. Click Auto-generate a new password in case you need a new password for your section.

5. Set the Usage Limit and Password Expiry to your liking. This prevents your users from sharing the passwords with others. In the popup, you can see the password status and the number of passwords used.
#3 Bypass Partial Protection with Quick Access Links
Occasionally, you may want authorized visitors to access your protected content directly without entering passwords. This helps save them a huge time.
With the assistance of PPWP Pro, this is no longer an impossible task.
- In the Manage passwords popup, get the access token by clicking the Copy Access Token button.
For example, the access token can look like this:
?ppwp_sc=eyJwYXNzd29yZCI6IiFrejk0UXVuIn0=
2. Combine your page URL and the access token to create a quick access link (QAL). Here is an example:
https://passwordprotectwp.com/demo/demo-password-protect-wordpress-content-section/?ppwp_sc=eyJwYXNzd29yZCI6IiFrejk0UXVuIn0=
Now, send the link you’ve generated to your users. They can access your protected content directly via this link without filling in the password form.
#4 Whitelist Roles to Access Password-Protected Sections
Besides QALs, it’s possible to bypass WordPress password-protected sections using the PPWP Pro’s whitelisted roles. In simple terms, you can allow specific user roles to reach the protected content without entering passwords.
- Go to Password Protect WordPress → Settings in the admin panel.
- In the Whitelisted Roles drop-down menu, choose the user roles you would like to grant access to protected sections.

If you select Admin users, only logged-in users who have the Admin role can open the protected content sections. Others can’t view the content even though they have the correct passwords.
#5 Secure Multiple Sections with a Single Password Form
Once you password-protect your content partially, each password-protected area will be hidden under a password form. This is quite annoying for users when you have multiple protected content sections on one page. They are probably confused about the forms and corresponding passwords.
To get rid of this problem, PPWP Pro facilitates displaying a single password form and hiding the others.
For instance, you want to create two protected sections for two types of users. One section can be accessed with the password “type1” and the other can be unlocked with the password “type2”.
Add the shortcodes below to your content.
[ppwp passwords="type1 type2"] [/ppwp]
[ppwp passwords="type1" hidden_form_text="" ] Protected content for type 1 [/ppwp]
[ppwp passwords="type2" hidden_form_text="" ] Protected content for type 2 [/ppwp]
Now, only one password form will show up instead of two as usual. If users enter the password “type1” in this form, content section 1 will appear. In case they fill in the form with the password “type 2”, they will see the content section 2.
#6 Unlock All Protected Sections with a Master Password
Another interesting feature of PPWP Pro is the master password. Your users can view all protected sections using the same password across different pages, posts, and custom post types.
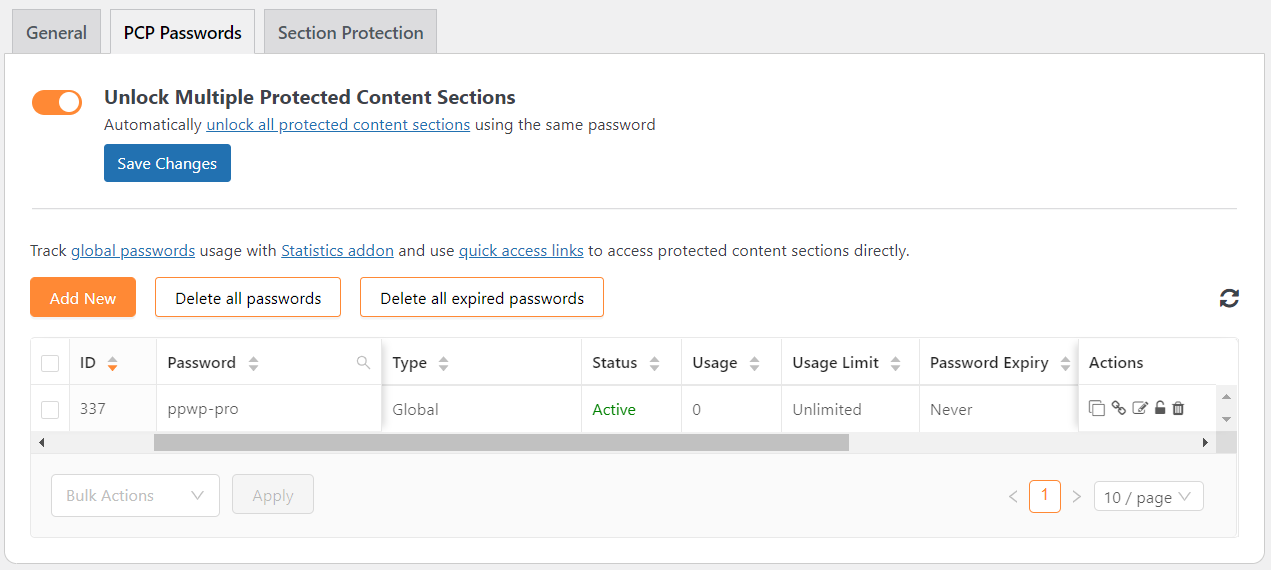
- In the admin panel, navigate to Password Protect WordPress → Partial Protection → PCP Passwords.
- Enable the Unlock Multiple Protected Content Sections option.

To illustrate, you protect a section in post A and another section in post B with the same password “ppwp”. After enabling this feature, your users can unlock those 2 protected sections simultaneously using the password “ppwp”.
In other words, when users unlock the protected section in post A, they can access the protected section in post B without re-entering the password.
Another way to open all protected sections is using global passwords.
- In the admin dashboard, head over to Password Protect WordPress → Partial Protection → PCP Passwords.
- Press the Add New button to generate a global password. You can add as many passwords as you wish.
3. In the Add New Password popup, configure the New Password, Usage Limit, and Password Expiry to your liking.
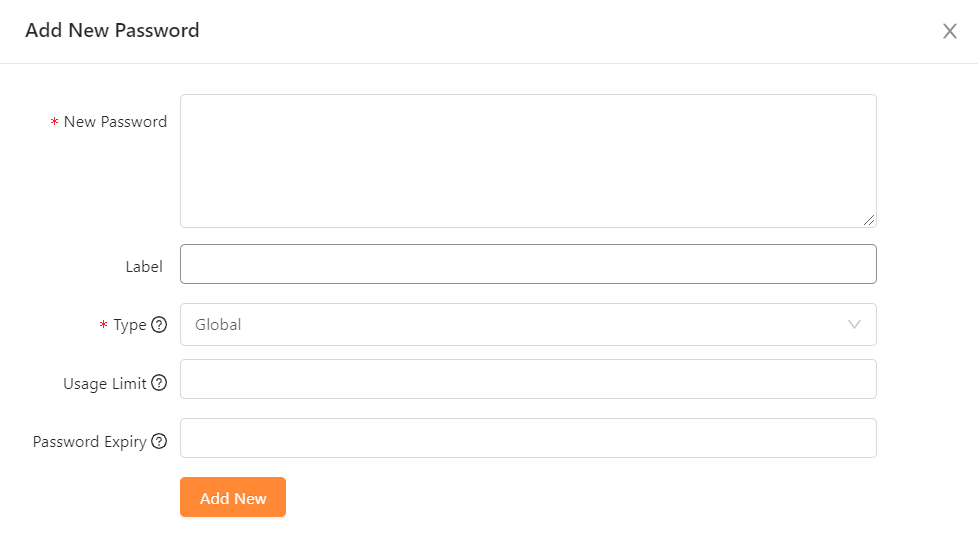
4. Hit the Add New button to finish creating a global password. Your password will appear under the PCP Passwords tab corresponding with an ID.
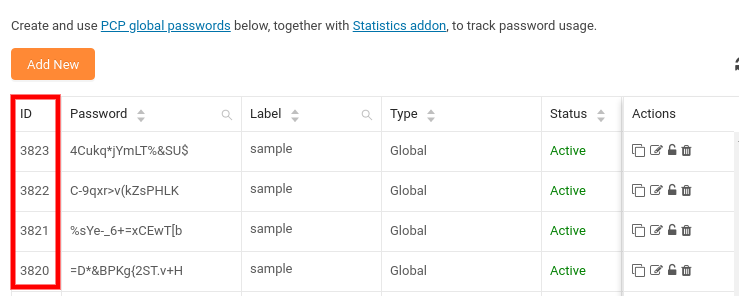
5. Simply copy the password ID and paste it to the shortcode as follows. Then embed the shortcode in your content.
[ppwp pwd="3820,3821,3822,3823"] Your protected content [/ppwp]
In this case, if the user enters one of the passwords with the ID numbers 3820, 3821, 3822, or 3823, all your protected content will be unlocked.
Create a Password-Protected Section with Ease!
Protecting a content section of a WordPress page has never been so simple with the PPWP Pro plugin.
Besides securing a section, it also provides you with plenty of other powerful features. You can manage all your passwords in a single dashboard, bypass passwords for specific users, and unlock protected content all at once.
That’s everything about how to create WordPress password-protected sections. Don’t forget to subscribe to our website for more useful tutorials.
