WordPress gives you everything to build a website from scratch. It offers you diverse built-in functions as well as a thousand plugins for you to achieve what you need. However, sometimes using multiple plugins at the same time will lead to inconsistencies in the UI. Fortunately, you can customize everything with WordPress.
One of the most frequently asked questions is: “how do I change the button color in WordPress?”
So in this article, we’ll guide you through:
- How to Change Button Color via WordPress Theme
- How to Change Button Color in Woocommerce
- How to Change Submit Button Color in Password Forms
Now, let’s jump in!
How to Change Button Color via WordPress Theme
The easiest way to customize the button color within your site is using WordPress themes.
To change the button color via themes, simply navigate to Appearance > Customize > Additional CSS in your admin dashboard.
Here are some sample CSS codes that you use to change the color of all buttons on your site.
For icons and buttons in your footer:
.social-icons a, #site-footer button:not(.toggle), #site-footer .button, #site-footer .faux-button, #site-footer .wp-block-button__link, #site-footer .wp-block-file__button, #site-footer input[type="button"], #site-footer input[type="reset"], #site-footer input[type="submit"] {
background-color: blue;
color: white;
}
For buttons in your content:
button:not(.toggle), .button, .faux-button, .wp-block-button__link, .wp-block-file .wp-block-file__button, input[type="button"], input[type="reset"], input[type="submit"], .bg-accent, .bg-accent-hover:hover, .bg-accent-hover:focus, :root .has-accent-background-color, .comment-reply-link {
background-color: blue;
}
Bonus tip, you can also change the color of links and menu on your site.
For links on your website:
.color-accent, .color-accent-hover:hover, .color-accent-hover:focus, :root .has-accent-color, .has-drop-cap:not(:focus)::first-letter, .wp-block-button.is-style-outline, a {
color: blue;
}
For the menu:
body:not(.overlay-header) .primary-menu > li > a, body:not(.overlay-header) .primary-menu > li > .icon, .modal-menu a, .footer-menu a, .footer-widgets a, #site-footer .wp-block-button.is-style-outline, .wp-block-pullquote::before, .singular:not(.overlay-header) .entry-header a, .archive-header a, .header-footer-group .color-accent, .header-footer-group .color-accent-hover:hover {
color: blue;
Don’t forget to substitute the color values with the actual colors you want in each case.
How to Change Button Color in Woocommerce
WooCommerce button colors are governed by the theme your site is running. While it’s easy to make general settings for all buttons on your site, there comes a time when you want to customize the button separately.
In this post, we’re going to show you the quickest method to change WooCommerce’s buttons’ color. You can apply this method to other buttons on your site as well.
Step 1: Get the CSS Selector of the Button
The first step is to get the CSS selector of the button. Open your site in Chrome or any web browser, right-click on the button, and select Inspect. We’ll use the Add to Cart button in this example. You can do the same with other buttons.
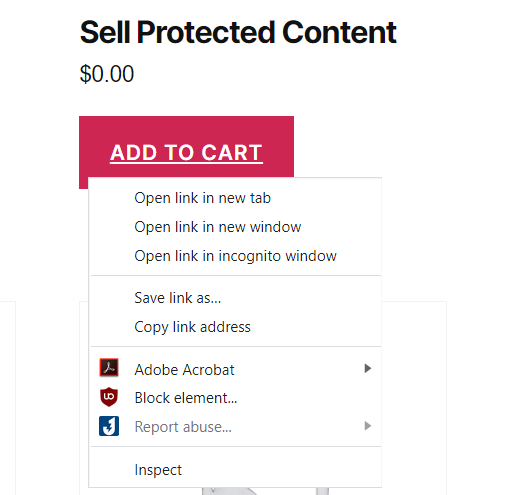
A new window appears. You should see the add to cart button in the HTML code.
Now, pay attention to the class part. The button usually has three classes:
- single_add_to_cart_button
- button
- alt
Step 2: Choose Your Preferred WooCommerce Buttons’ Colors
First things first, let’s pick a color for the button. The quickest way to get a color is to go to Google and search for Color Picker.
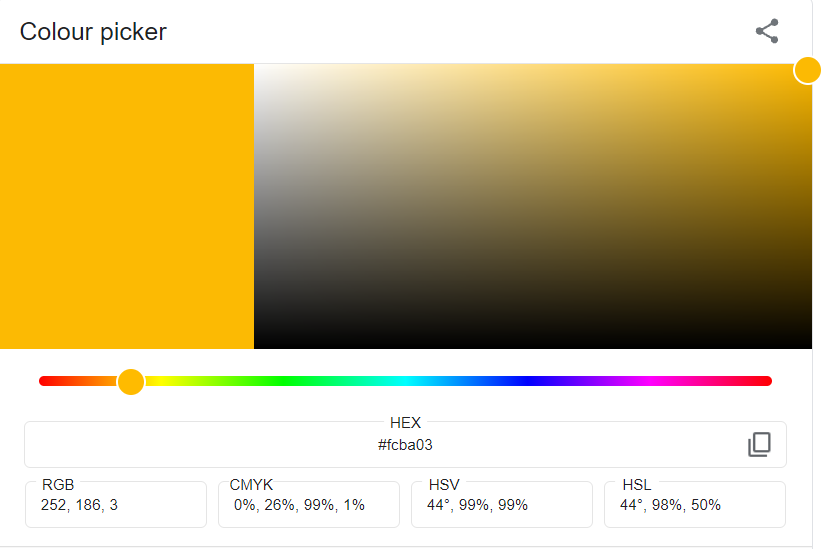
Choose your preferred color here. Once done, copy the code starts with # under HEX. That’s the color code you need for your CSS rule. In the screenshot above, it’s #fcba03.
Step 3: Writing CSS Rules to Change WooCommerce Buttons’ Colors
Navigate to Appearance > Customize > Additional CSS.
Here, put the following code snippet.
button.single_add_to_cart_button.button.alt {
background-color: #fcba03;
}
The box should look like this:
Once you’re done, don’t forget to press Publish for all your settings to be changed.
That’s all! The color of your button in the front end will look like this:

How to Change Submit Button Color in Password Forms
Let’s say you have some premium content that needs to be secured from the public eye. While WordPress offers you the password protection function, it doesn’t give you an option to customize the password form to fit your site design.
That’s when you should give PPWP plugin a try. This plugin not only allows you to password protect your content without hassles but also integrates well with WordPress Customizer. In other words, you don’t need to touch a line of CSS code.
This plugin allows you to customize all your password forms, i.e. sitewide, single, partial ones.
In this article, let’s go through with the single password form.
Step 1: Password Protect Your Content with PPWP Plugin
You can get PPWP plugin on the WordPress plugin directory for free. Let’s say you’ve installed and activated the plugin successfully on your site.
Now, navigate to Pages > Edit page.
Here, you will see our Password Protect WordPress section in the right-hand. Simply turn the switch button on to lock your content. A random password will be generated automatically.

It’s possible to create a custom password with the Add new button.
By default, your content will be protected with a password form like this:

Step 2: Customize the Submit Button Color
It’s time for you to make the submit button more attractive. It can be your favorite color or the color to fit your whole site design.
Whatever it is, simply follow our instructions here to achieve it.
Navigate to Appearance > Customize in your WordPress dashboard.
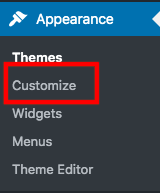
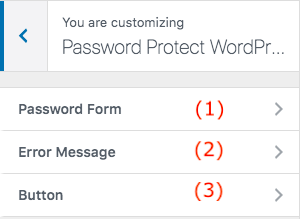
Choose PPWP Single Password Form object in the left-hand sidebar.
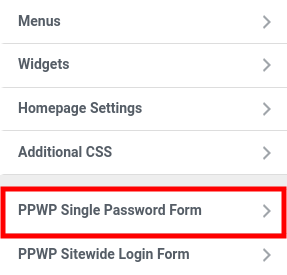
There are 3 options for you to customize. Here, choose Button.
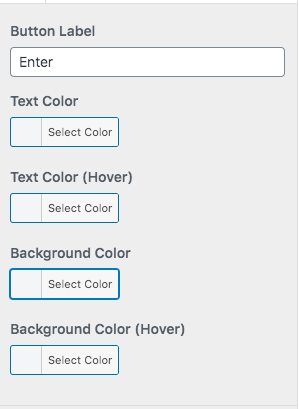
You’re able to modify the button style, from the label, text color to background color.
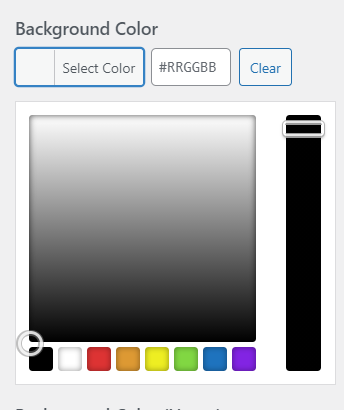
You can select a color directly or paste a color code gotten from Color Picker.
That’s all!
You can also customize other parts of your password forms with ease.
Now You Already Know How to Change Button Color in WordPress
We’ve just walked you through methods to customize the button color on your WordPress site. You can change all the button colors associated with your theme, or only some specific buttons in WooCommerce.
If you’re protecting content with PPWP plugin, simply make your button color as well as your whole password form fancy via WordPress Customizer.
Which methods are you using to customize your button color?
Let’s share with us in the comment section below!

