Did you know that you can create temporary login without passwords in WordPress?
In particular, website owners often hire developers to improve their sites. These developers usually need access to the admin area to get things done. That’s why allowing temporary login without passwords facilitates the development process. Anyone you approve to access can make changes to your site.
Of course, you can create admin accounts on your site for the people you hire. However, you may not want them to permanently access your site. WordPress allows you to delete these accounts later. Likewise, you can also block the user without deleting their account.
But what if you forget that you’ve added someone with the privilege to make changes to your website? This makes your website vulnerable to potential security threats and data breach issues.
At this point, temporary logins will be your savior. In this case, you can create temporary accounts that do not require a password to log in. These accounts will be automatically disabled after a certain period of time.
- Why Is Temporary Login without Passwords Important?
- How to Create Temporary Login without Passwords
- Manage Temporary Logins
- Provide Temporary Access to Password Protected Content
Why Is Temporary Login without Passwords Important?
It is dangerous to open admin access for temporary users all the time, or to share your site’s information.
Additionally, it takes extra time to delete their accounts each time after temporary users are done with their jobs. There is also a possibility that you forget to do so. Hence, creating a passwordless WordPress temporary login will help you a lot.
The coolest thing is that temporary user accounts have a certain period of activity and then automatically expire. The expiration of these accounts will protect your site from all security threats.
Plus, you can determine the period of activity provided to temporary users. This eliminates the possibility of forgetting to delete user accounts.
How to Create Temporary Login without Passwords
First, you have to install and activate the Temporary Login Without Password plugin.
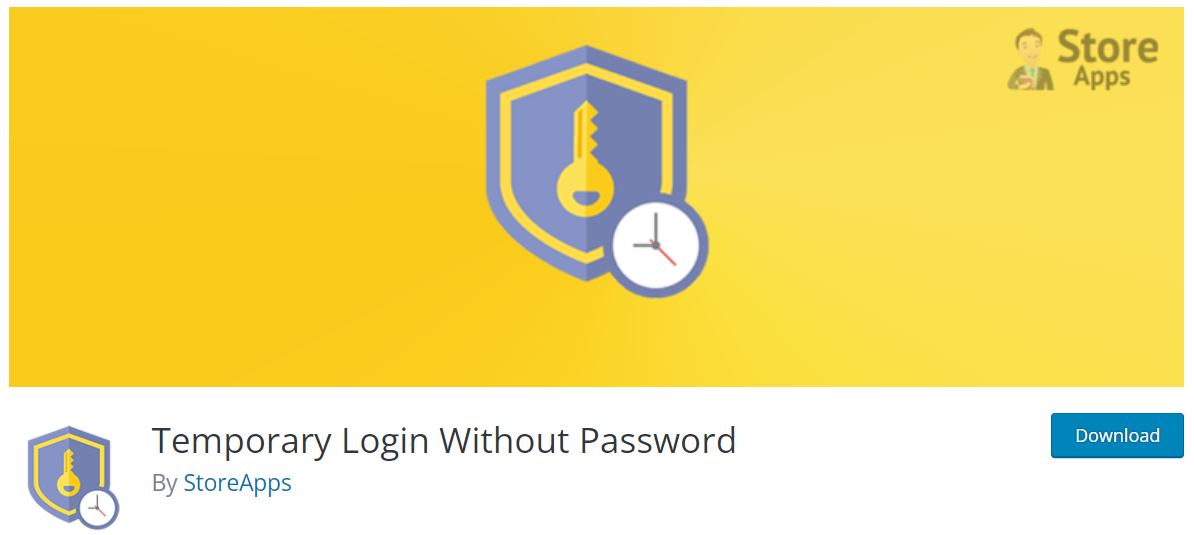
To add a new temporary login account, open Users > Temporary Logins from the admin panel and click Create New.
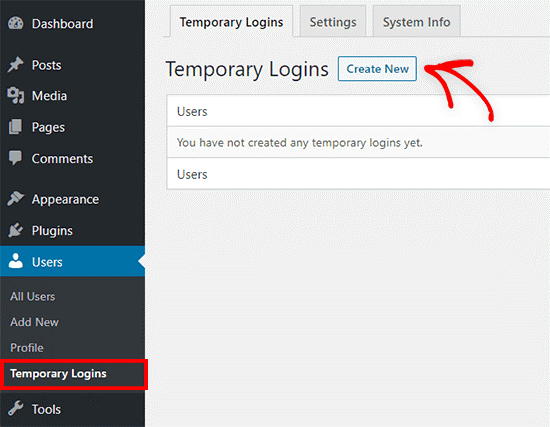
Here you will see a form. You need to enter the user information for whom you will create a temporary account in the form.
Type an Email address for the user, followed by the First Name and Last Name. Then choose the Role and user Language as well. Also, you can specify how long the user can access the site in the Expiry field. When this period expires, the account will be automatically disabled.
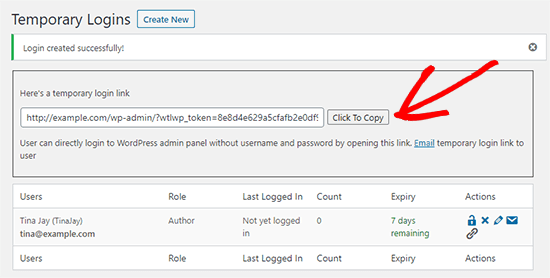
Click the Submit button to save your changes. After that, WordPress will give you a URL that your temporary user can use. Hit the Click to Copy button to share the URL with your user.
Manage Temporary Logins
The plugin also makes it easy for you to manage your transactions.
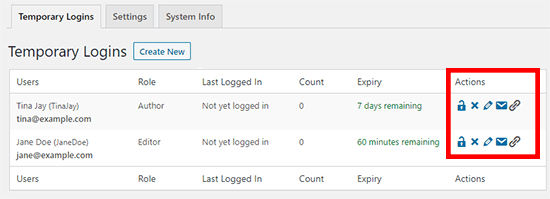
When you open the Users > Temporary Logins page, a list of temporary logins you’ve added will show up. In this list, you will be able to see the information you have entered for each account. It includes the user’s name, email address, assigned role, last login date, and expiry time.
Under the Actions column, you can extend or shorten the time you set. It also enables you to delete an account and edit the user’s information.
Provide Temporary Access to Password Protected Content
Temporary login without password is not just for your admin dashboard. You can also use this feature for some protected pages and posts. Normally, users are prompted for a password to access password-protected content. However, in some cases, you may want to enable site visitors to view the content without requiring any password.
To achieve this, it is necessary to use the Password Protect WordPress Pro plugin. It authorizes your users to access protected pages and posts by simply sending quick access links. By clicking on these links, users can access your content without filling in the password form.
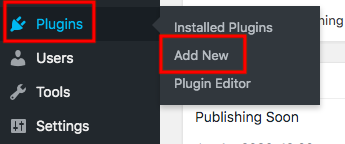
To install the plugin, go to Plugins from the admin menu and click Add New.
Then Upload Plugin to your site and Install > Activate it. After installation, you can start using the plugin right away.
To create temporary access to your protected pages and posts, you first need to password-protect them. Then create temporary access links to them. Here’s the route:
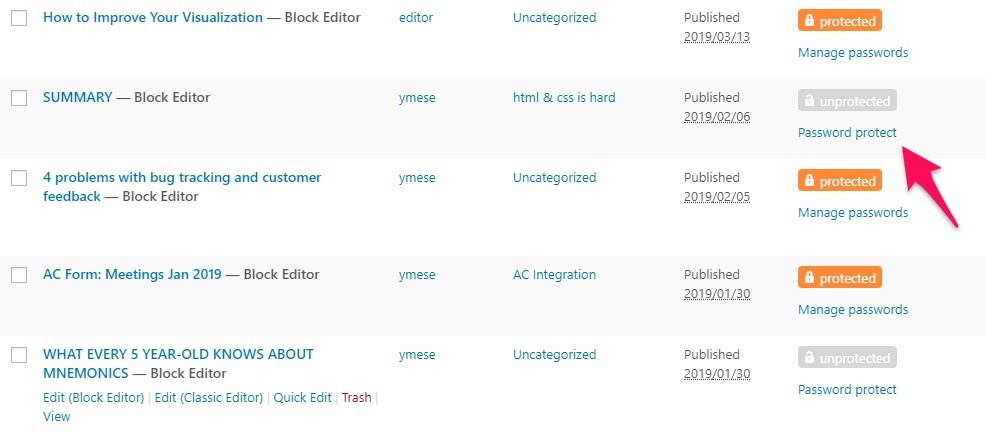
- Go to Posts or Pages and find the post/page you want to protect. Click the Password protect link.
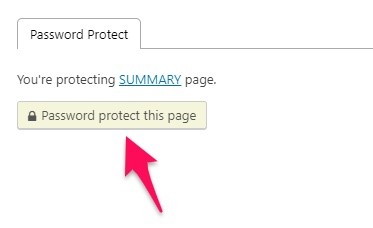
2. In the pop-up window, press the Password protect this page button.
3. Your page will be locked with the automatically assigned passwords. But you can create your own passwords from the New Password tab.
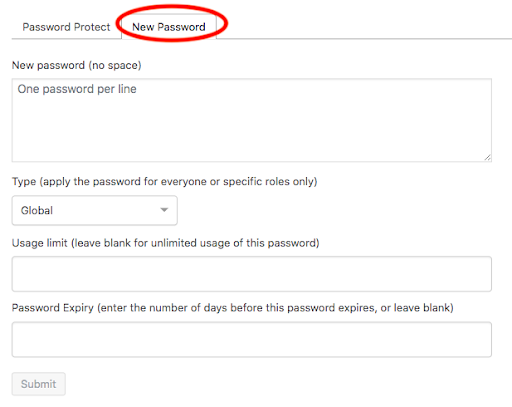
4. Configure the Usage Limit and Password Expiry to your liking. Then hit the Submit button.
5. Get the temporary access links to your protected content by clicking the Copy access link under the Action column. Please note that the links will automatically expire when your passwords expire.

6. Send the links you’ve copied to your users.
Now, your users can view the protected content in 2 ways. One is accessing the content directly using the temporary access links. The other is entering the correct passwords to the password form.
Protect Your Site
If you share your admin account with others or forget to delete the accounts you added, your site becomes vulnerable to many threats.
Fortunately, you no longer need to share your website information or create an administrator account for your temporary users. You can create as many temporary login accounts as you want by using temporary login accounts and set the access periods for these accounts. Thus, you protect your site against threats.
Besides, you can also generate temporary access links for your password-protected content by using the PPWP Pro plugin.
Do you enjoy the benefits of logging into WordPress with a temporary password that automatically expires after a certain period of time? If our article helped you, tell us about your experience in the comments section below.
