- How to hide a category in WordPress?
- How to remove “Uncategorized” category in WordPress?
- How to hide authors in WordPress?
- How to hide tags in WordPress?
- How to hide archives in WordPress?
How to you hide a category in WordPress?
When presenting your latest posts on the homepage, you might want to hide or exclude one or more categories without actually deleting them on this page.
The reason behind it is the desire of most of the users to see the new articles being featured there by keeping your homepage for only news posts and leaving the rest of the posts to other sections accessed through the menu.
Excluding a specific category from your WordPress homepage can sometimes become a complicated act for beginners, so here’s the easy way to do it.
Method 1: Exclude a Category from WordPress Homepage Using Code
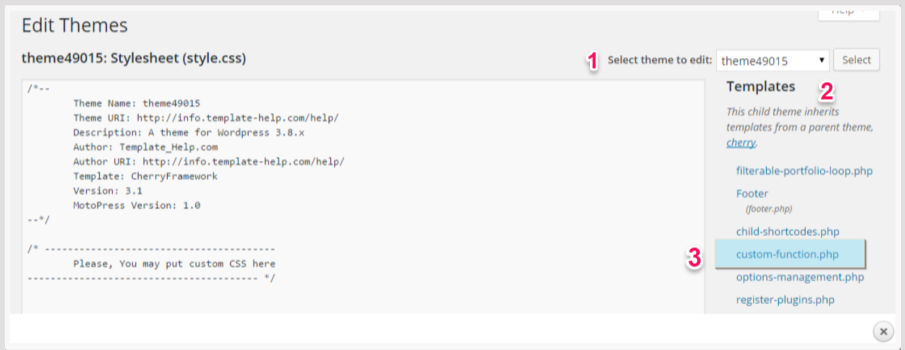
- Log into WordPress dashboard and navigate to Appearance » Editor
- Choose themeXXXXX, where XXXXX is your actual theme number in Select theme to edit
- Open to edit custom-function.php file
- Navigate to Posts » Categories to get category ID before editing
- Hover over the category name (that you want to exclude from blog page) to see its ID

- Add this code to the very end of the file before closing php tag ?> and replace 6 with your category ID. Then click Update file button to save changes
function exclude_category( $query ) { if ( $query->is_home() && $query->is_main_query() ) { $query->set( 'cat', '-6' ); } } add_action( 'pre_get_posts', 'exclude_category' ); - Separate the comma in the code to exclude 2 or more categories
$query->set( 'cat', '-6,-7' );
Method 2: Exclude a Category from WordPress Using Plugin
First thing you need to do is to install and activate the Ultimate Category Excluder plugin.
Upon activation, you’ll need to go to Settings » Category Excluder page and tick the category names you want to hide.
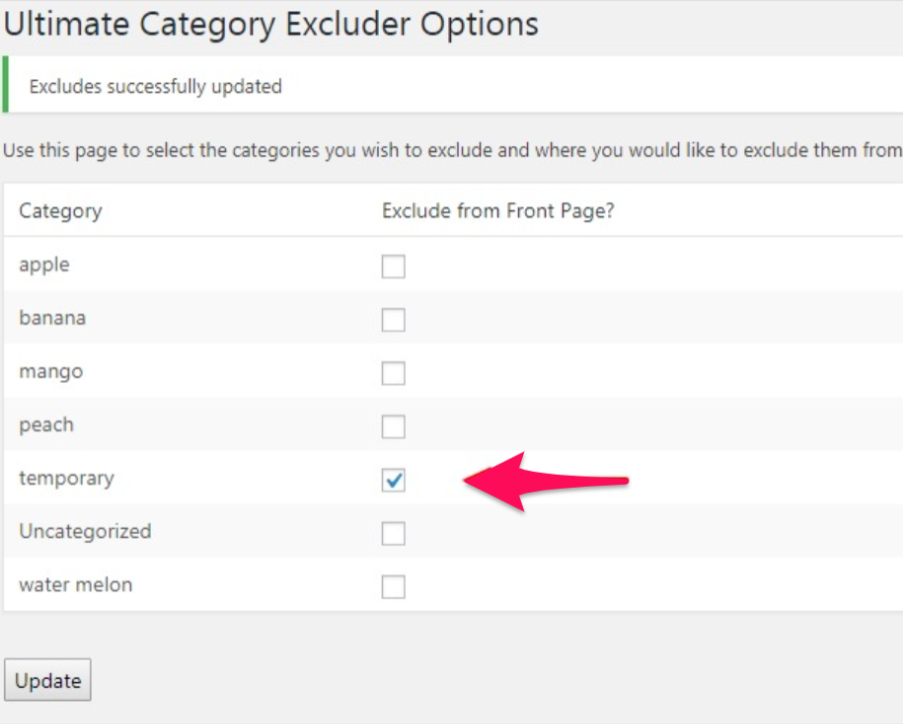
Press Update to save settings. That’s it.
Now you can visit your website to see that the posts from the selected categories are excluded from the front page.
How to remove “Uncategorized” category in WordPress?
When you publish WordPress blog, you will notice that all of your posts are automatically being categorized as “Uncategorized”. Incase you forget to mention a category for your later posts, WordPress will publish it as “Uncategorized” in default.
If you’ve ever tried to remove the default category before, then you would have noticed that no option is available to delete the “Uncategorized” from the Categories menu directly.
Method 1: Change Default Category in WordPress
First, you need to create a new category by visiting Posts » Categories and create a new one. If you have a category to use as default, you can skip this step.
Now, to change the default category, go to Settings » Writing page. You’ll see that the first option is the default category.
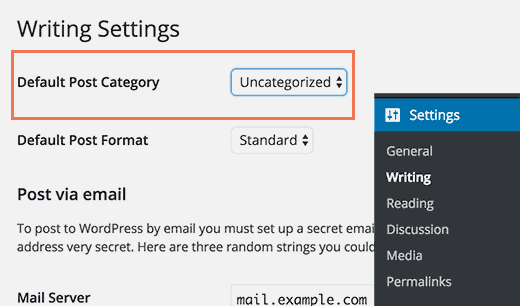
Select the category you want to use as default from the drop down menu. Save you changes and it’s done.
Now your posts will be categorized under the category you chose as default if you forget to assign a category to a post.
However, posts that were previously filed as “Uncategorized” will not be moved to the new category. You’ll need to edit the posts to change their categories.
Otherwise, you can delete the “Uncategorized” category and the posts filed under the “Uncategorized” category will be assigned the new default category.
Method 2: Rename “Uncategorized” category
You cannot delete a default category, but you can rename it. You need to visit Posts » Categories page in the WordPress admin and click on the edit link below the “Uncategorized” category.
After that, you will be prompted to a screen where you can change the name of your category and its slug.
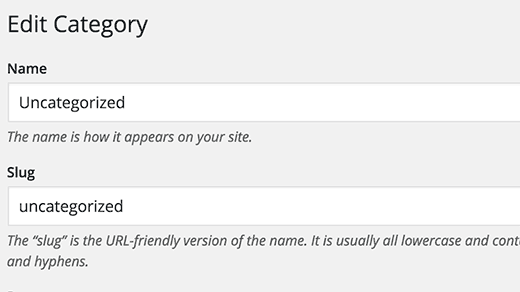
Then change category slug and click save once more. Now all your posts will display this new name instead of “Uncategorized”.
How to hide authors in WordPress?
When publish a post, WordPress automatically displays the author of the articles. It certainly one of the beneficial features in WordPress. However, in some instances, you might have the necessity of removing the author information. In cases, when you want the published article to be named under the website company and not the individual or keep the author’s identity closed, you may want to remove author from WordPress posts.
Method 1: Remove Author Name in WordPress Posts Manually
Make sure you create a backup of your theme before diving into the coding. This will help you if something goes wrong.
WordPress themes use different variations of code to present the author name. You will need to locate the code responsible for displaying the author’s name in your theme files and delete it. Most common locations to find this code are single.php, content.php, archive.php, and index.php files.
In many cases, you will not be able to find the code that presents the author name. Instead, you will find a template tag defined in the functions.php file or template-tags.php file.
For example, the default Twenty Seventeen theme uses the function twentyseventeen_posted_on to display author name and post date/time. This function is defined in the template-tags.php file.
function twentynineteen_posted_by() {
        printf(
            /* translators: 1: SVG icon. 2: post author, only visible to screen readers. 3: author link. */
            '<span class="byline">%1$s<span class="screen-reader-text">%2$s</span><span class="author vcard"><a class="url fn n" href="%3$s">%4$s</a></span></span>',
            twentynineteen_get_icon_svg( 'person', 16 ),
            __( 'Posted by', 'twentynineteen' ),
            esc_url( get_author_posts_url( get_the_author_meta( 'ID' ) ) ),
            esc_html( get_the_author() )
        );
    }
endif;
Once you have located the code that outputs the author name, you need to delete it.
For example, you have to delete the code from the second line to the ninth line in the above code. After that, the remaining code will look like below.
function twentynineteen_posted_by() {
}
endif;
Save your changes and upload the files back to your website. You can visit your website to see the changes.
Method 2: Remove the Author Name in WordPress Posts Using a Plugin
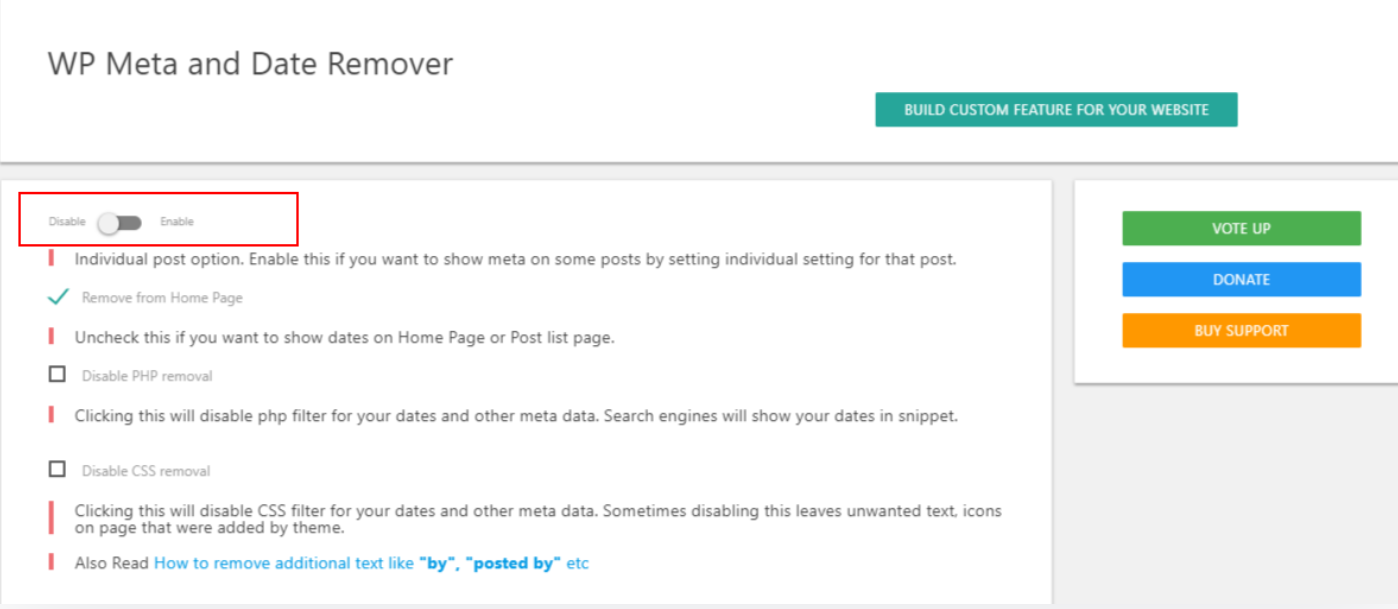
If you don’t want to use codes, that’s fine. You can add the WP Meta and Date Remover plugin to remove the author from all of your posts in one go.
Once you activate your plugin, all posts will have its author data hidden. However, we can change the plugin’s settings so that selected individual posts can have their author settings enabled.
For this, refer to its settings section. Hover over Settings on your WordPress dashboard and click on Wp Meta and Date remover.
Now we need to enable the plugin’s individual option first so Click on the Enable slider to enable the option.
Method 3: Create a Generic Author Name for Publishing WordPress Posts
Another alternative way to hide the author in WordPress posts is to create a generic name and use it for all your past and future articles.
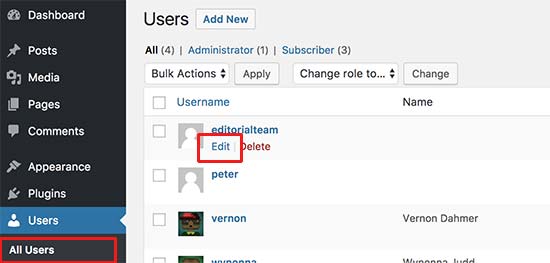
First add a new author to your WordPress site and give it a generic username such as editorial team.
Next, you need to visit Users » All Users page and click on the Edit link below the username you just added.
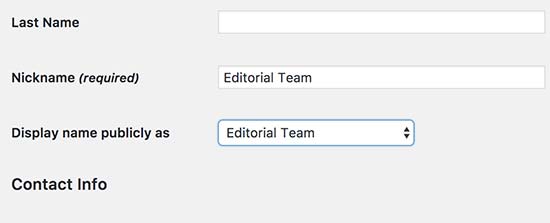
On the user profile screen, scroll down to the Nickname option and enter the name you want to be displayed (for example, Editorial Team).
After that, click on the drop down menu next to Display name publicly as option and select the nickname you just entered.
Now, WordPress will update all selected posts and change the author name.
