As a built-in part of WordPress core functionality, custom fields are a familiar feature to most WordPress site owners. This cornerstone is to help change or expand the information of posts or pages flexibly.
By default, the custom fields option is hidden on the post edit screen. You can enable it via WordPress built-in function or a plugin like WordPress Advanced Custom Fields (ACF). This freemium plugin is a good fit for WordPress beginners with easy-to-use features.
In this article, we’ll get you through what custom fields are, and how to display or hide them using the manual method and ACF plugin.
- What Are WordPress Custom Fields?
- How to Display Custom Fields in WordPress
- How to Hide Custom Fields in WordPress
What Are WordPress Custom Fields?
Custom fields are a type of metadata allowing you to add additional information related to specific pages or posts. The information can be text, images, numbers, or some calculations. However, these fields are not involved in the post content but a separate box and stored separately in the WordPress database.
Some components of a post like author names, titles, reviews, product information, or disclosure statements, are usually categorized and customized to custom fields.
One benefit of custom fields is that you can automatically display the available information to any page template wherever you need to. It’s time-saving and easy to input data from custom fields rather than typing things from scratch. That way, if you want to change any pieces of information, you can update things in one place instead of editing each post.
How to Display Custom Fields in WordPress
While WordPress does offer a native custom field feature, a plugin would leverage your custom fields more. In this section, we’ll introduce you to two methods, including the manual method and the plugin one.
Using Manual Method
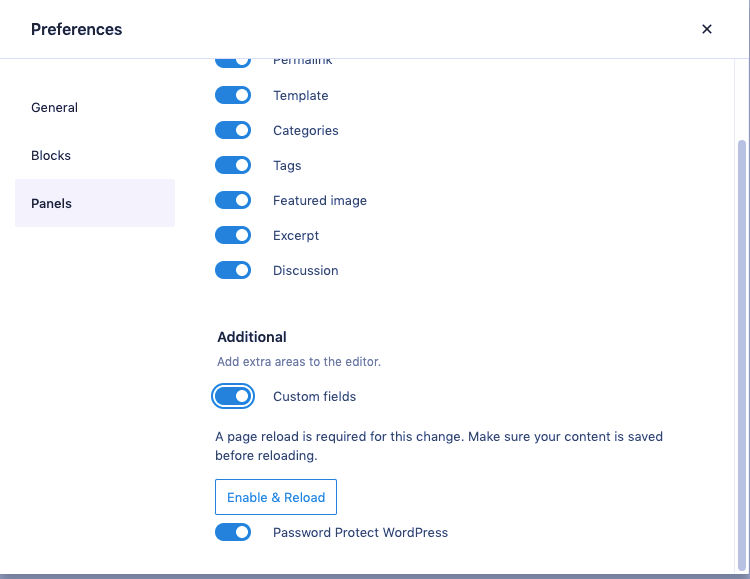
First, you’ll need to enable the Custom fields on any existing posts or the new ones. Open a page or post and click on the three dots on the top-right corner of the page. Scroll down and select Preferences, then click Enable and Reload custom fields in the Panels section.
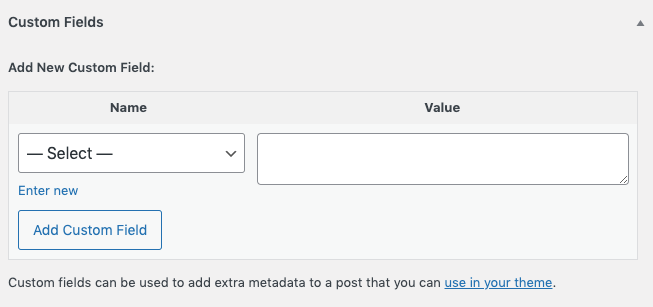
Once reload the page, you’ll see a custom fields box at the bottom of the editor.
From the Name column drop-down, choose an available custom field on your site or create a new one. Next, enter the information you want to include in the custom fields in the Value box.
After creating fields, edit your themes to display them; otherwise, they won’t show up on the front end.
Go to Appearance > Theme File Editor under your WordPress admin dashboard. You might see a warning message to be careful since you’re making over directly to your site’s files there.
In the right-hand sidebar, find the single.php to see your blog posts template. Open the file and look for the line /* Start the Loop */. We’re not going to edit that “loop” but add a new line of code at the end of it. At this stage, feel free to add any code you’d like WordPress to display your custom fields. Here’s an example of code snippet you could use:
<?php echo get_post_meta($post->ID, 'key', true); ?>
<?php endwhile; // end of the loop. ?>
<?php } ?>
Don’t forget to replace the key value with the name of your custom fields created in the first step.
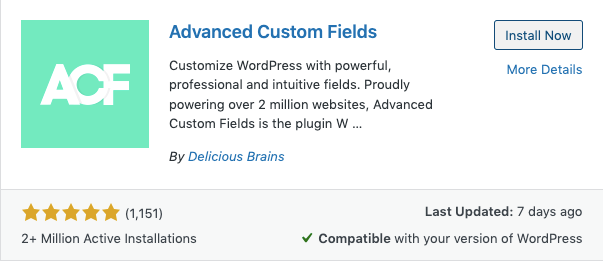
Frankly, the manual method does not provide you with many options to customize your fields. That’s why we highly recommend using Advanced Custom Fields (ACF) plugin for more advanced functions.
Using Advanced Custom Fields Plugin
Before getting started, make sure you’ve installed and activated the ACF plugin on your site.
Once the plugin is activated successfully, navigate to Custom Fields > Add New on the admin panel to start configuring your custom fields. You’ll see an Add New Field Group section here. ACF calls it a “field group” as it is a collection of one or more custom fields that will appear together on the post editor.
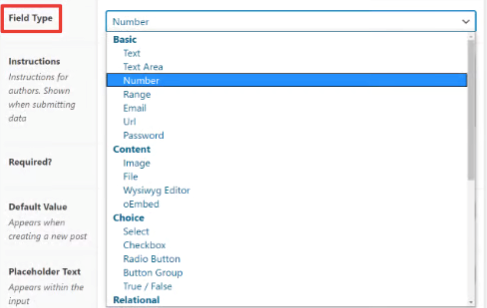
Simply name your field group and click on Add Fields to input data. A big plus of the ACF plugin is that you’re able to choose which information you want to collect like text, number, email, password, URL, image, date picker, etc.
Another important thing is to set Location rules to determine where to attach your field group. For example, if you want to display the custom fields on posts only, kindly set Post Type is equal to Post. As per your setup, the box will appear on regular blog posts, not pages or custom post types.

Once you’re done with the settings, remember to Publish your field so that it can be a part of the posts.
What’s next? As the same as the manual method, you need to configure your themes to display the custom fields. If not, they’re just sitting in your site’s database.
Choosing to display custom fields on the front end is conducive for your users to sort or query information. However, it’s also a downside if you’re running a membership site.
Imagine you’re password protecting private content and setting up users’ emails as passwords. For easy data input, these emails are categorized in a custom field. Regardless of how your post content is secured, the custom fields are still visible. To resolve this issue, take a look at the following section on how to hide your custom fields with the Password Protect WordPress (PPWP) plugin.
How to Hide Custom Fields in WordPress
By default, the custom fields are still displayed on the front end though the posts are protected. In order to hide fields generated by the post meta or ACF plugin, simply wrap them up with a conditional check using WordPress default.
if ( post_password_required() ) {
echo get_the_password_form();
} else {
'Password Protected Custom Content'
}
That’s the case when you want to hide entire custom fields in custom templates. Besides, you can also protect just a section of the custom fields, not the whole one, with the PPWP plugin.
Plus, the PPWP plugin also enables you to safeguard content sections under custom page templates with passwords.
Check Out Password Protect WordPress Plugin Now
Password Protect WordPress (PPWP) plugin is an expert in content protection. This powerful plugin goes beyond the WordPress default of securing your pages or posts but also the custom fields content.
You can choose to password protect not only the entire custom fields but also parts of them. It’s worth mentioning this function is available in the PPWP Lite version. So, feel free to check it out and add another security layer to your content.
