Back then, the Customizer in WordPress was not really a practical function and gradually forgotten by most users. Fortunately, with WordPress’s recent updates, especially from version 4.5, WordPress has taken its Customizer to a higher level.
The new Customizer has become a powerful front-end editor allowing users to change their website appearance effectively and effortlessly. There are so many things you can do there, from customizing the navigation menu to setting a tactic homepage.
In this article, we will dig into details on how the new Customizer can help you through its dynamic features. More importantly, in the end, we will introduce to you a great bonus tip to extend the default customizer functionalities.
- How to Access WordPress Customizer
- How to use WordPress Customizer
- Style your password form using WP Customizer
Now let’s dive in:
How to Access WordPress Customizer
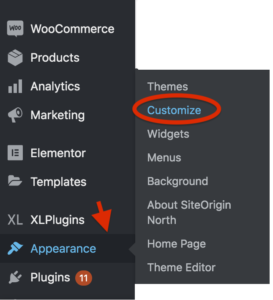
In order to access all the powerful features in Customizer, simply navigate to Appearance >> Customize in your Admin Dashboard. You will be immediately redirected to the Customizer interface.
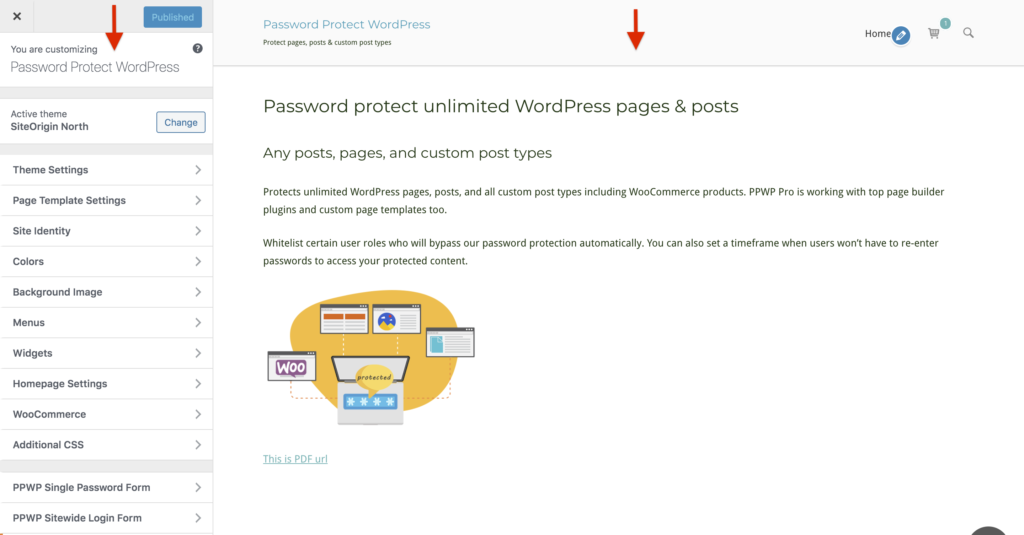
The Customizer interface has two main parts. The one on the right site is your WordPress theme preview and the left displays Customizer menus which contain all the necessary features for editing and customizing your site appearance.
How to Use WordPress Customizer
As mentioned above, you can make changes to almost all aspects of your WordPress site’s appearance right inside the Customizer window.
Change the website’s title, tagline, logo, and favicon
The first thing you probably want to change is your site identity including the title of your website along with the logo, tagline, and favicon.
On your left side, navigate to Site Identity, and you will see the three main options to change for your website.
Click on Select Logo to choose the image for the logo.
![]()
Depending on the theme you are using, the image dimensions will vary. For example, the theme Twenty Sixteen is suggested for 240×240, while the Twenty Nineteen requires only 190×190.
![]()
You’re able to choose the image in your media library or upload a new one. Remember, if your image is bigger than the required dimension, you will see the crop function in the next window. Simply align the image until you find it good enough to represent your website and hit Crop. The Customizer will automatically show a live preview for you to check.
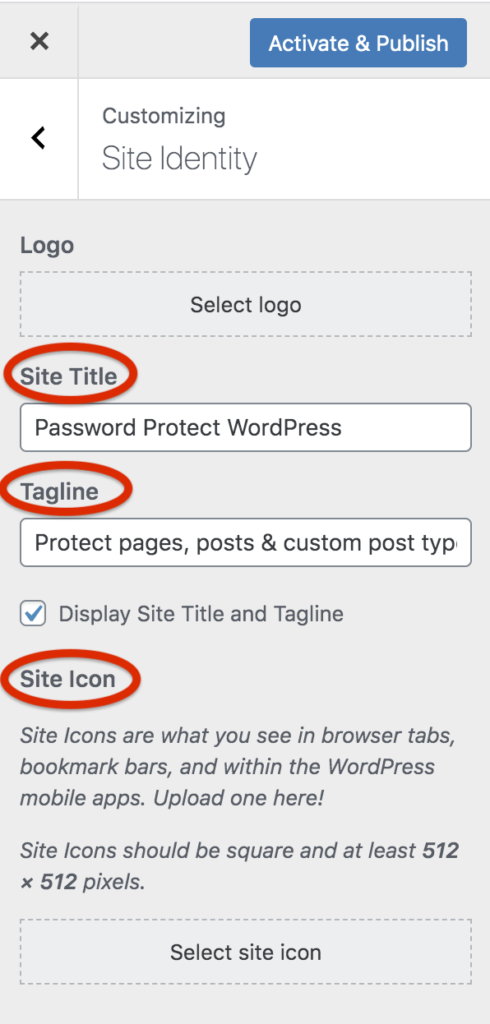
Site Title and Tagline are where you should put your website title and tagline. You also have the option to show the site icon for better recognition.
Add and customize navigation menus
If your website doesn’t have any menu, you can create one with Customizer. Navigate to Menus and choose Create New Menu. In case you already have one on your website, just follow the same steps to add more menus.
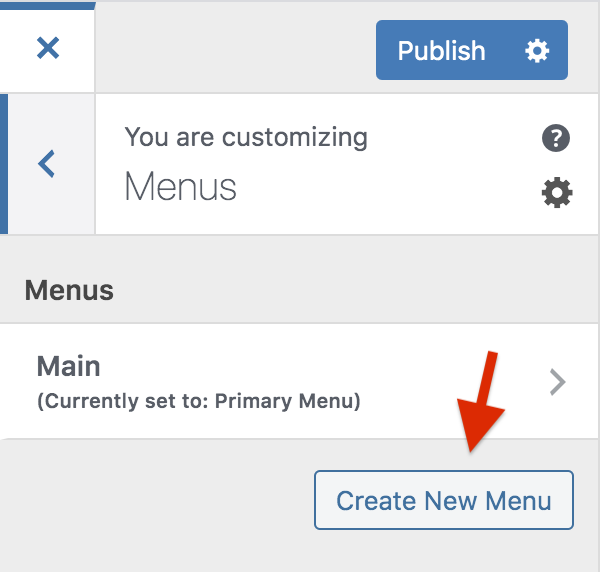
You can adjust several settings for your new menu with Customizer. Don’t forget to give it a name and choose the Menu Location.
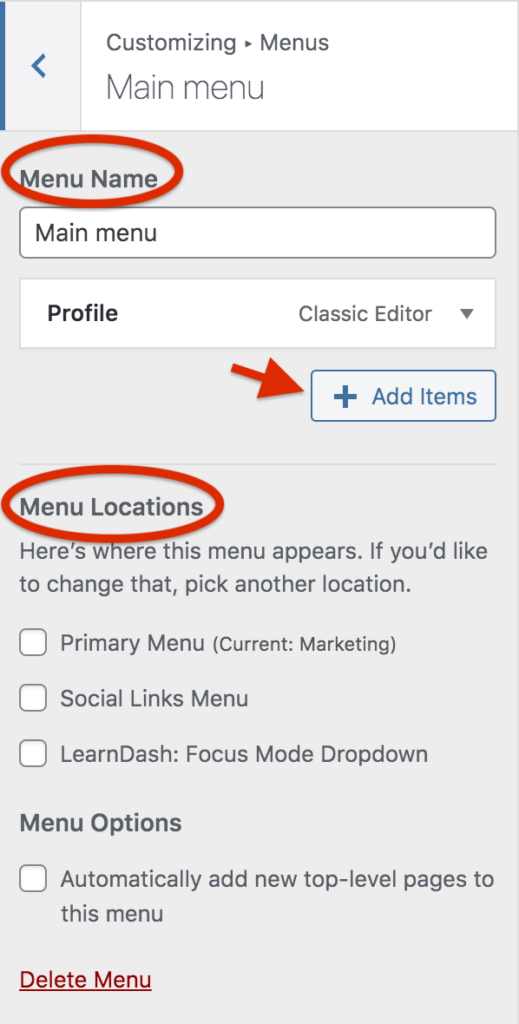
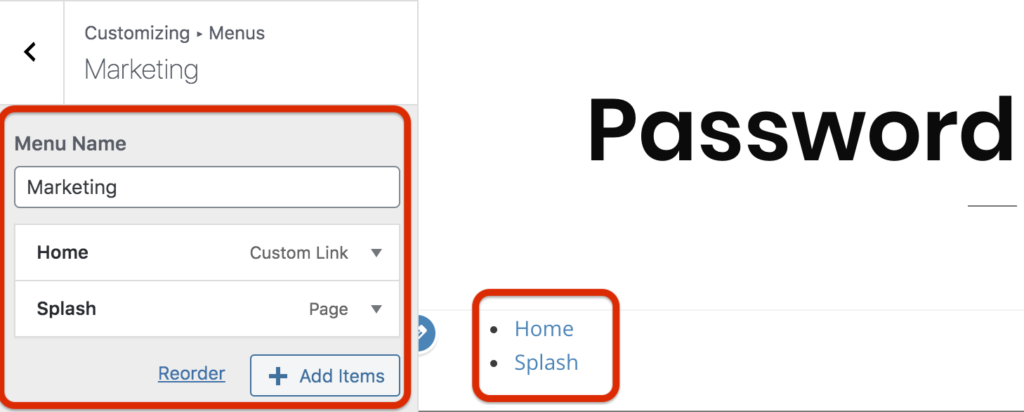
In the Main Menu section, click on “Add Items”. In the new window showing all the pages, select your desired page. You can check if your settings work by looking at the live preview in the right-side panel.
Hit “Save changes” to save the settings.
Change the colors of your theme
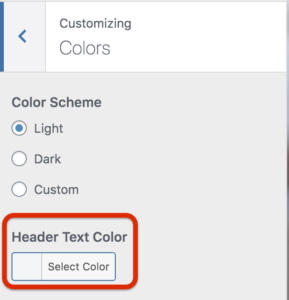
Depending on the WordPress theme you’re using, the controls on the Colors panel will be mostly different. Typically, you can choose the colors of headings, links, body text, or the background of your website.
Head to the “Colors” section on your WordPress Customizer to see all the color-changing options. For example, if you want to choose another color for the Heading, click on “Select Color”. Pick a color you like and preview it on the right-side panel.
Set a tactic homepage
In the “Homepage Settings” section, you will have two options:
- “Your latest posts” – This feature is enabled by default to automatically display the latest posts on your homepage.
- “A tactic page” – This allows you to choose a certain page on your website as the homepage. The other option works as a blog archive page listing all your posts.
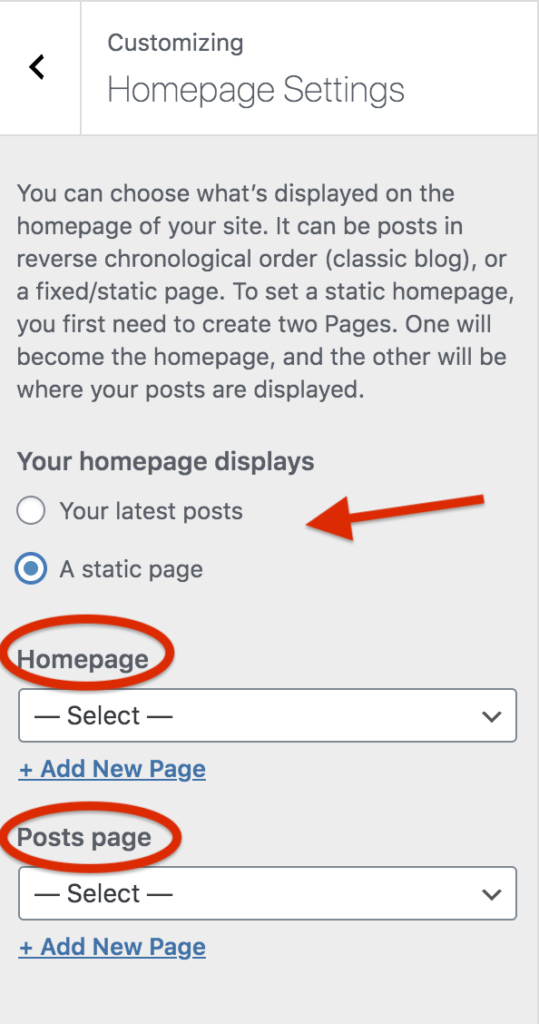
If you don’t have a page on your site yet, you can create a new one by clicking on “Add a new page” right under the dropdown menu. After this, you will have a new page with the name of your choice.
Preview your website on different screen types
After customizing your theme, you need to make sure it looks good on different types of screens.
On your Customizer menu, look for the “Hide Controls” section at the bottom. The three icons in this section represent the screen resolutions of desktop, tablet, and mobile phone. Click on each icon to see how your theme looks on these devices.
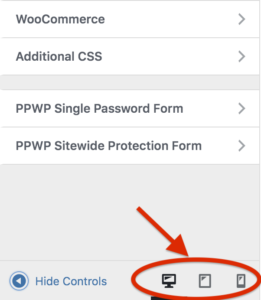
This helps you pre-check the view from your front-end dashboard. Then you can take timely action before hitting Publish to save all of your settings.
However, sometimes it’s impossible for you to preview your website due to some WordPress Customizer errors. In case this happens, check out how to fix WordPress Customizer not working to amend it immediately.
Using WordPress Customizer to Style Password Form
It’s possible for you to extend WordPress customizer features, for example adding a custom control or a range slider. On top of that, it supports you in styling your password protection form.
You’re required to password protect your content using Password Protect WordPress Pro in order to redesign your password form. It doesn’t apply on pages locked by WordPress default password protection feature.
The plugin secures certain WordPress pages, posts, custom post types, categories as well as the entire site. You’re authorized to customize the password form message right in the plugin Settings page. What if you intend to style form color, size, and descriptions, etc, head to your WordPress customizer and make changes there.
Customize your password-protected page and the entire site
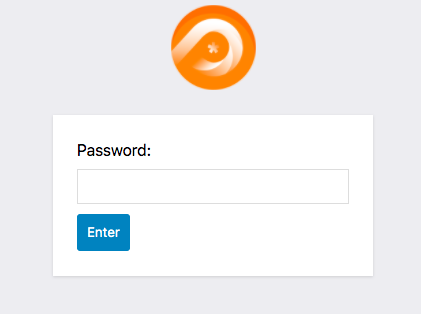
In the Customizer settings window, there are two main settings for password form including PPWP Single Password Form and PPWP Sitewide Protection Form.
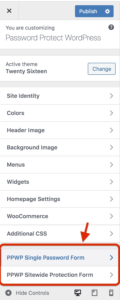
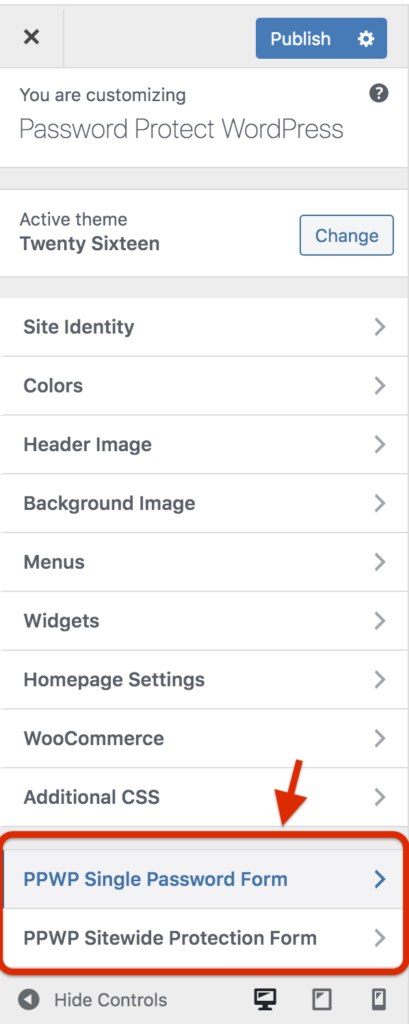
Your password forms will look different when you protect single posts and the entire site. That’s why we have 2 options for you to change the style of your password forms: Single Password Form and Sitewide Protection Form.
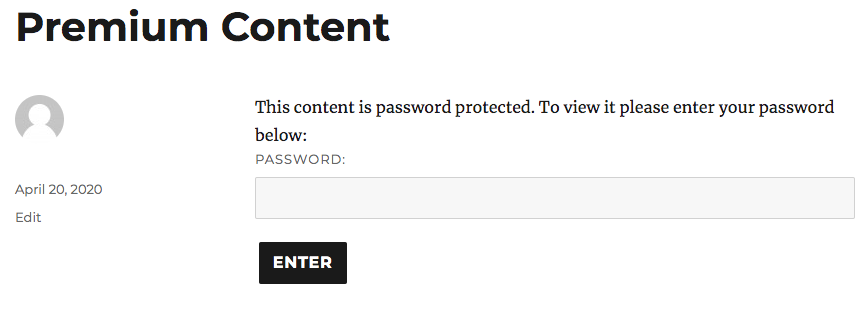
If you style the password of a single post, it will apply to all your protected pages, posts, and custom post types.
The WordPress Customizer enables you to adjust the form description, button colors, text sizes, and much more. You can refer to our detailed guide on how to customize single password form with WordPress Customizer.
Maximize Your WordPress Customizer
WordPress updated versions facilitate users to use Customizer more effectively and effortlessly. You can see a whole lot of settings incorporated into a small but convenient interface. Therefore, you don’t need to be a savvy user to know how to customize your WordPress theme.
You’re permitted to extend your WordPress Customizer controls in many ways, including styling the password for the protected content. Password Protect WordPress works compatible with WordPress Customizer allowing you to change the form message as well as elements’ sizes and colors with ease.
Still, have a question about how to use WordPress Customizer? Just say the word in the comment section below.

One Reply to “How to Use WordPress Customizer”
Comments are closed.