Designed for small to large-sized online merchants using WordPress, WooCommerce has become the most popular e-commerce solution so far.
You can use the plugin to easily create a store and sell any products there, from physical to digital ones. Customer data and sales reports are fully controlled right in your WordPress dashboard too.
In terms of product page layout, since WooCommerce has to satisfy the demand of almost all business types, it must provide a basic default one so everyone can use it.
Since then, you’re required to customize several product pages designs for specific needs.
A visual editor is not helpful in this case. WooCommerce uses one template file for all product pages. When styling an individual product page template, you will apply the changes to all pages.
So what should you do? To help you get started on how to create custom single product page in WooCommerce, we’ve put together a simple guide. Before digging into steps, let’s touch on some reasons for replacing the WooCommerce default product pages.
- Why Is It Important to Create a Custom WooCommerce Product Page?
- How to Edit Single Product Page Layout in WooCommerce
- Password Protect Single WooCommerce Products
Why Is It Important to Create a Custom WooCommerce Product Page?
Compared to the built-in template, it’s better to create a more attractive layout for specific products in your WooCommerce store. These main reasons partly explain why:
- Create an attractive visual store
Not all your products are similar to each other so applying multiple layouts will keep your product pages more eye-catching and increase their value.
It depends on your product types to provide a suitable design. For example, if you offer an online fashion store, the woman cloth product pages shouldn’t look the same as men’s. You can also add a video or more SEO-friendly text there.
- Stay competitive with your competitors
Knowing how to differentiate your goods from competitors can shift their customers to your store. Besides quality, most customers prefer something visual as well.
When considering goods in 2 or 3 online stores, they won’t hesitate to make a purchase of those they fall in love with at first sight. Once achieving this, you will become the game changer in your niche.
How to Edit Single Product Page Layout in WooCommerce
What does the default product page look like?
The basic WooCommerce product page includes 2 main columns: the product image on the left and the product name with a description on the right. Here is how it actually shows up.
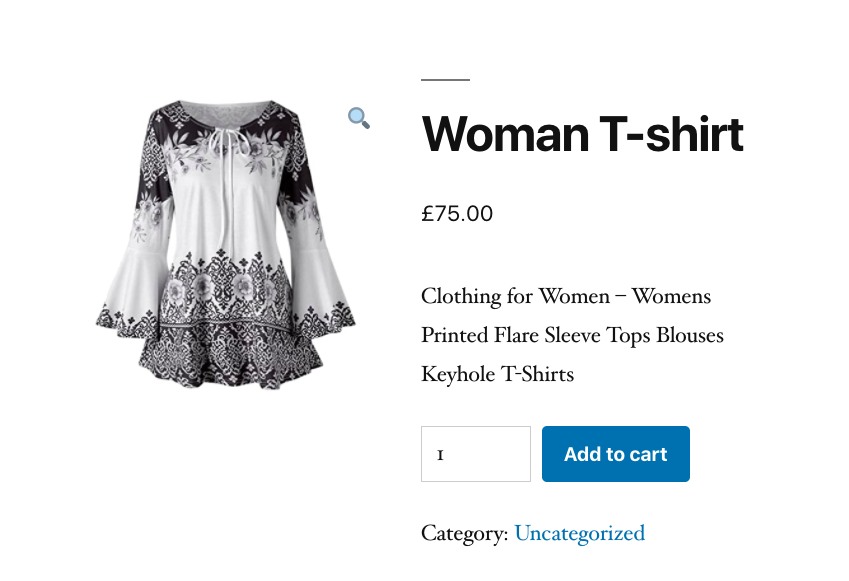
It’s possible for you to modify the product page template in many ways, such as including a shopping cart column on the right or displaying more than one product image on a page. Adding the product’s rating is a great option too.
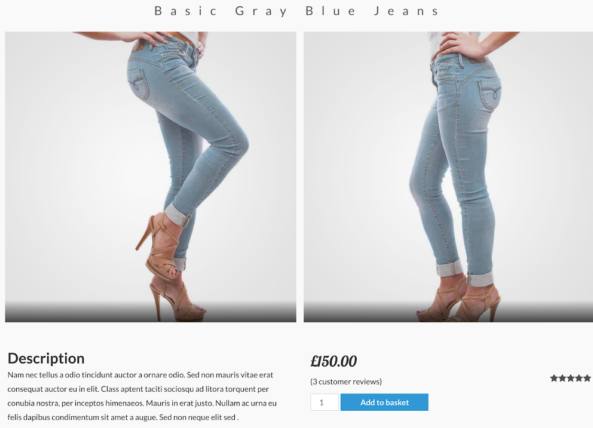
You’re able to manually edit single product pages in WooCommerce or use a third-party plugin to deal with it. While the sooner doesn’t require outside help, the latter saves you from coding and technical issues.
However, for the first method, the challenge lies in code overwriting when you upgrade the WooCommerce plugin. Once the plugin is updated, all the code will disappear and the customization will be removed. You have to consider carefully before adopting this way.
It’s highly recommended to add a plugin specialized for individual product page template customization, Elementor WooCommerce Builder for instance.
How to Create Custom Single Product Page in WooCommerce
The WooCommerce Builder plugin allows you to drag and drop multiple elements on your product pages as well as personalizing the page’s design and layout. There is no code or theme file edition needed.
WooCommerce Builder feature is available in Elementor Pro so you need to buy this plugin to use this function. Apart from editing a WooCommerce single product page template, the plugin enables you to build WordPress pages and add popup too.
Follow this guide to easily create your own product page template:
Step 1: Setup plugins
To customize the WooCommerce product page layout, you must have the WooCommerce plugin installed and activated in your WordPress site. Take these steps to install Elementor plugins and its Pro version:
- Download the Elementor and Elementor Pro plugins
- Head to the Plugins in your WordPress admin dashboard and click Add New
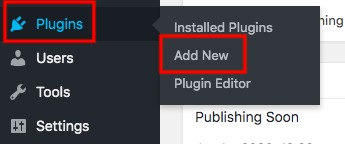
- Click Upload Plugin and select the zip files you’ve just downloaded
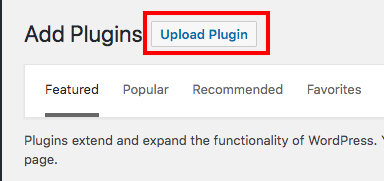
- Install and activate the plugins
Step 2: Create the single product page template
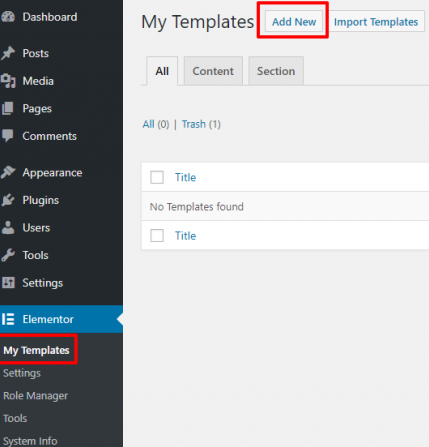
- Go to Elementor → My Templates and hit Add New. Then you will see a popup where you can select a template.
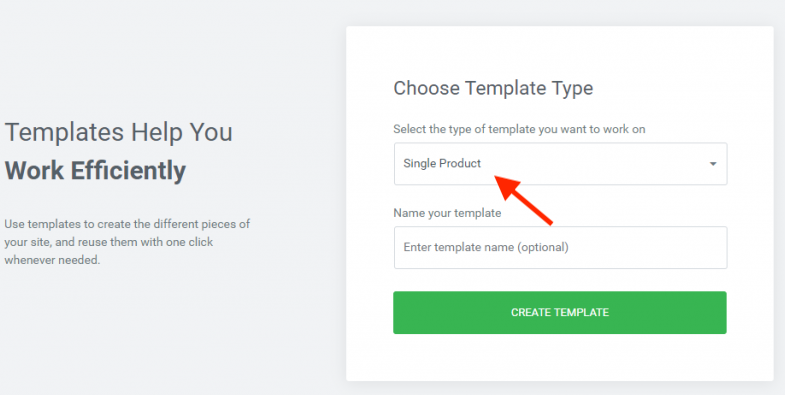
- Choose Single Product in the dropdown list and name your template before clicking Create Template
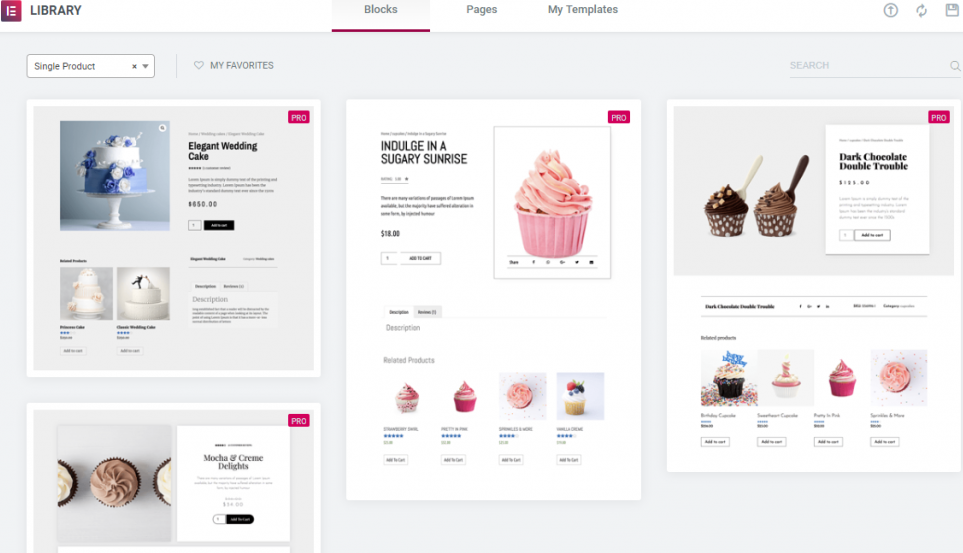
- Select an available predesigned template provided by the plugin (optional)
Step 3: Add product elements
You should add product widgets such as product title, breadcrumbs, product image, product description, rating, or related products. There are other elements you should consider like upsells, product data, share buttons, and even additional information.
Step 4: Preview new product design
You can preview the new product page template with multiple products to make sure it’s applied in the right way. This also supports you in adjusting the layout when there is a potential problem.
Step 5: Display your single product layout
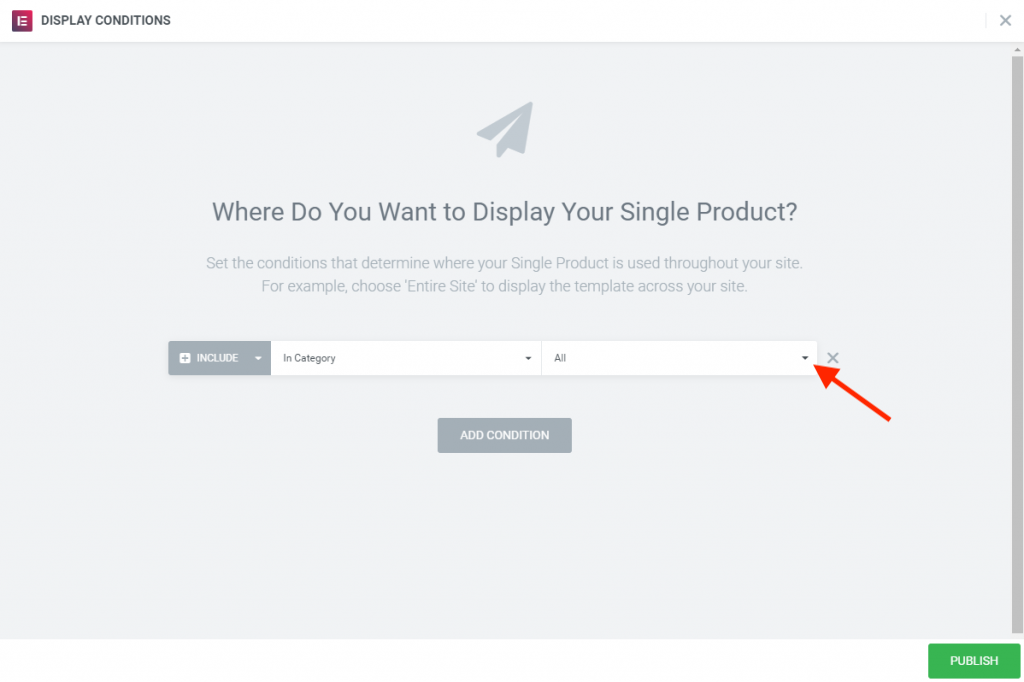
The new template will be set on all of your WooCommerce product pages by default. You need to select which product category this template can show up. After that, hit publish.
Password Protect Single WooCommerce Products
You’re enabled to protect single WooCommerce product pages as well as sections of a product with passwords. Since you’re using Elementor to build pages and create product pages, the Password Protect WordPress (PPWP) Pro plugin would be a perfect addition.
The plugin is integrated and compatible with Elementor so you can protect your product pages while creating them with ease.
You can refer to the steps to install the plugin in the section above. Then,
- Visit the plugin Settings page
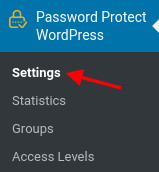
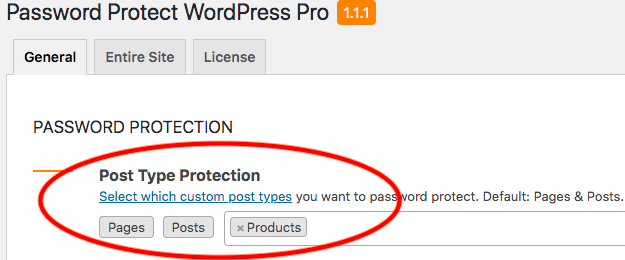
- Choose Products in the Post Type Protection section and save your changes
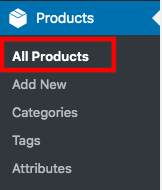
- Go to All Products under Products section
- Click Password protect to secure your desired product
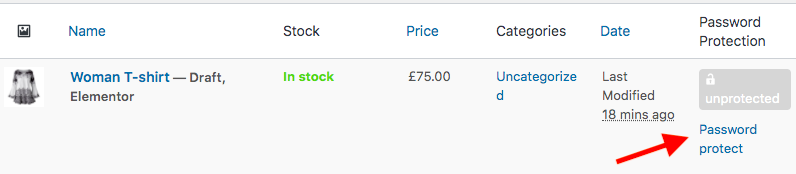
- In the Password Protection management popup, auto-generate a password or add your own one
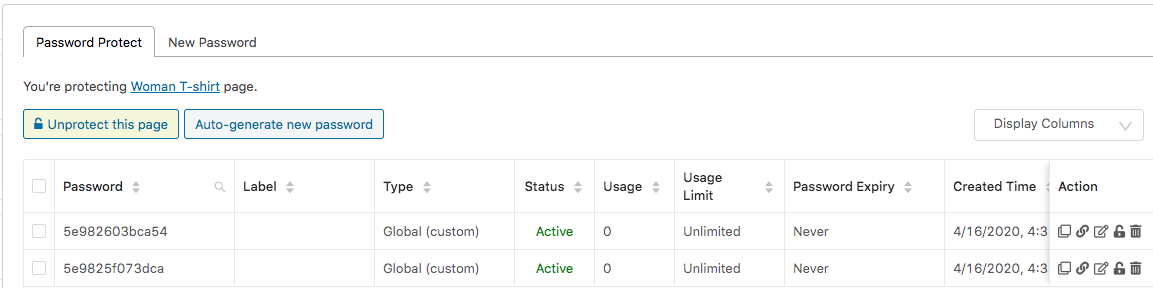
Your single product page becomes invisible to the public now. People have to enter the right password in order to access it and purchase the product.
Password protect products with Elementor
As mentioned, PPWP Pro is integrated with Elementor. In other words, you can add a password-protected element to your product page while building or editing it. This private section can be the product’s additional information or any custom fields.
The guide below will show you how to cover private parts on your product page:
- In the product list, edit your desired product
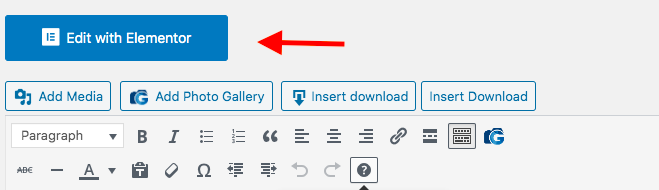
- Click the Edit with Elementor button
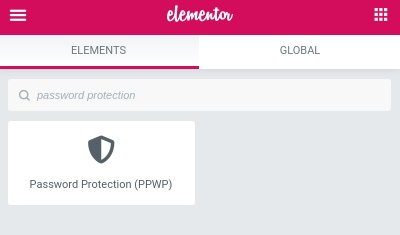
- Search for the Password Protection (PPWP) element under “Search Widget” field
- Drop it to the place where you want to display the protected area
- Set passwords for the private section
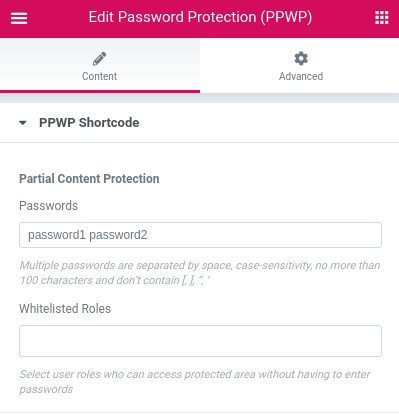
- Add content that you will covered under the password form
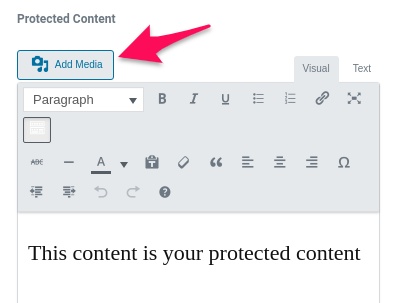
- Update the product page
Make Use of Customized WooCommerce Product Layout
Instead of using the default product template provided by WooCommerce, you can create a custom product layout to attract more customers and surpass the competitors.
Elementor WooCommerce Builder turns out to be the easiest solution to style your single product page’s design. It saves you a lot of time and effort compared to adding code to the theme files.
You’re allowed to password protect single or parts of WooCommerce product pages. PPWP Pro works perfectly with Elementor to lock your products with one or multiple passwords. You can protect them right in the product edit screen. And you don’t have to worry about plugin conflicts either.
Install Elementor WooCommerce Builder and PPWP Pro to style and protect your single product page now!
