WordPress category offers one of the most convenient ways to organize your related posts together. This makes it easier for users to scan through your content. Your website and Blog section will look more professional as well.
WordPress, by default, displays all available categories on your blog, homepage, or feeds. In fact, it isn’t always appropriate to have every category shown up on your site. You sometimes want to hide specific categories for some reasons.
In this post, we’ll list out 5 reasons for hiding WordPress categories and put together 3 common ways to make a category private.
- Why Hiding WordPress Category?
- Make WordPress Category Private Manually
- Hide WordPress Category with PPWP Pro Plugin
- Protect WordPress Categories with Access Level Extension
Why Hiding WordPress Category?
Following are the 5 most popular cases where you would like to unlist a category:
1. Hide WordPress Categories from the Homepage
There might be times you intend to display a specific section on your homepage only. Then, other categories shouldn’t be listed on the navigation menu.
Let’s take the News category as an example. There are important upcoming events in your company as well as the industry. Users must keep up with this news instead of other types of content. Then, taking all other categories except the “News” off the homepage would make more sense. Since other categories are hidden, users are forced to read the latest news in the News section only.
2. Hide a Category from the Blog Page
You have multiple products and each has its own content category. Your blog lists out every article belonging to all categories.
However, you’re boosting a specific product so content related to others shouldn’t show up and confuse visitors. However, it takes a lot of time to hide post by post. Removing a whole category proves convenient to hide multiple related posts at a time.
Another great example comes to removing Uncategorized cateogy. You published some posts in the past and they’re not relevant to the site content now. It’s recommended to hide them from the blog so that users won’t be confused by irrelevant topics.
3. Hide a Category from the Author Page
Every writer has expert knowledge of a specific niche. That’s why each site requires several authors to focus on different areas in their business. Some of them just write standard content while others provide premium posts.
Not all visitors are authorized to view both types of content. Premium writers should be hidden from the “Author” page. Once excluded, all posts written by these authors won’t show up anymore.
4. Hide a Category from WordPress Search
Readers often find articles through the search box. Removing less important categories offers users a shorter list of results. What’s more, these results would be more relevant to the search query. This creates a better experience for users and improves your website’s usability.
5. Hide a Category from RSS Feeds
RSS – “rich site summary” includes simple text files which provide basic updated information on a website such as news or articles. There could be a content category that you don’t want to appear in the feeds. So, it’s necessary to exclude it from the RSS feeds on your WordPress site.
You’ve known where to hide your category from. The question now turns to how you make a category private.
It’s really easy to make a page or post hidden with the WordPress Private Page Visibility default feature. However, removing an entire category sometimes frustrates beginners. Let’s take a look at the 3 solutions listed below to help put your mind at ease: manually hide a category, password protect it with the PPWP Pro plugin, or create access levels using the Access Level extension.
Make WordPress Category Private Manually
This method requires you to add code to your WordPress theme’s functions.php file. In order to exclude a category from displaying on your blog page or homepage, manually take these 2 big steps:
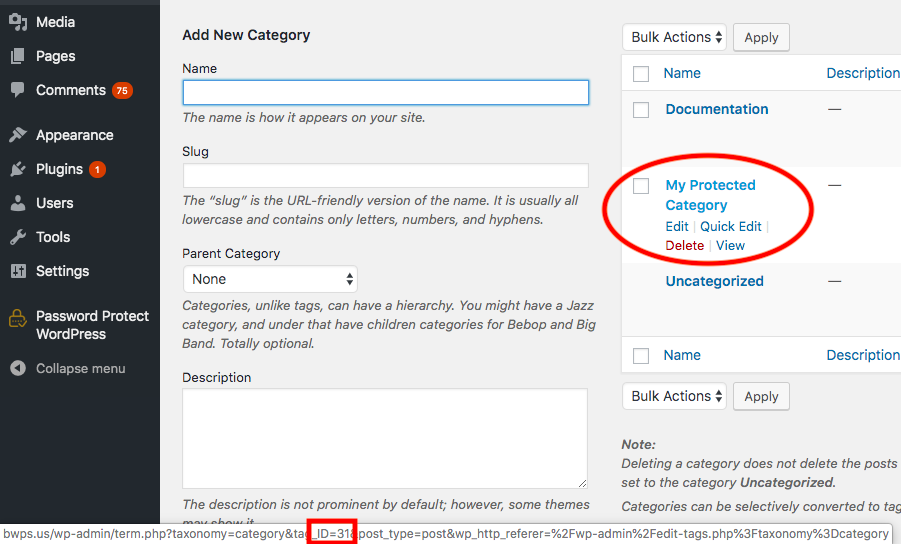
Step 1: Get the category ID
1. Head to Post → Categories in your WordPress admin dashboard
2. Hover on the title of the desired category
3. Get its ID number in the link at the bottom of the screen
Step 2: Edit the theme file
4. Go to Appearance → Editor
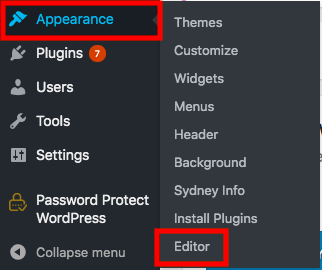
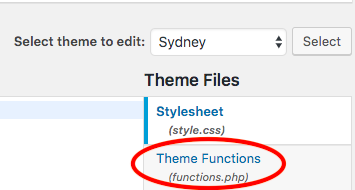
5. Select the theme you’re using from the dropdown
6. Click on the functions.php file
7. Add the following code to the bottom of the file
function exclude_category( $query ) {
if ( $query->is_home() && $query->is_main_query() ) {
$query->set( 'cat', '-31' );
}
}
add_action( 'pre_get_posts', 'exclude_category' );
There are 2 things to keep in mind:
- The number “31” in the third line refers to the ID whose category you wish to hide
- The minus symbol “–” (minus) means this category should be excluded
You can also exclude several categories at a time by adding their category IDs into the brackets in the third line and separating them with commas. For example:
function exclude_category( $query ) {
if ( $query->is_home() && $query->is_main_query() ) {
$query->set( 'cat', '-31, 15, 20' );
}
}
add_action( 'pre_get_posts', 'exclude_category' );
How to Remove a Category from the Loop
It’s possible for you to remove a category from the loop as well. Place the following code snippet in your functions.php file:
/** Exclude Specific Categories From The WordPress Loop */
add_action( 'pre_get_posts', 'exclude_specific_cats' );
function exclude_specific_cats( $wp_query ) {
if( !is_admin() && is_main_query() && is_home() ) {
$wp_query->set( 'cat', '-31, 15' );
}
}
Removing a category programmatically requires technical knowledge. You also have to remember every ID whenever removing multiple categories at a time. That’s where a third-party plugin comes in handy.
There are a number of plugins capable of handling this concern. PPWP Pro and its Access Level extension stand out from the crowd due to their powerful features and friendly UI.
Protect WordPress Category with PPWP Pro Plugin
Password Protect WordPress (PPWP) Pro effectively secures your WordPress categories with passwords. Take the following 4-step guide to get started:
1. Install and activate PPWP Pro. The Pro version won’t work without the Free version so remember to install the Free version first.
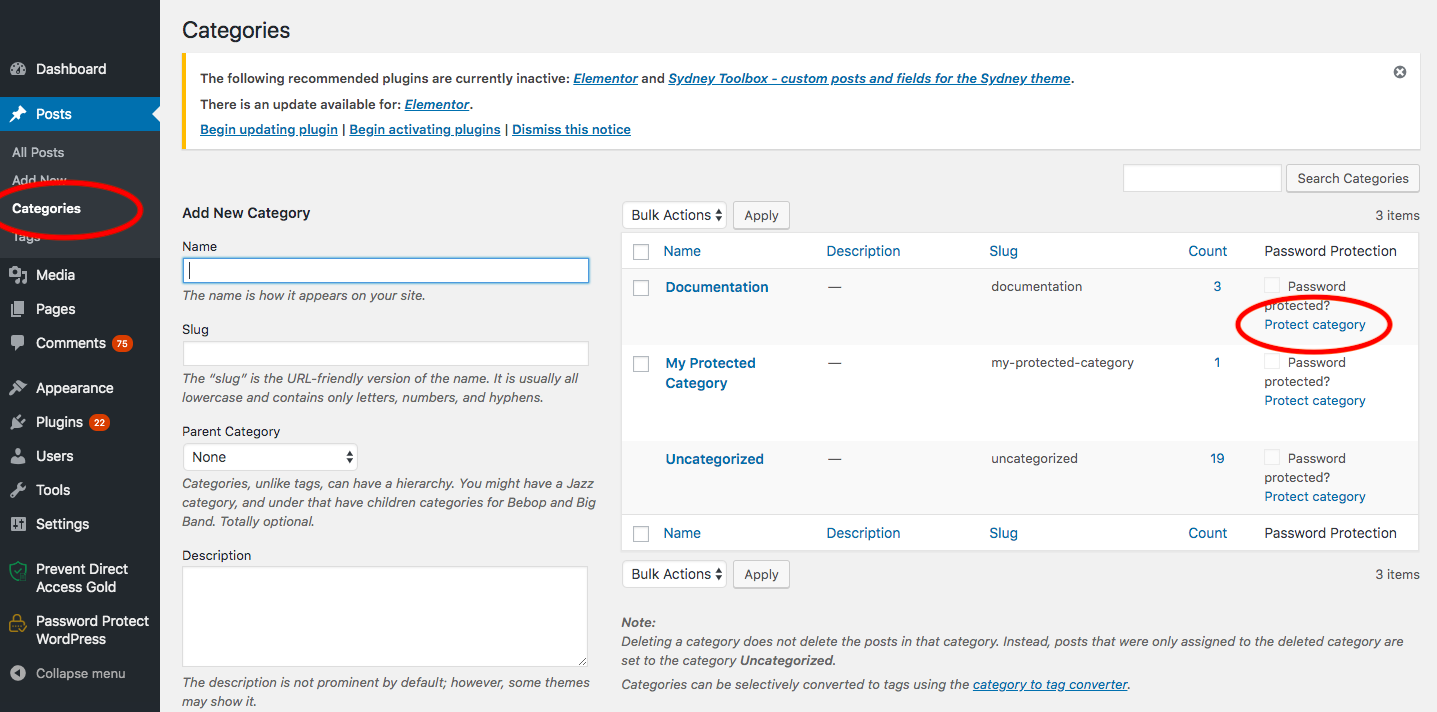
2. Go to Posts → Categories in your WordPress dashboard
3. Select your desired category
4. In the Password Protection column, click on the Protect category to quickly password protect it
Once password protected, all posts under that category become invisible to the general public. Users have to fill in a password form whenever accessing your category page or any posts belonging to that category.
Each article in your category will be assigned a different password. If one post in the category is unlocked, this means your category becomes unprotected now. However, other articles will still display a password form when users attempting to access them.
You can do even more with this Pro plugin. It’s possible for you to hide the protected content from search indexing. In other words, your category page and all posts under it won’t be shown in search results.

On top of that, you can make the entire WordPress site private with just a single password. Last but not least, the plugin enables you to exclude some pages from the site-wide protection too.
You can refer to this video for more visualization of the instruction.
Secure WordPress Categories by Levels
PPWP Pro plugin permits you to protect content categories only. Its Access Levels addon, meanwhile, extends the capabilities by securing product categories as well as assigning them different permission levels.
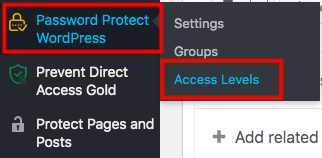
You firstly need to download the PPWP Access Levels extension. It will now add an extra section to the Password Protect WordPress menu on your sidebar. Click here to start securing your categories.
You need to go through a 3-step process to successfully hide your WordPress categories by levels.
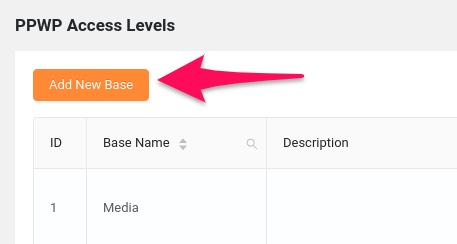
Step 1: Create a base
After clicking Access Levels from the main menu, you will be led to an Access Levels Management screen. Hit the Add new Base button which brings up a popup window for you to add a base name.
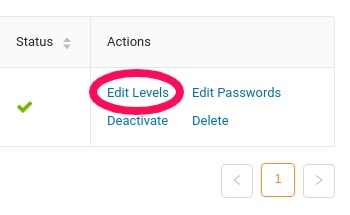
Step 2: Select categories and order them into levels
The Edit Levels option in the Actions column lets you choose the post types to protect. It can be Posts, Products, or any other custom post type.
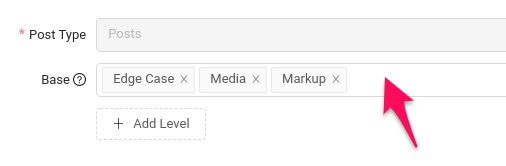
It’s time to decide the levels of your categories. Level 2 will be higher permission than level 1. In the example below, if users enter passwords to posts in the “Media” category, they are at the same time unlocking the “Edge Case” category.
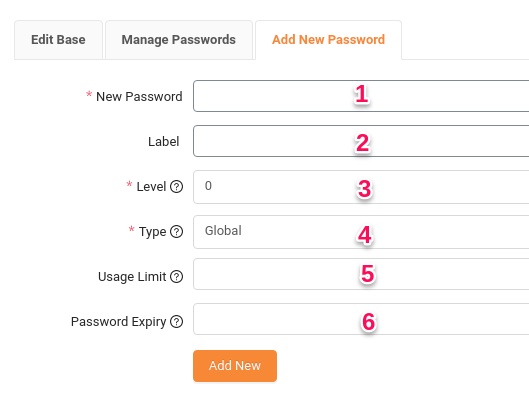
Step 3: Create Access Levels passwords
Move the next tab of Add New Password. Enter your password as well as its information such as levels, type (global or user roles), usage limit, and expiration time.
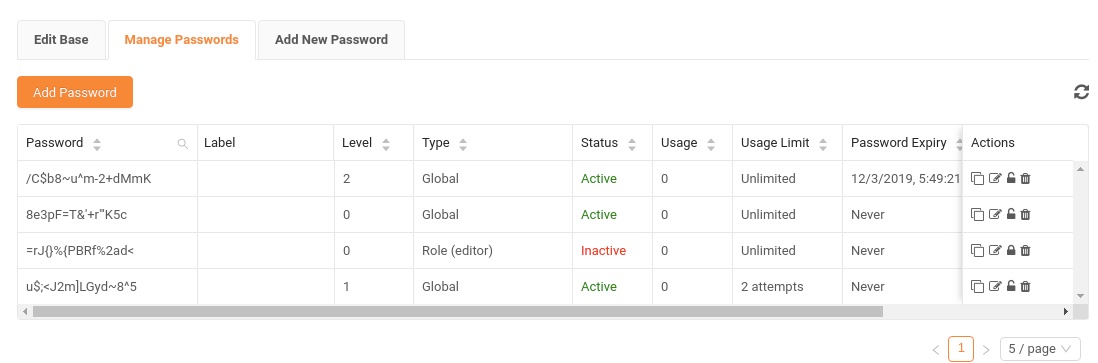
You can edit your passwords by going back to the Manage Passwords tab. This gives you an overview of all your passwords and their status.
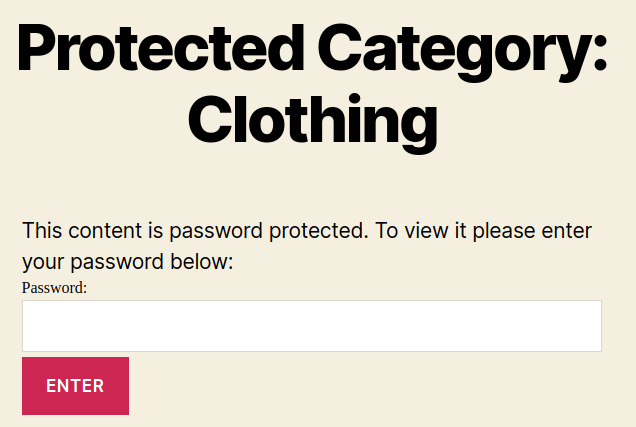
Here is what your category page looks like when you assign passwords to them via the PPWP Pro plugin and Access Level extension.
You now have full control over your private content management. It saves you time in hiding individual categories. Different types of users will have different content access permissions. While premium members can open all categories at once, standard members have the right to see a few category contents only.
Ready to Hide Your WordPress Category?
Categories are compulsory and of great significance to group content in all WordPress websites. When it comes to hiding a category, there are different options for you to choose from, either technically inserting code or installing a plugin.
Firstly, you can manually add code to your theme’s functions.php file to hide categories. However, the challenge lies in the technical programming skills you must have to apply this method.
Rather than using code, take advantage of plugins in case you’re not familiar with technical knowledge. PPWP Pro and its Access Level extension allow you to hide categories from the front pages. Only those with the correct passwords can view their posts.
Install PPWP Pro and Access Levels extension to hide your WordPress category today!
