Pages and posts are the two most important content types in WordPress. At first sight, they look nearly identical in the WordPress dashboard as well as on the website. However, each of them might have different designs and uses. Pages are a static “one-off” content type such as your about page, privacy policy, contact page, etc. Posts, meanwhile, refer to blog content listed in reverse chronological order.
Compared to posts, a page can be standalone or hierarchical, hence you can add some sub-pages or child pages to it. In fact, you can create infinite level child pages under one parent page.
In this article, you will see the following instructions to complete the process of having a wonderful page’s structure on your WordPress website.
- What Is a Child Page?
- When Do You Need to Create One?
- How to Create a Child Page
- Create Page Hierarchical Menu in WordPress
- How to Protect Child Pages
What Is a WordPress Child Page or Sub-pages?
While posts are displayed in descending date order, pages are more independent and don’t need to be organized chronologically.
Unlike posts, you can’t use tags and categories to organize pages. Instead, you need the support from the child pages and parent page to organize them.
In order to have a child page, you have to find a parent page first. Whenever you think that page should contain some other related subpages, you assign that page as parent. Which means any other pages under that level will become subpages or child pages.
When Do You Need to Create one?
Since pages are not part of the blog, you can create as many pages as you need. A lot of businesses are using pages to build their website.
For different purposes, you may create different blog pages. However, too many pages will lead to out-of-control problems.
To manage your site smarter, and even make it more convenient for your visitors, create a broader page as a parent page and add relevant child pages to it. The child page itself can also have some other child page, too.
The most popular example you might see before is the About page. You’re easy to find the company history, and employees’ introduction, or office tour in one simple About page.
Another good practice to create a parent page and its child pages is to show features. You can have the main page listing out all your features with their descriptions. Then, these features will be linked to sub-pages for more explanation and illustration.
After you understand what a child page is and when you should use it, now it’s time to create one.
How to Create a Child Page in WordPress
As mentioned, you should have a parent page before creating its child pages. If you already have in mind what an existing page you want to assign it to the parent page, then follow these steps.
If not, just create a parent page with the same process of creating a new page.
In your admin dashboard, go to Page → Add new. On the right side, you will see Page Attributes.
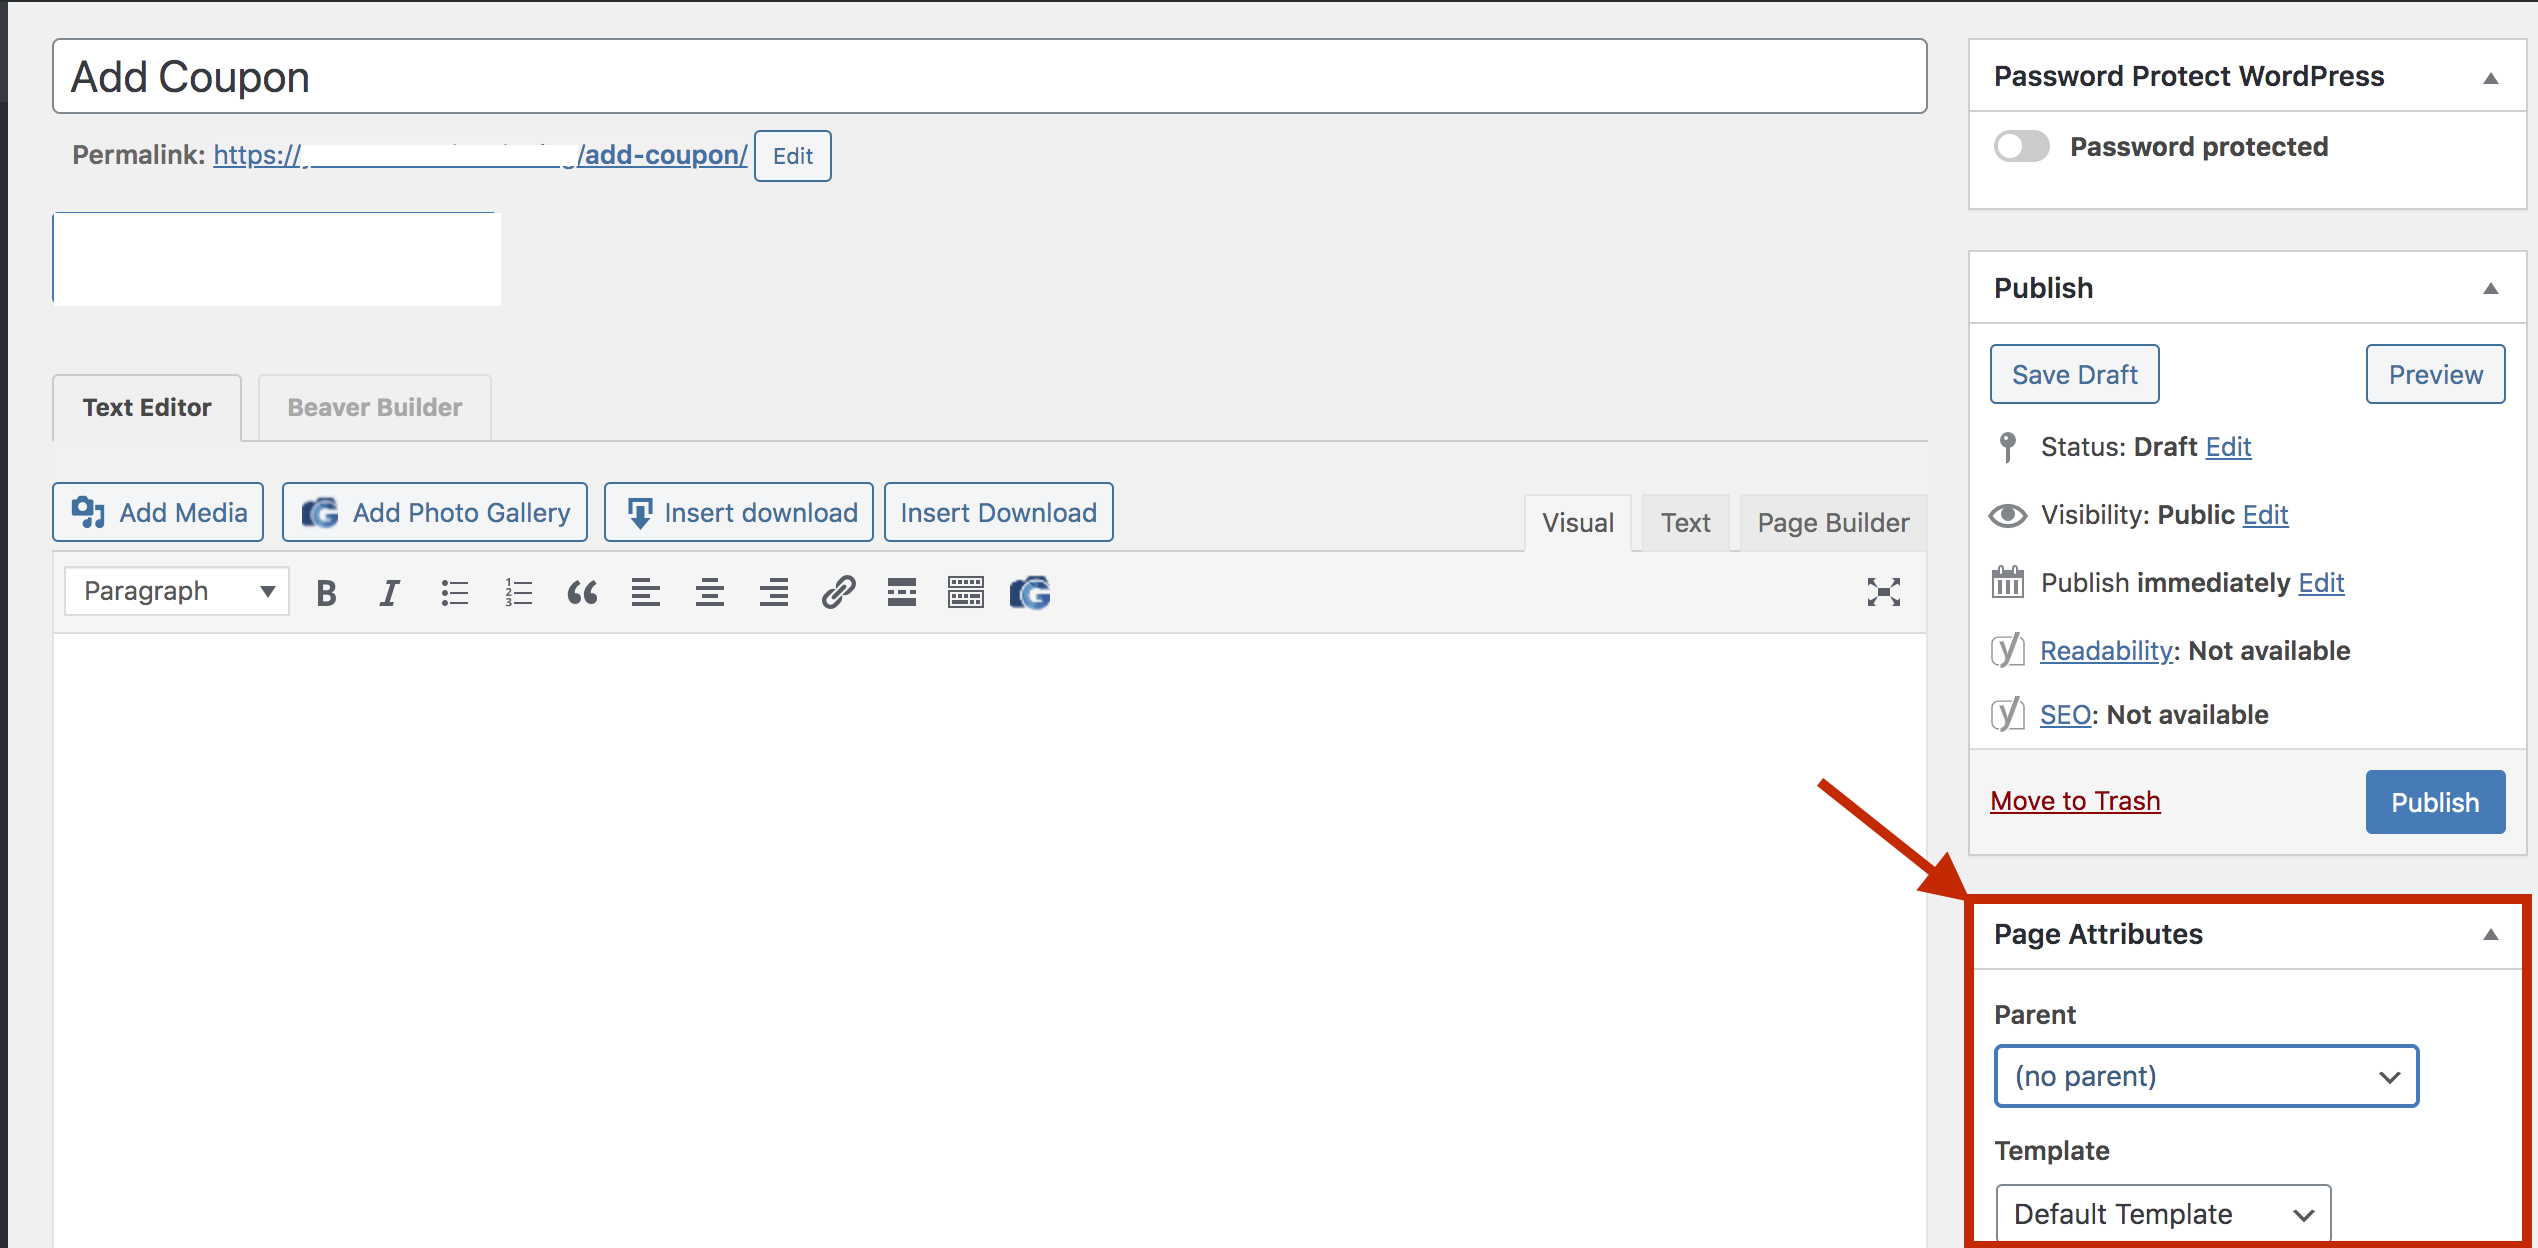
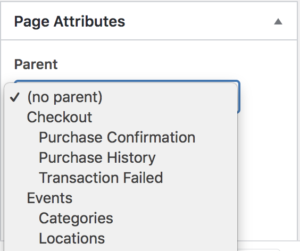
Under the Parent drop-down, there will be a list of pages. WordPress sets it to (no parent) by default to make it a stand-alone page. In this case, you want it to be a child page of a certain page, then just select that parent page.
After that, you can build content for that page as you wish and save your changes. You may repeat this process to create more than one child page.
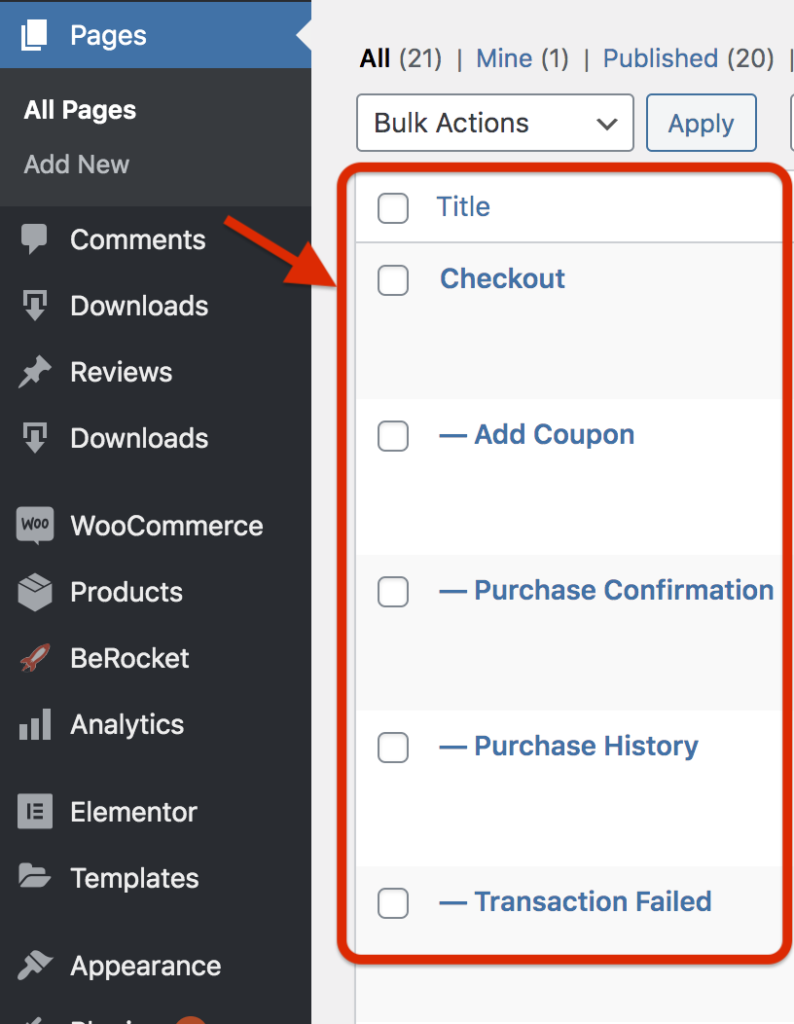
Go back to Pages → All Pages to review your new child pages. It should appear in the page list, under the parent page with a “—” prefix.
Create Page Hierarchical Menu in WordPress
It would be better if you reorganize both parent and child pages in your navigation menu. You can rearrange the order of child pages to help them make more sense.
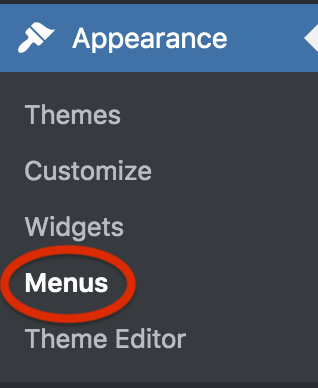
To do that, find Appearance → Menus. If you can’t see the menus under Appearance in your admin dashboard, it’s because your theme doesn’t support the menu.
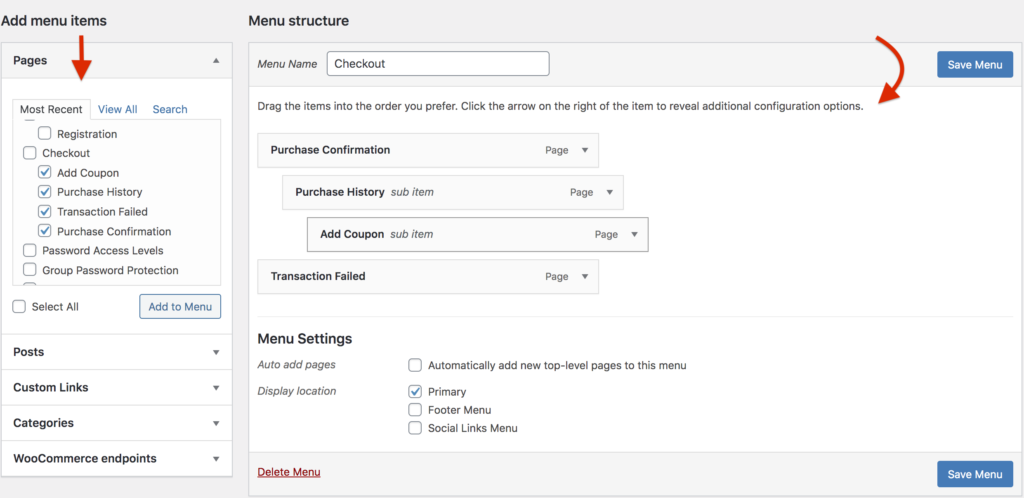
In the Menus editing board, you will see the two main columns: Add menu items and Menu structure.
Under Add menu items, there is a list of all your pages with selectable checkboxes. Check the boxes of the pages you want to put to the menu.
For Menu Structure, you need to put in the name of that menu first. Then simply use drag and drop to arrange the order of added child pages.
Well up to this step, you’re almost done with creating and displaying a child page. Still, have you wondered how to protect this child page like other pages or any other private content on your WordPress site?
The next part is all about what you should do to prevent unauthorized access to your parent pages, child pages, as well as the whole website, in general.
How to Protect WordPress Child Pages
One of the most powerful ways to protect your pages and posts is by using a password. Password Protect WordPress Pro (PPWP) provides everything you need to have a better WordPress site protection.
To protect a child page, PPWP offers you two efficient options. You can either protect child pages individually or protect them based on their parent setting.
With individual page protection, PPWP allows you to do it right in the Admin page list. Go to Pages, and click on Password protect at the desired child page.
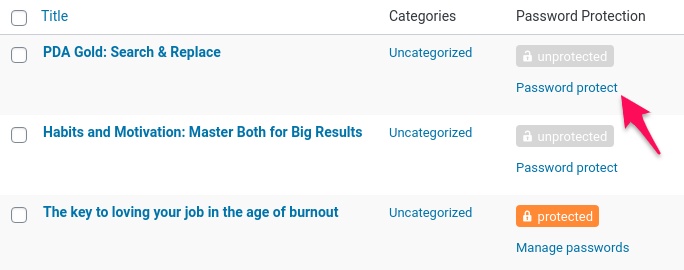
Click on the “Password protect this page” under the popup. The plugin will automatically generate a new strong password for that page.

That’s how you protect any pages on your website.
However, after creating them as a parent-child relationship, you might want to protect them as a whole, then let’s do it.
Navigate to the Password Protect WordPress plugin’s Settings page. Find the “Password Protect Child Pages” option and enable it.
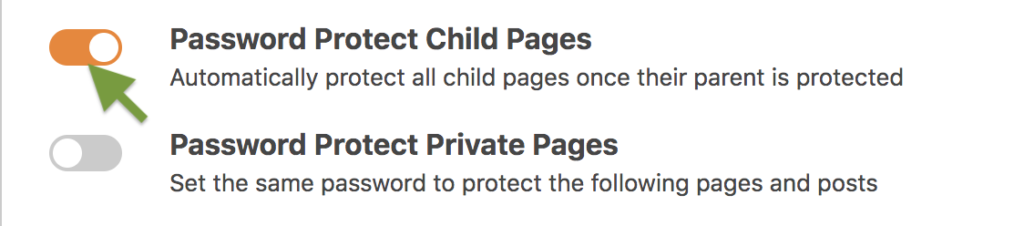
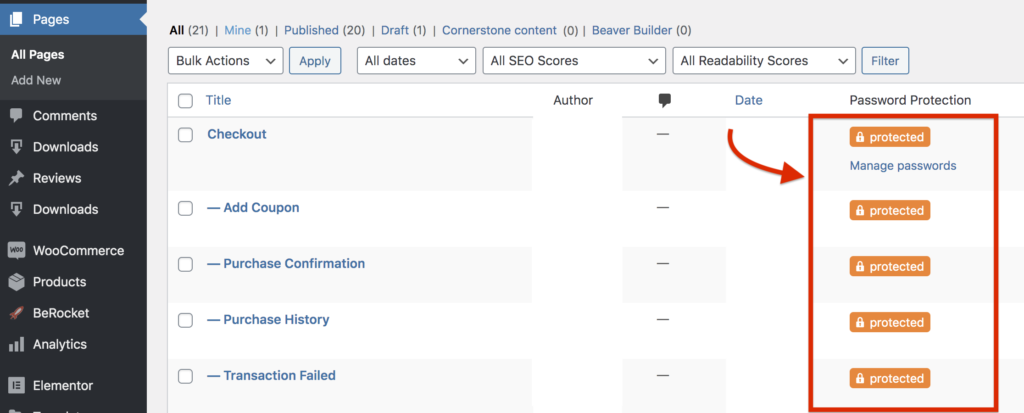
Now go back to the Pages section and protect the parent page. All its child pages will be immediately protected as well.
Not only does the plugin help you password protect the content but it also offers various advanced features.
Password Protect WordPress Pro works as a powerful password manager and generator allowing you to create and control unlimited passwords easily.
You can also use it to limit password usage by user roles. This means different user roles will get different passwords to access certain pages or posts, or even the entire site. And those passwords may expire after certain entered times or days.
If you are owning an online business, the plugin will be the must-have support. Unlike other password protection plugins in the market, you can password protect any custom post types including WooCommerce products and categories with ease.
Better Page Structure, Better Protection, Better Business
Creating a parent page and child page benefits your site management and customer experience as well.
Instead of spending hours organizing and managing pages that might mess up your site, you can take advantage of WordPress parent pages and child pages to structure your site better.
It’s never enough to emphasize the importance of every element in the website to the success of your business. So, before you regret letting your content be leaked out to the public without your permission, let’s protect it now with Password Protect WordPress.
If you still have any problem with child page creation and protection, let us know in the comment section below.
