According to recent research, WooCommerce is the leading e-commerce platform with a market share of more than 25,9%. It does not only help users quickly create online stores but also easily extends the core features. In fact, it’s one of the reasons why developers want to contribute to WooCommerce plugins and make them more and more popular.
While developing our new extension which is PPWP WooCommerce Integration, we wanted to add extra information to clients’ WooCommerce products data.
This post will show you how to achieve this mission:
- Add a new tab and its content to “Product data”
- Save the new tab content data to product metadata
Show the Custom Tab and Its Content in Product Data
Our secret “weapon” is using woocommerce_product_data_tabs to add the “PPWP Access Link” tab. We can see that WooCommerce fires a hook in the static function get_product_data_tabs. The hook parameter is an array with the key being the tab’s key and value being the collection of tab attributes label, target, class, and priority.
<?php
add_filter('woocommerce_product_data_tabs', 'add_ppwp_access_link_tab');
function add_ppwp_access_link_tab($tabs) {
    $tabs['ppwp_woo'] = array(
        'label' => 'PPWP Access Link',
        'target' => 'ppwp_woo_options',
        'class' => array( 'show_if_virtual' ),
        'priority' => 65,
    );
    return $tabs;
}
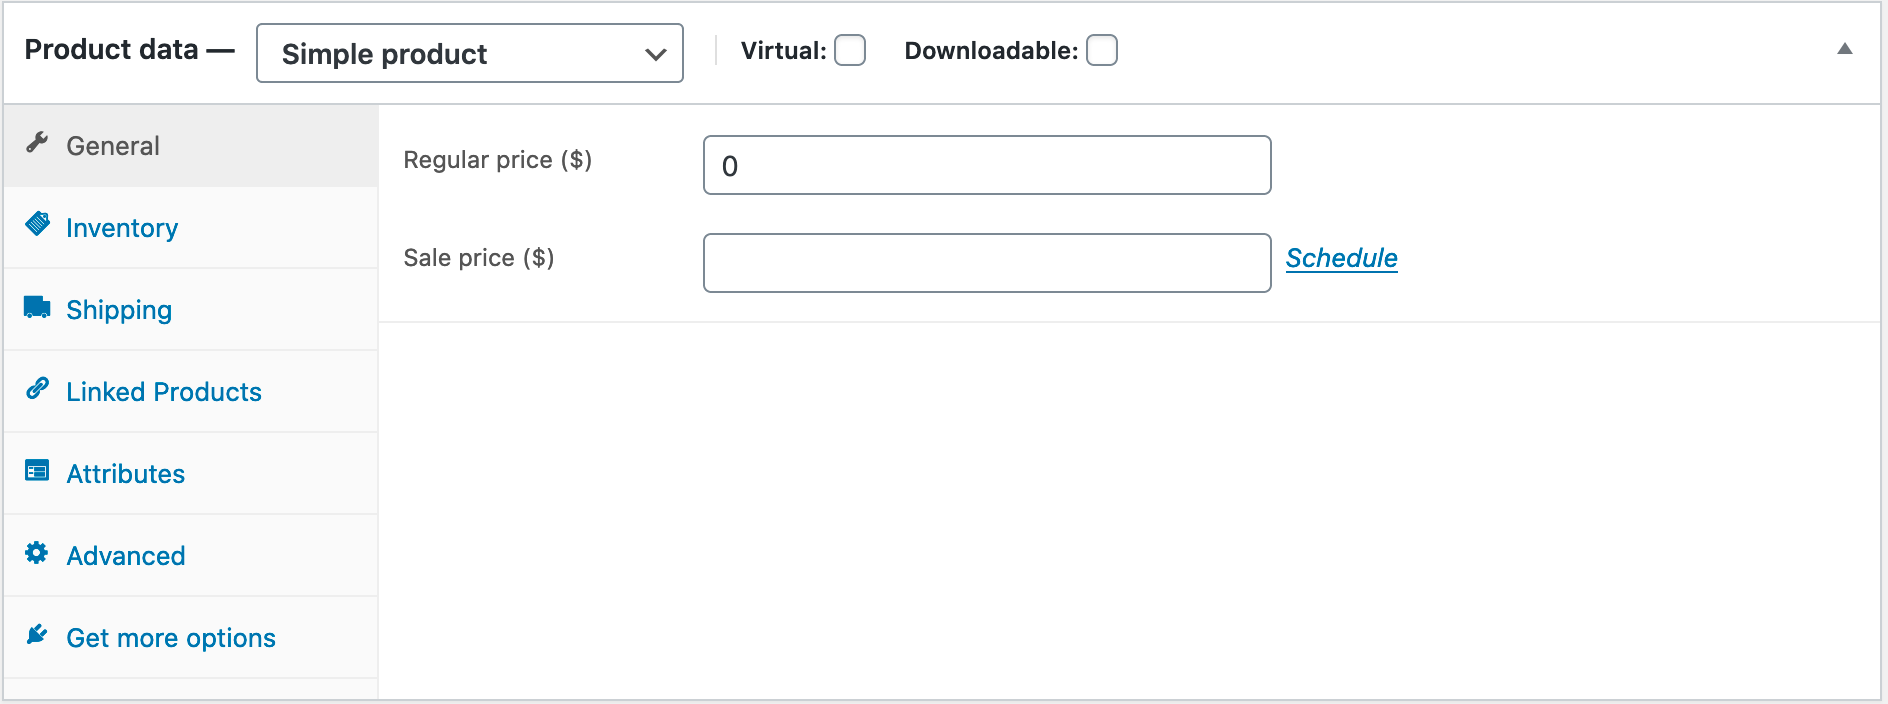
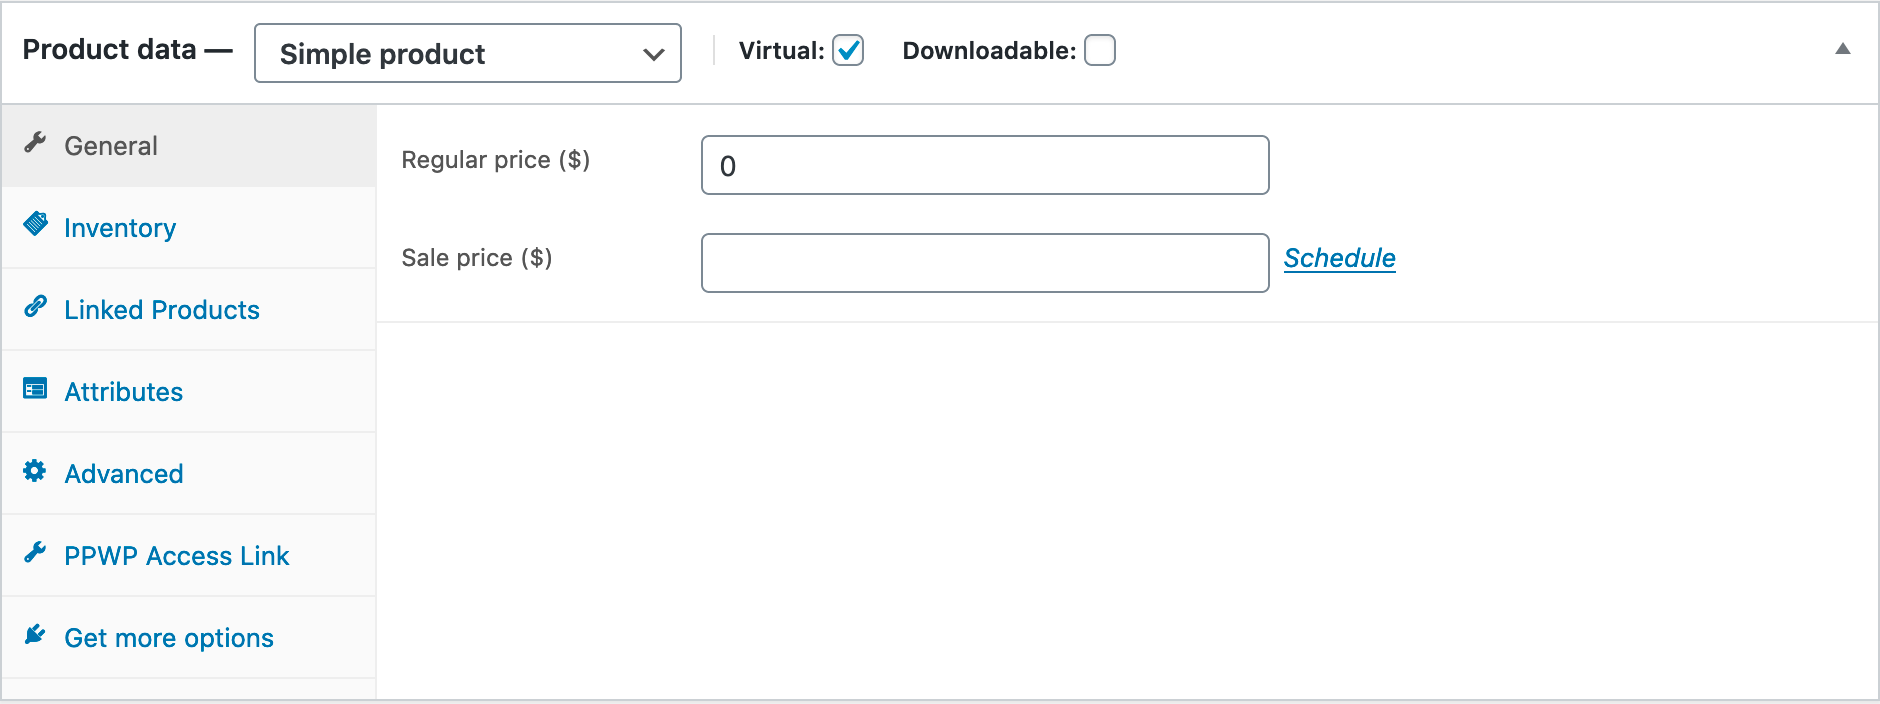
We can define the “show and hide” rules by defining classes hide_if_downloadable, hide_if_virtual, show_if_downloadable, and show_if_virtual. In the snippet above, we only show our tab if the product type is virtual.
After adding the custom tab, namely PPWP Access Link, we need to provide the corresponding tab content by hooking into the woocommerce_product_data_panels action.
<?php
add_action( 'woocommerce_product_data_panels' ,'show_ppwp_access_link_tab_content' );
function show_ppwp_access_link_tab_content() {
	global $woocommerce, $post;
	?>
	<div id="ppwp_woo_options" class="panel woocommerce_options_panel">
		<?php
		woocommerce_wp_select(
			array(
				'id'      => '_ppwp_woo_protected_post',
				'label'   => __( 'Protected post', 'woocommerce' ),
				'options' => array(
					'0' => '-- Select a password protected page --',
				),
			)
		);

		woocommerce_wp_text_input(
			array(
				'id'                => '_ppwp_woo_usage_limit',
				'label'             => __( 'Usage limit', 'woocommerce' ),
				'desc_tip'          => 'true',
				'description'       => __( 'Enter the number of times user can access the link.', 'woocommerce' ),
				'type'              => 'number',
				'custom_attributes' => array(
					'min'  => '1',
					'step' => '1',
				),
			)
		);

		woocommerce_wp_text_input(
			array(
				'id'                => '_ppwp_woo_expiration',
				'label'             => __( 'Expiration (minutes)', 'woocommerce' ),
				'desc_tip'          => 'true',
				'description'       => __( 'Enter the number of minutes the link is valid for.', 'woocommerce' ),
				'type'              => 'number',
				'custom_attributes' => array(
					'min'  => '1',
					'step' => '1',
				),
			)
		);

		woocommerce_wp_textarea_input(
			array(
				'id'          => '_ppwp_woo_custom_text',
				'label'       => __( 'Custom text', 'woocommerce' ),
				'desc_tip'    => 'true',
				'description' => __( 'Insert any text that you want to include in the order product details. The text within the percent sign % %  will become Bypass URL. Use {usage_limit} to display password usage limit and {expiration} to display expiry date.', 'woocommerce' ),
			)
		);
		?>
	</div>
	<?php
}
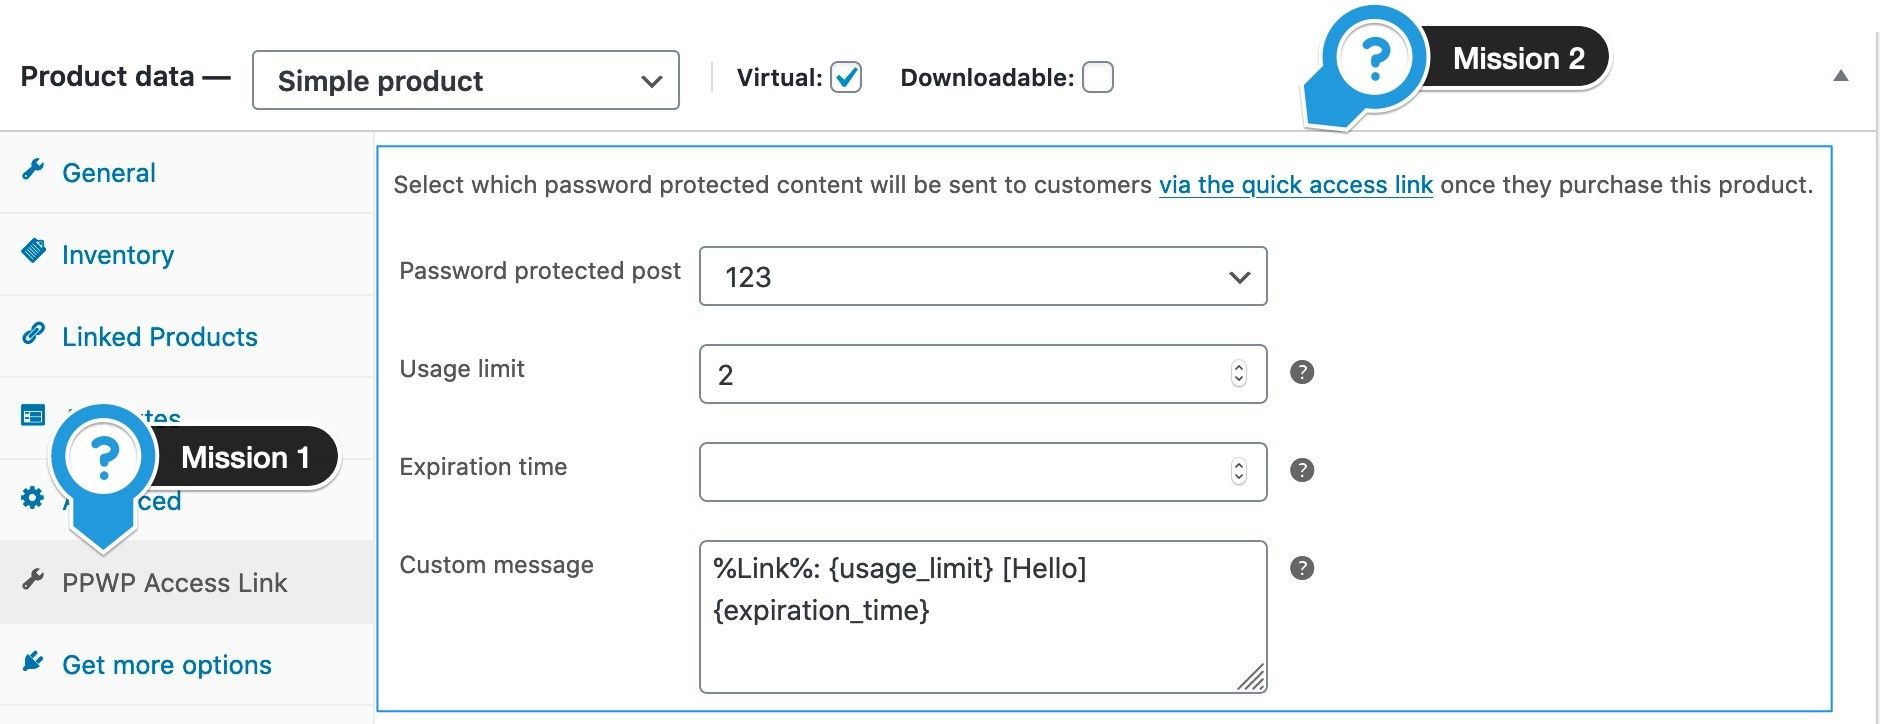
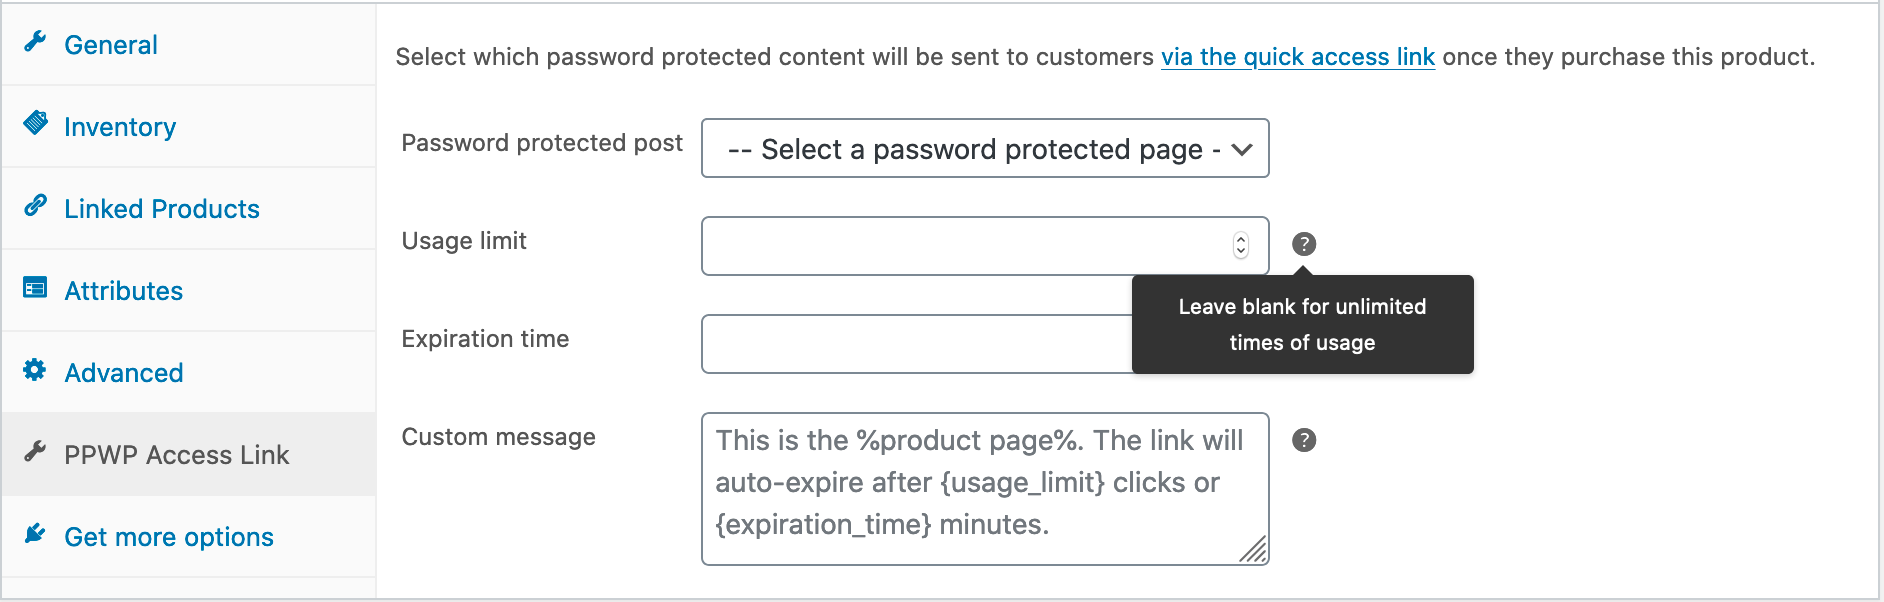
We can use the built-in WooCommerce functions woocommerce_wp_text_input, woocommerce_wp_textarea_input, woocommerce_wp_select to render the text boxes, select boxes, etc. As a result of the above snippet, our tab content added new fields following their labels and tooltips.
We succeed to create a handsome man, but behind every decent man, there’s always a decent woman who saves their assets.
Saving the Custom Tab Data
The woocommerce_process_product_meta hook passes us the post ID following the metadata. In this situation, we would use woocommerce_process_product_meta_simple because our solution currently supports the simple product type.
add_action('woocommerce_process_product_meta_simple', 'save_options');
function save_options($product_id)
{
    $keys = array(
        '_ppwp_woo_protected_post',
        '_ppwp_woo_usage_limit',
        '_ppwp_woo_expiration',
        '_ppwp_woo_custom_text',
        '_ppwp_woo_protection_type',
    );

    foreach ($keys as $key) {
        if (isset($_POST[$key])) { // phpcs:ignore
            update_post_meta($product_id, $key, $_POST[$key]); // phpcs:ignore
        }
    }
}
The save_options function updates the product metadata received from our defined form data. After we change the tab field values and click update, the updated data still remains.
What are your thoughts? Are you ready to create your own awesome WooCommerce product settings? If you have any questions, let us know in the comment box below.
