Leading the CMS space, WordPress empowers over 30% of all the web due to its simple yet powerful features. WordPress is suitable for any kind of content you throw at it, from pages, posts, to attachments. You want to create custom posts like film reviews, books, or coupon pages that don’t follow the default formats? Simply add a custom post type.
In fact, WordPress, by default, allows you to add only title, editor box fields, etc. to custom post types. Intend to add a meta box or an image field to these post types? You have to look for a more robust method.
You may be surprised how easy it’s to add custom fields to custom post types. Our instruction below will keep you inserting and protecting advanced fields on the go.
- How to Add Custom Post Types to WordPress
- How to Add Custom Fields to WordPress Custom Post Types
- 3 Steps to Password Protect Custom Fields
How to Add Custom Post Types to WordPress
Before displaying a meta box in custom post types, make sure you have at least one custom post type on your site.
Since WordPress doesn’t provide custom post types as a built-in post type in the navigation menu like Pages or Posts, you must create it yourself, either with or without a plugin.
Creating custom post types without a plugin
The first method most web developers think of when making a custom post type is using code.
As these post types are custom, you can name them anything you want, for example, Products, Books, or Reviews. Then, add this code to your theme’s functions.php file.
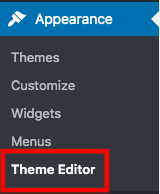
- Go to Appearance then choose Theme Editor
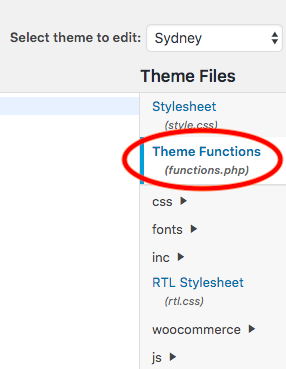
- Click functions.php under the Theme Files menu on your right
- Place this code below the <?php line
function create_post_type() { register_post_type( 'acme_product', array( 'labels' => array( 'name' => __( 'Products' ), 'singular_name' => __( 'Product' ) ), 'public' => true, 'has_archive' => true, 'supports' => array( 'title', 'editor', 'custom-fields' ) ) ); } add_action( 'init', 'create_post_type' ); - Update the file
Anew post type called Products has been created and inserted directly into your WordPress navigation menu now.
Tired of coding and theme file adjustments? Going without a plugin, you might worry about making changes to your Theme Files since it can affect the entire site performance. Then, install a custom post type plugin.
Generating Custom Post Types Using a Plugin
There are thousands of plugins available on WordPress repository enabling you to create and manage custom post types. Custom Post Type UI turns out to be one of the most effective solutions. The plugin provides a modern and friendly UI to create custom post types and taxonomies.
Take these 6 steps to get started with the plugin:
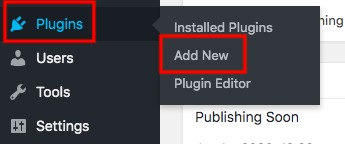
- Head to Plugins in your WordPress dashboard and click Add New
- Type “custom post type ui” in the keyword box
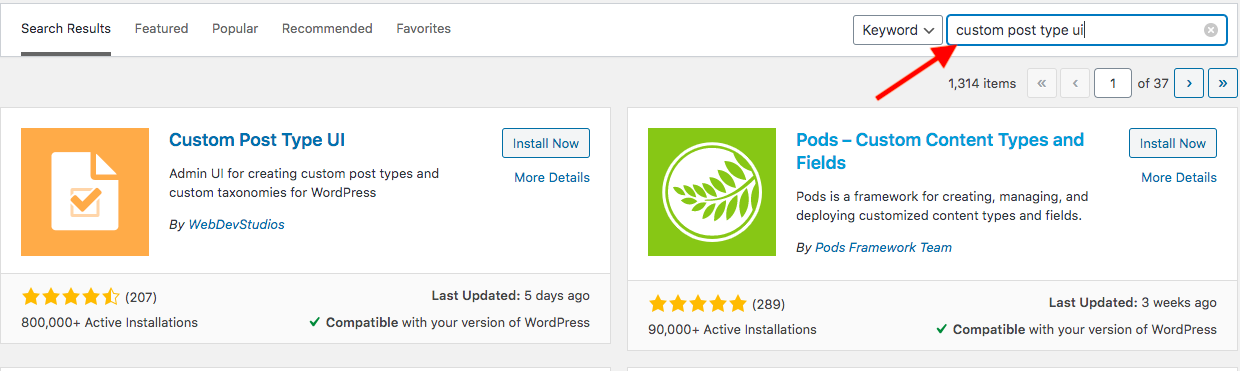
- Install and activate the plugin
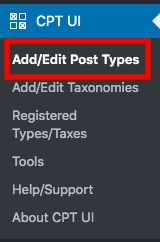
- Visit the Add/Edit Post Type page
- Set basic settings, additional labels, and settings
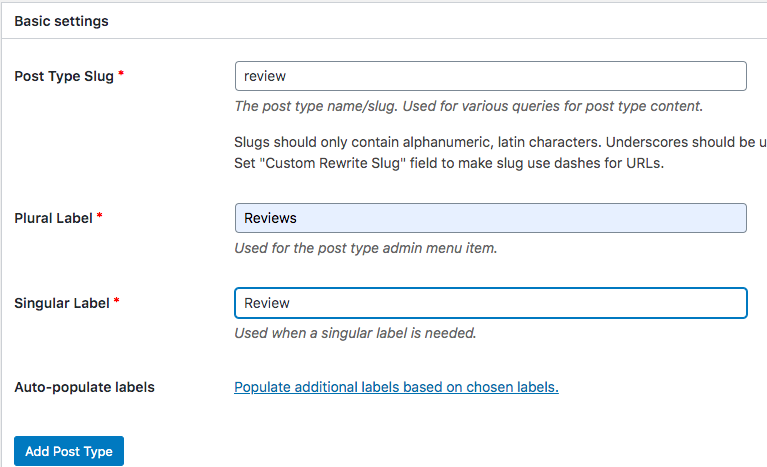
- Hit the Add Post Type button to save your post
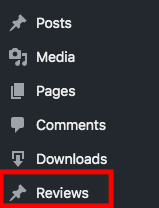
To take one example, we’ve added a new custom post type namely Reviews using Custom Post Type UI. You can click there and create your first review post.
How to Add Custom Fields to WordPress Custom Post Types
After generating custom post types, it’s time to add custom fields to your new post types. The easiest way comes to installing a third-party plugin.
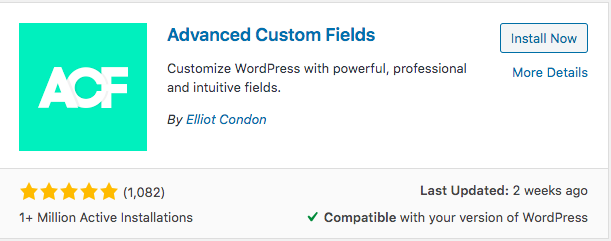
Advanced Custom Fields is highly recommended in this case. You’re permitted to easily build and add fields to WP edit screens in custom post type edit screens. On top of that, these fields can be inserted into posts, taxonomy terms, media, comments, and even custom options pages.
Go through these 5 simple steps to add custom fields to your custom post types using the Advanced Custom Fields plugin.
- Install and active Advanced Custom Fields free plugin
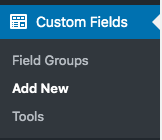
- Click Custom Fields on your WordPress sidebar and add a new field
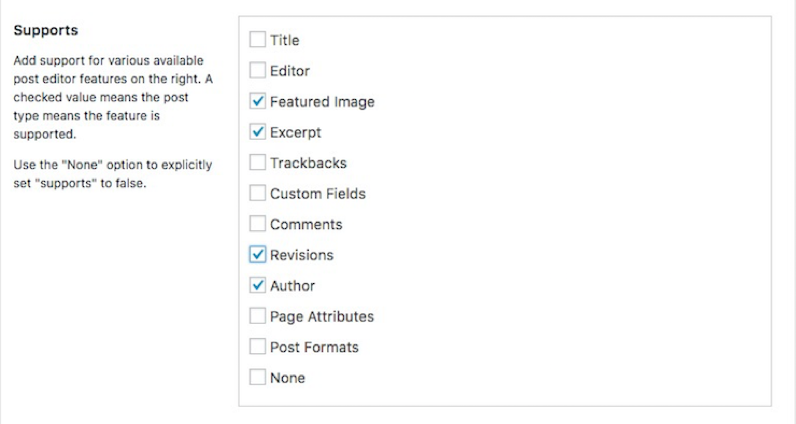
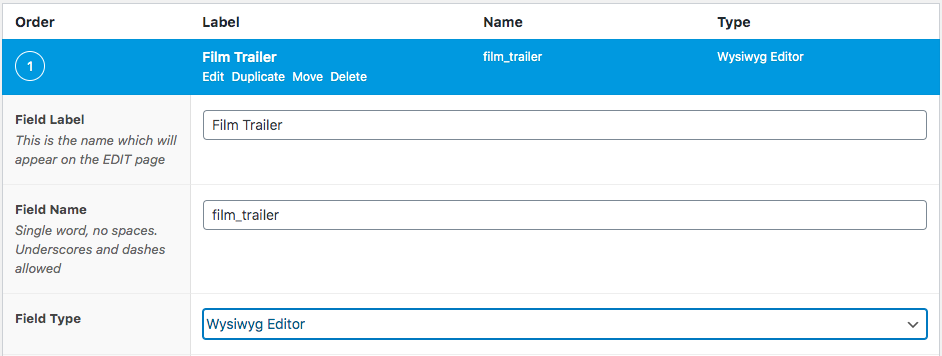
- Hit Add Field and complete general settings. Choose Wysiwyg in Field Type. Select Image option if you want to add an image field to custom post types.
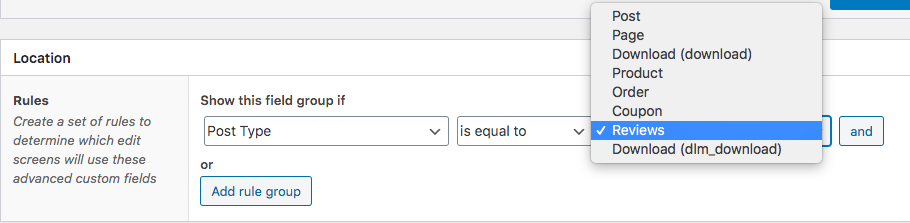
- Set Post Type rules in the Location section. Remember to select the custom post type you intend to add the custom field in the third box, next to the “and” button.
- Publish the new custom field
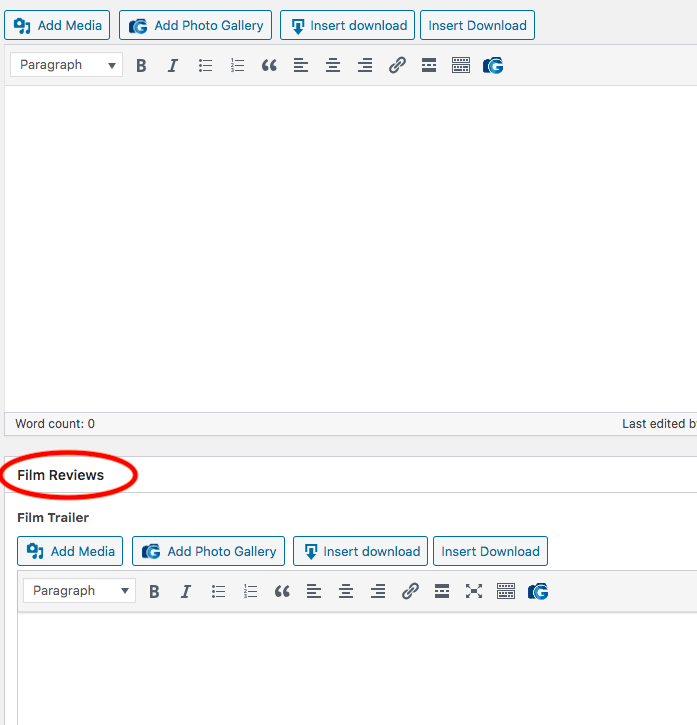
- Visit a custom post type and scroll down to the bottom to see the new custom field added to your post
3 Steps to Password Protect Custom Fields
WordPress won’t show the custom fields on custom post types when publishing. However, there might be times when you want to display the custom fields so that specific users can see them. Just wrap these sections with a password and share the password with certain people.
Primarily come as a content password protection solution, Password Protect WordPress Page also appears as one of the very few free plugins allowing you to secure custom fields. Once protected, only those with the correct passwords, such as your customers, team members, and editors, can unlock this content.
This guide shows you how to password protect custom fields using Password Protect WordPress Page plugin.
- Create a new custom field and add your data. Skip this step if you’ve already created custom fields for your custom post types before.
- Wrap the section you want to protect with the PPWP shortcode
[ppwp id="" class="" passwords="password1 password2" whitelisted_roles="administrator, editor"] Your protected content here [/ppwp]
- Your custom field data won’t display on your content. Copy this custom code snippet and add to your theme files
<?php
// Change "field-name" to your custom field name
echo '<div class="ppwp-is-custom-field" ppwp-data-mt="field-name">';
foreach( get_post_meta( get_the_ID(), 'field-name' ) as $meta_data ) {
echo do_shortcode( $meta_data );
}
echo '</div>';
?>
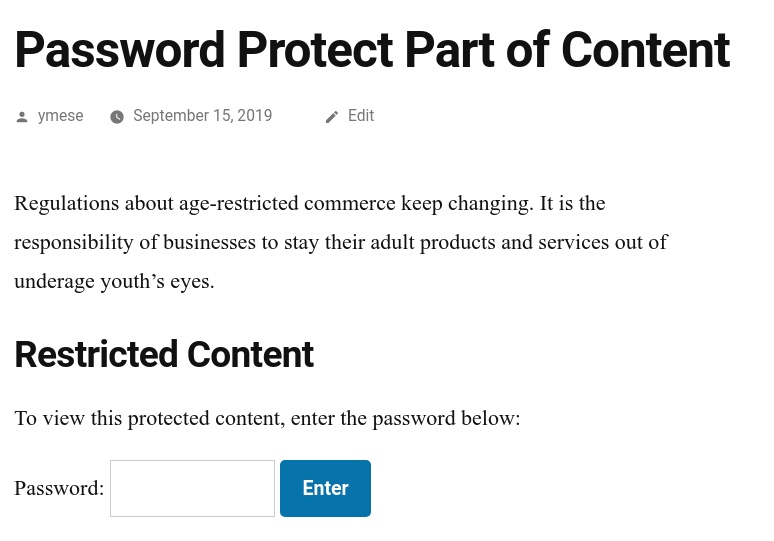
Upon protection, your protected custom fields and custom post types will look like this.
Make Use of Addition Custom Fields in WordPress Custom Post Types
Custom post types prove extremely powerful to create custom content for your WordPress site. You can add custom fields to custom post types too.
While WordPress authorizes you to create custom fields, using a plugin like Advanced Custom Fields will bring down a lot of manual work. You’re able to include any custom field types such as text boxes, images, or messages.
Password protecting custom post types is also supported. You can wrap these fields under a password from and grant access to certain users with the right password only.
Still have questions about how to add custom fields to custom posts types as well as securing them? Leave a comment below to let us know.
