Have you ever made changes to a post or your WordPress site in general, but those changes are not reflected at all? Like they have disappeared into thin air, you’re not able to see them anywhere on your website. In that case, it’s likely that the culprit is the cached files. So what are cached files then?
When it comes to optimizing your website, cached files help enhance the page loading time, which leads to better SEO scores and user experience. However, cached files can also be tricky to update your website by displaying the stored static content.
This article will discuss how to simplify your work by clearing cached files manually.
- How Cache Works
- Why Clear Cached Files
- Clear Cache on cPanel
- Expires Headers
- Using WP-CLI
- Hosting Providers
How Cache Works
Whenever you visit a website, your browser will download static content, such as HTML, Javascript, CSS, and image. The data is then stored as cached files in your local storage. So when you revisit the same website, it will load much faster as you already have parts of the content saved in your device.
In other words, your browser would create fewer requests to the server, and you don’t have to download the whole website content all over again. That’s why caching plays an important role in improving site performance.
Another term that you should know is site cache. A site cache works in the same way and saves the same types of content as a browser cache. However, site caching is the concept of caching from the client’s side. This means that site caching is completely taken care of, and controlled by the end user. On the other hand, browser cache is saved on your computer, through your browser, and is controlled by the browser.
Last but not least, server caches should be mentioned. Server caches store content, code, queries, or similar data on servers and are controlled by the server instead of a browser or user.
Why You Should Clear Cached Files
Now, you’re probably thinking that if website cache is doing such a great job, why do we ever need to clear it?
Here are the reasons:
- Cached content impedes your website to update new posts or any changes you’ve made.
- Cached pages can increase the storage size, causing your website to load more slowly than usual.
- When you have merely a small storage space, you would want to clear the website cache.
Clear Cache on cPanel
When it comes to launching a new website, you need to register a website hosting service first. To be more specific, web hosting is a must in order for your website to be accessible online publicly or privately. Once purchasing a website hosting package, most hosting providers give their users a control panel which works like a dashboard.
cPanel is one of the most popular choices of control panels by web hosting providers, as it simplifies your work to the maximum when running a website. cPanel works like the interface to manage websites, manage domains, organize web files, do backups and so much more.
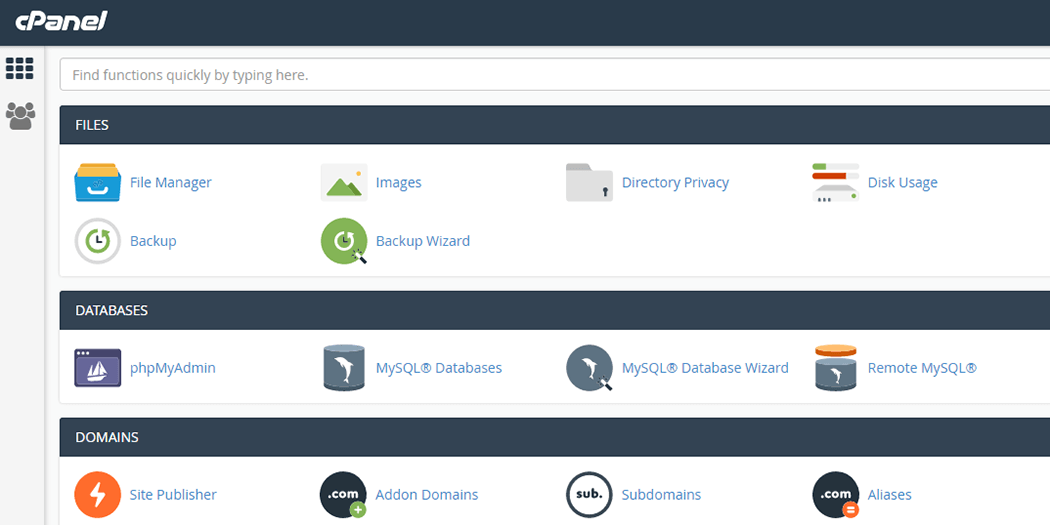
Being an interface for customizing and making changes to your hosting account, cPanel enables you to clear cached files without hassle. All you have to do is navigate to file explorer in the cPanel interface to locate the ‘wp-content/cache’ folder. All the website cache is saved inside the ‘cache’ folder. So, you can simply empty this folder and all cached files will be deleted.
While deleting cached files with cPanel is as easy as a piece of cake, installing WordPress with cPanel is quite a challenge for beginners. In case you are planning to manage your WordPress websites with cPanel and make use of numerous tools included, please take a look at a complete guide on how to install WordPress with cPanel.
Clear Cache Using Expires Headers
As mentioned above, when a website’s cached files such as HTML, JavaScript, and CSS are stored in the browser’s cache for a long time, this will increase the page loading time.
In this situation, expires headers will come in handy. They are a set of rules in the website header section that inform the browser the specific date to discard specific cached files and fetch fresh copies.
How Long Cached Files Should Stay Before Expiring
There are no set rules. Whenever you visit a website, your browser will download many types of static content such as HTML, Javascript, CSS, and images.
So the trick is that cached files that are requested more frequently should have a shorter expiration time. For HTML files, 1 hour is right enough. On the other hand, cached files such as CSS and JavaScript which are less requested should have a longer expiration time. These should be given an expiration time of 1 month, for example.
For files that hardly change such as images, the expiration time should be set up to 1 year.
How to Add Expires Headers in WordPress Manually
One of the easiest ways to add expires headers to a WordPress site is to do it through the .htaccess file. cPanel continues to prove a powerful tool in managing WordPress sites as it enables you to easily access .htaccess file through the File Manager folder.
There are other ways to find the .htaccess file, but for the sake of simplicity, cPanel is still the best option.
Clear Cache Using the Command Line Interface for WordPress (WP-CLI)
The WP-CLI is a tool that enables you to efficiently interact with your WordPress site directly by using a wide variety of commands in a text-based interface.
WP-CLI enables users to perform a wide range of tasks such as manage your database, manage posts, and WordPress multisite. However, installing WP-CLI requires some requirements and for beginners, mastering it takes time & effort.
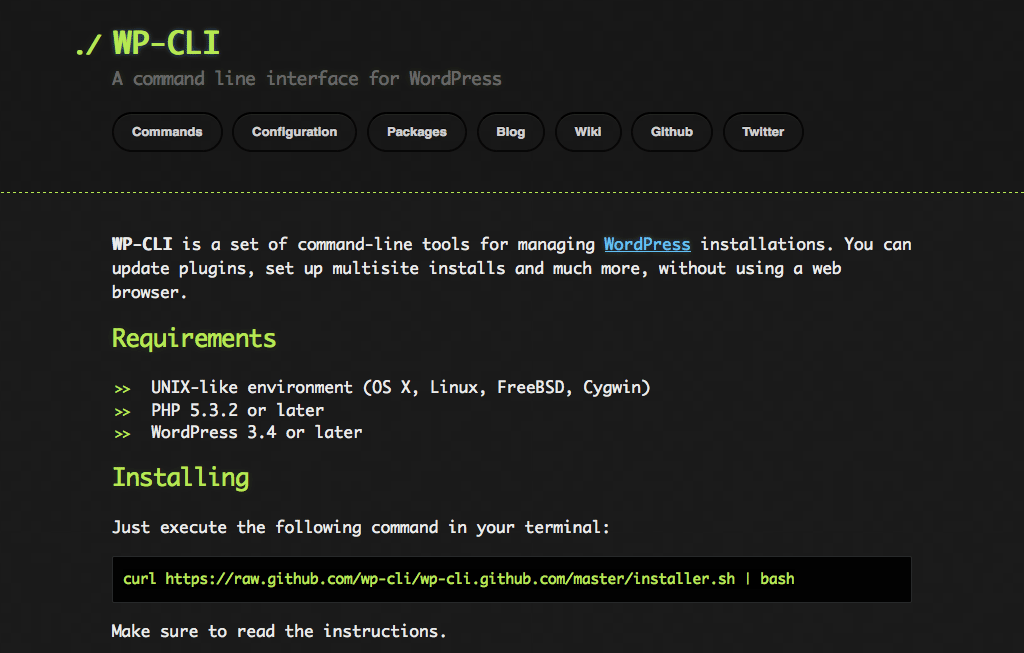
Once getting familiar with WP-CPI, clearing cache would be just a piece of cake by using the code provided by WordPress.
Clear Cache with Hosting Providers Recommended by WordPress
When you’re creating a WordPress website, one of the first things you need to think about is your choice of web hosting. There are hundreds of hosting providers out there, the vast majority of which meet the WordPress minimum requirements. However, WordPress only recommends some of them – BlueHost, DreamHost, and SiteGround. These hosting providers provide users with an efficient way to easily cache clearing.
With BlueHost, you can clear your cache from the WordPress admin area. All you need to do is log into the admin area and navigate to the ‘Caching’ button in the admin toolbar. Now you’ll see the option to ‘Purge All’ cache. BlueHost will now clear all files from their WordPress cache.

DreamHost allows users to clear cache via plugin and via SSH. Proxy Cache Purge plugin provides a ‘Purge Cache‘ button located in the WP-Admin toolbar at the top. You can choose between clearing cache for this page, all pages or for the last 24 hours.
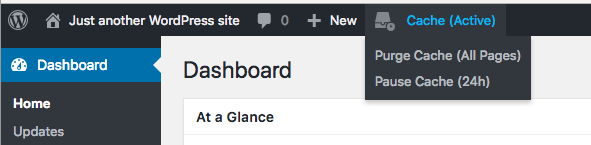
Additionally, you can also log into your domain via SSH and make use of the WP-CLI command-line tool to manually purge the DreamHost cache.
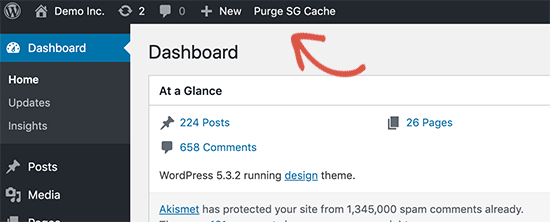
For SiteGround, it allows you to clear cache right from your hosting account dashboard or from WordPress admin dashboard. By installing and activating the SG Optimizer plugin, you can manage SiteGround cache without hassle. Upon activation, you need to click on the Purge SG Cache button in the WordPress admin toolbar. The plugin will now clear your SiteGround WordPress cache.
Wrapping Up
As we have learned, clearing your WordPress website’s cache is a common way to solve problems such as a web browser not responding or sluggish, and updates not displaying. It not only improves site performance but also improves SEO scores. Outdated cache files can become a bottleneck of problems for your visitors who would like to see the latest version of your website. If your website is frequently updated, you should use one of the solutions above to clear cache and have your problems solved.
If you are a low-tech person to work with those listed server methods, you can try out some cache plugins such as WP Rocket, W3 Total Cache and WP Super Cache. With the help of these plugins, you will be able to find a cache clear or flush button within your dashboard or from the top menu, which can simplify your work and also bring desired outcomes as manual solutions do.
